
Adding Content Components
Components are the actual content inside a Unit — the text, videos, and activities your learners see. A Unit can hold one component or several, stacked in the order you arrange them.
This article covers the five core component types: Text, Video, Problem, Open Response, and Drag and Drop.
Before you start
Section titled “Before you start”You’ll need a Unit to add components to. If you haven’t built your course structure yet, see How to Create a Course (Manual).
Adding a component
Section titled “Adding a component”The first three steps are the same for every component type:
-
Open the Unit you want to add content to.
-
Click + Add component.
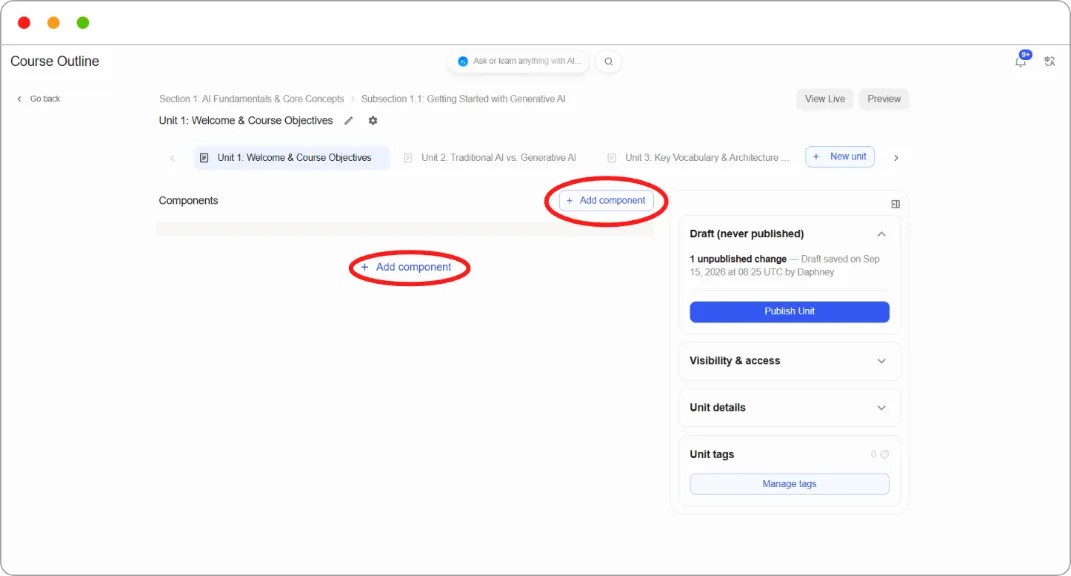
- In the Add a Component window, choose a type under Core Components, then click Add component.
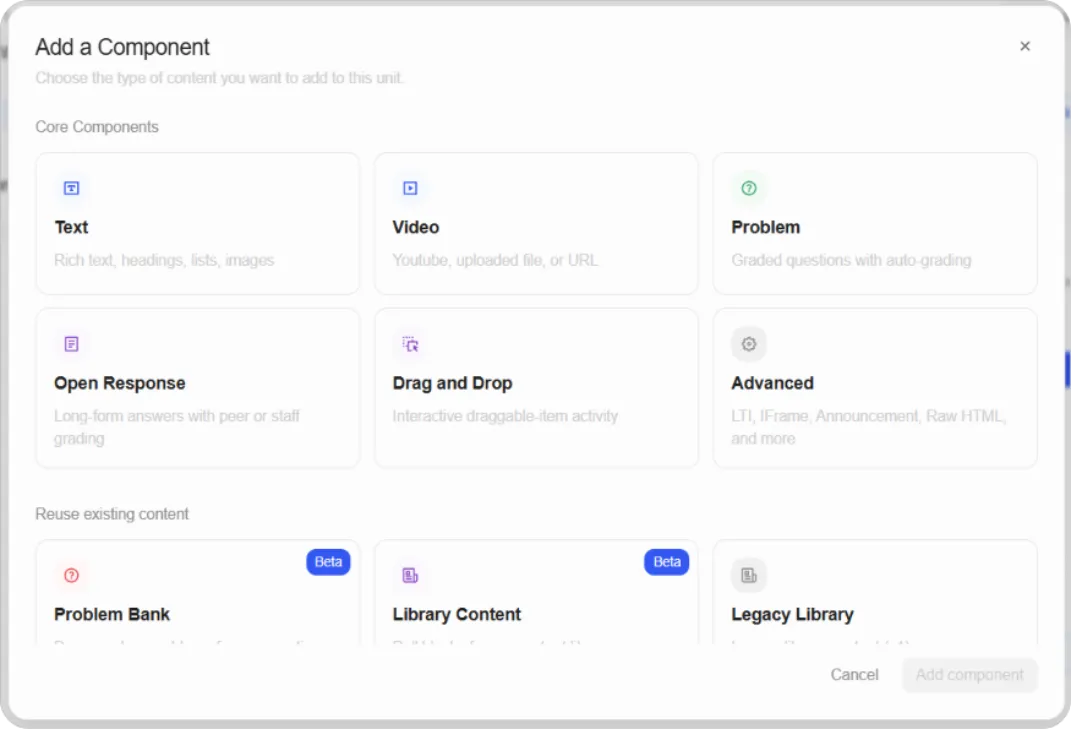
| Component | What it’s for |
|---|---|
| Text | Rich text, headings, lists, images |
| Video | YouTube, uploaded file, or URL |
| Problem | Graded questions with auto-grading |
| Open Response | Long-form answers with peer or staff grading |
| Drag and Drop | Interactive draggable-item activity |
| Advanced | LTI, IFrame, Announcement, Raw HTML, and more |
The same window also has a Reuse existing content section (Problem Bank, Library Content, Legacy Library) for pulling in content you’ve already built. See Using the Library.
Use Text for written content: explanations, instructions, headings, lists, and inline images.
-
Choose Text and click Add component.
-
Choose a template from the list, then click Select. Most of the time you want the default Text option.
-
Write your content in the editor.
-
Click Save.
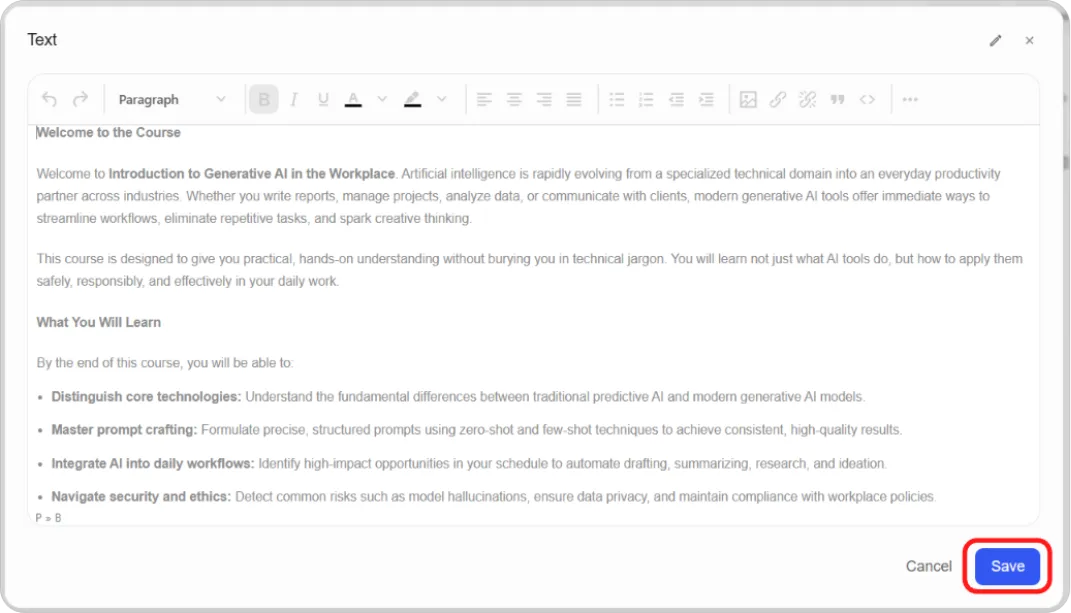
The editor toolbar
Block format (Paragraph, headings), bold, italic, underline, text colour, highlight colour, alignment, bulleted and numbered lists, indent and outdent, insert image, insert and remove link, blockquote, and source code view (<>). The ⋯ button reveals additional tools.
Text templates
Beyond the default, the template list includes Anonymous User ID, Zooming Image Tool, IFrame Tool, Raw HTML, and Announcement. These are specialised layouts built on the same Text component.
Note: IFrame Tool, Raw HTML, and Announcement also appear under the Advanced component. They’re the same thing reached two ways. Adding them through Text is the simpler route.
Use Video for recorded lessons, whether hosted on Blend-ed or embedded from elsewhere.
-
Choose Video and click Add component.
-
Add your video using one of three methods:
-
Select a video from library — browse or search videos already uploaded to your course. Click one to select it.
-
Upload video — upload a new file from your computer.
-
Video URL — paste a link (for example, a YouTube URL).
-
-
Click Save.
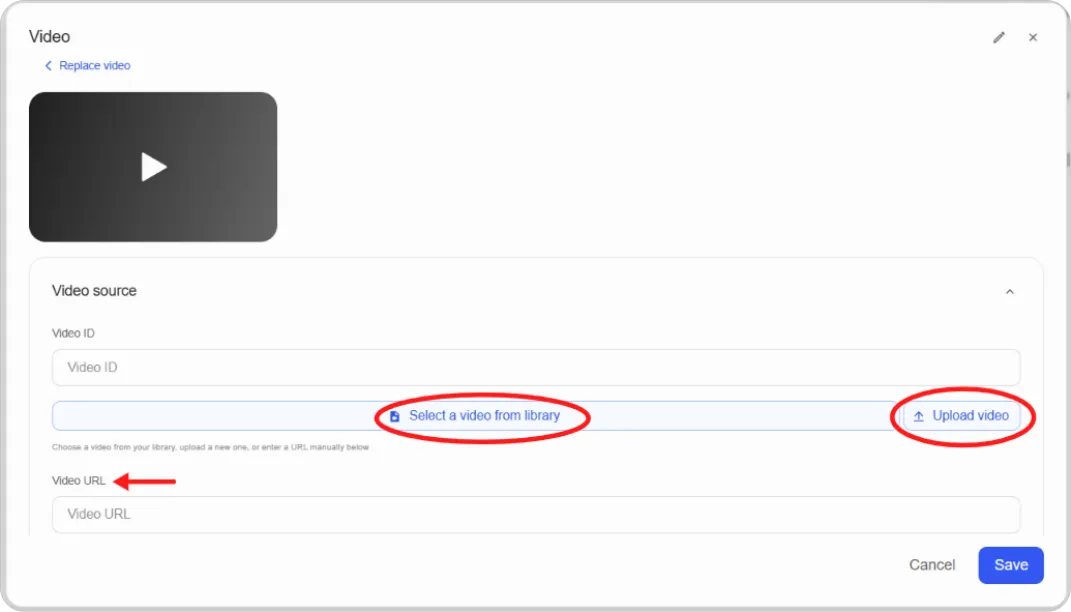
Once a video is attached you’ll see a preview at the top of the editor, with ‹ Replace video to swap it out. The fields move into a collapsible Video source section.
Additional settings
-
Allow video downloads — lets learners download the video file.
-
Fallback videos — additional URLs in other formats. Providing both .mp4 and .webm helps ensure every learner can play the video.
-
Transcripts — click + Add a transcript to upload an .srt file. Transcripts improve accessibility and let learners search the video.
-
Duration — set a start and end time to play only part of a longer video.
Tip: Add a transcript to every video. It’s the single biggest accessibility improvement you can make, and it lets learners find content by searching for a phrase.
Problem
Section titled “Problem”Use Problem for auto-graded questions.
-
Choose Problem and click Add component.
-
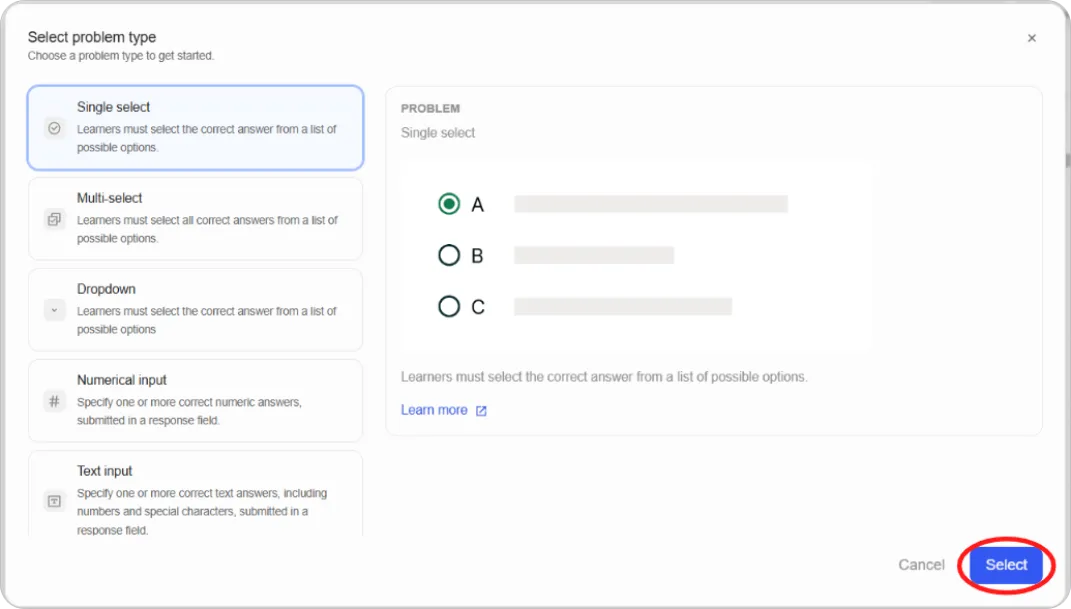
In Select problem type, pick a type from the list. The panel on the right previews it. Click Select.
-
Build the question and click Save.
Problem types
| Type | Behaviour |
|---|---|
| Single select | Learners choose one correct answer from a list |
| Multi-select | Learners choose all correct answers from a list |
| Dropdown | Learners choose the correct answer from a dropdown |
| Numerical input | Learners type a number; accepts one or more correct values |
| Text input | Learners type text; accepts one or more correct answers |
Building the question
-
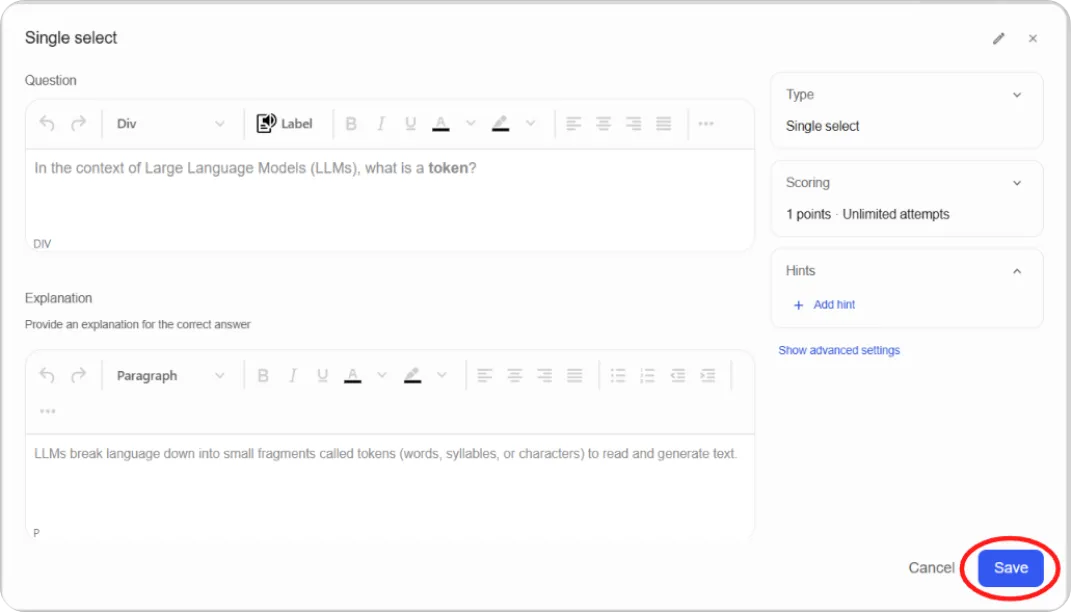
Question — the question text. Formatting works the same as the Text editor.
-
Explanation — shown to learners after they answer, explaining why the correct answer is correct.
-
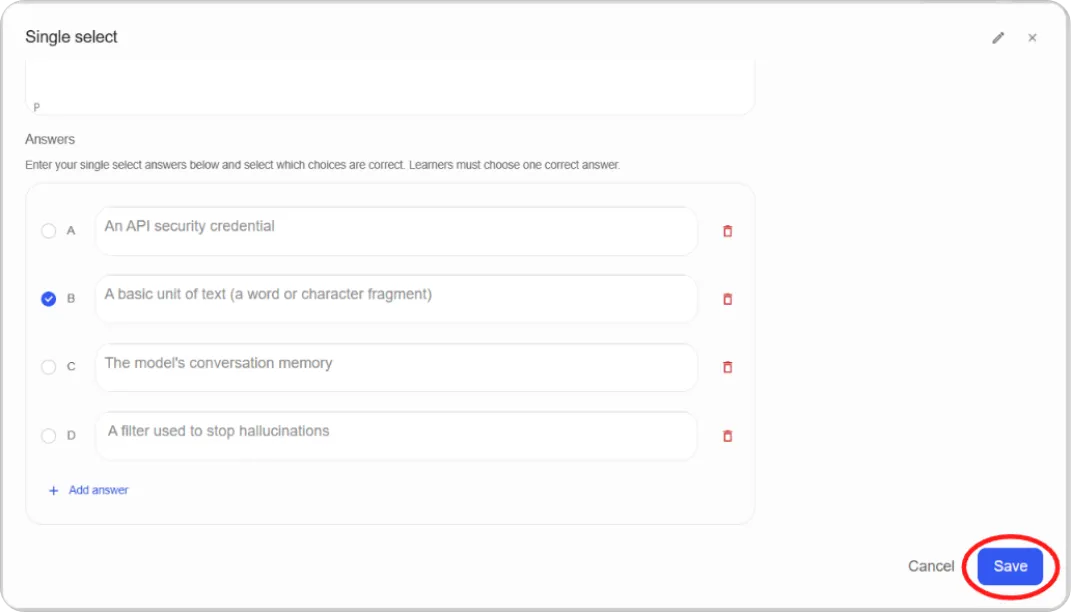
Answers — enter each option and mark the correct one. Use the trash icon to remove an option and + Add answer to add more.
Settings panel (right side)
-
Type — change the problem type.
-
Scoring — points awarded and number of attempts allowed. Defaults to 1 point and unlimited attempts.
-
Hints — click + Add hint to give learners optional nudges.
Click Show advanced settings for:
-
Show answer — when learners can see the correct answer. Default is Finished.
-
Show reset option — whether a Reset button appears so learners can retry. Useful for practice questions.
-
Time between attempts — a delay in seconds before a learner can try again.
Advanced problem types
Click + Advanced problem types in the problem type list for Blank problem, Custom JavaScript display and grading, and Math expression input. Some entries are marked Not supported or Provisional and are best avoided unless you know you need them.
Note: A saved problem shows “0 points possible (ungraded)” until the Subsection it sits in is assigned a grading type. See Setting Up Grading.
Open Response
Section titled “Open Response”Use Open Response for questions that need a written answer or an uploaded file rather than a selected option — essays, reflections, project submissions. Because the answer can’t be auto-graded, you decide who grades it.
-
Choose Open Response and click Add component.
-
Write the prompt — the question or task learners respond to.
-
Choose what learners submit: text, file upload, or both.
-
Build the rubric — the criteria you’re grading against. Each criterion gets a set of options with point values and short descriptions, so graders pick a level rather than inventing a score.
-
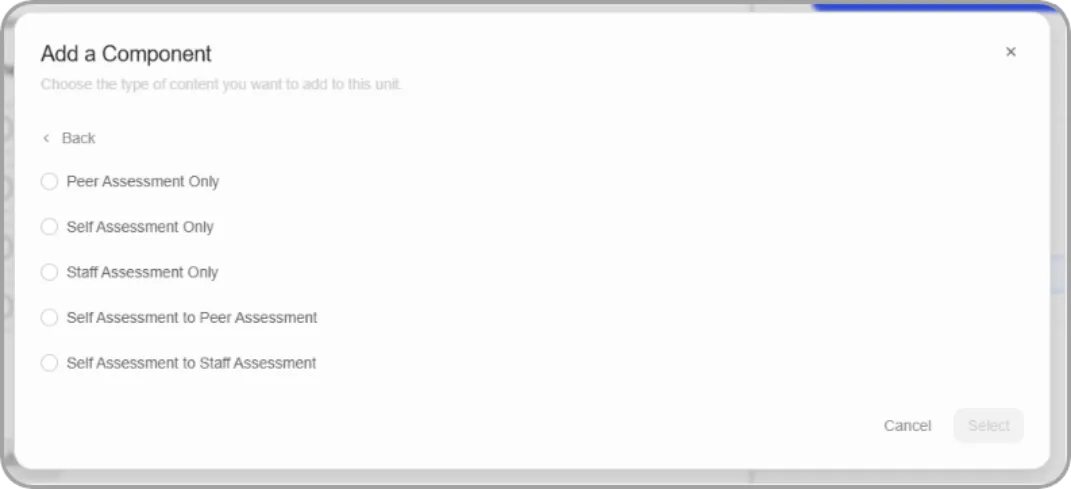
Choose the assessment steps:
-
Peer assessment — learners grade each other’s work against your rubric.
-
Self assessment — learners grade their own work.
-
Staff assessment — you or your course team grade every submission.
-
-
Set dates for the submission and each assessment step.
-
Click Save.
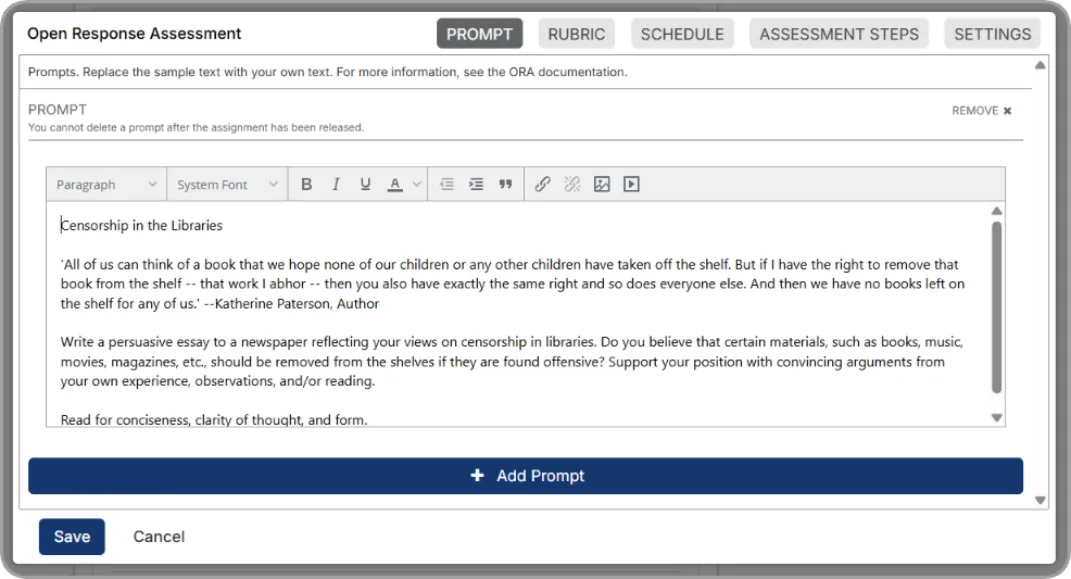
Tip: Peer assessment scales without adding work for you, but it needs enough learners submitting around the same time to function. For small cohorts or high-stakes work, use staff assessment.
Drag and Drop
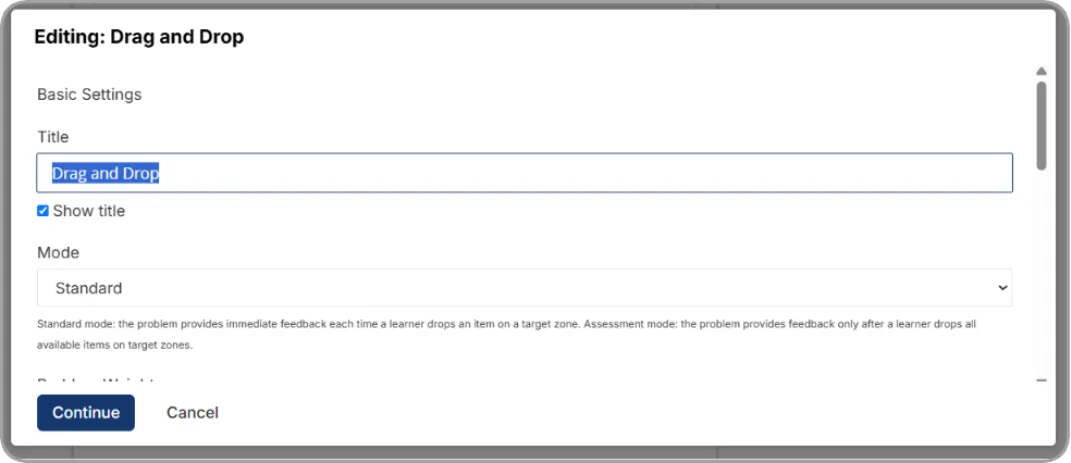
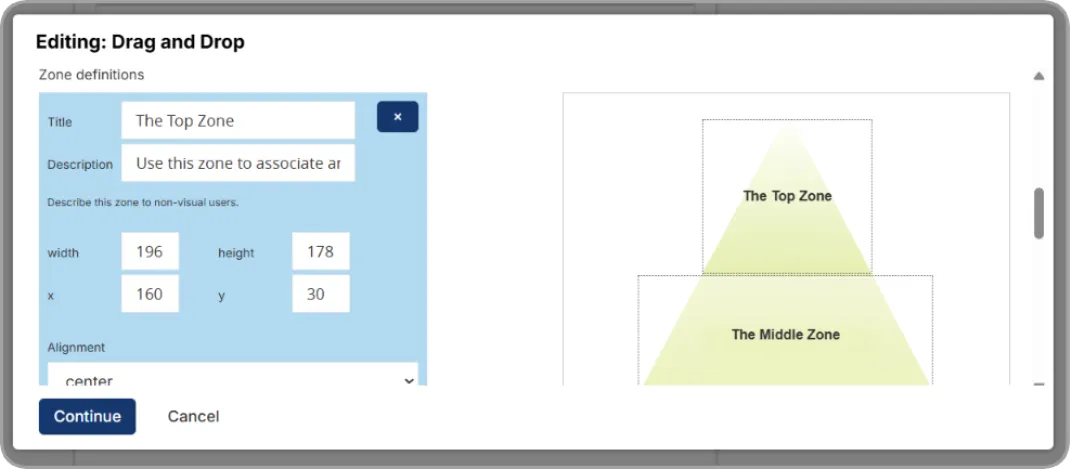
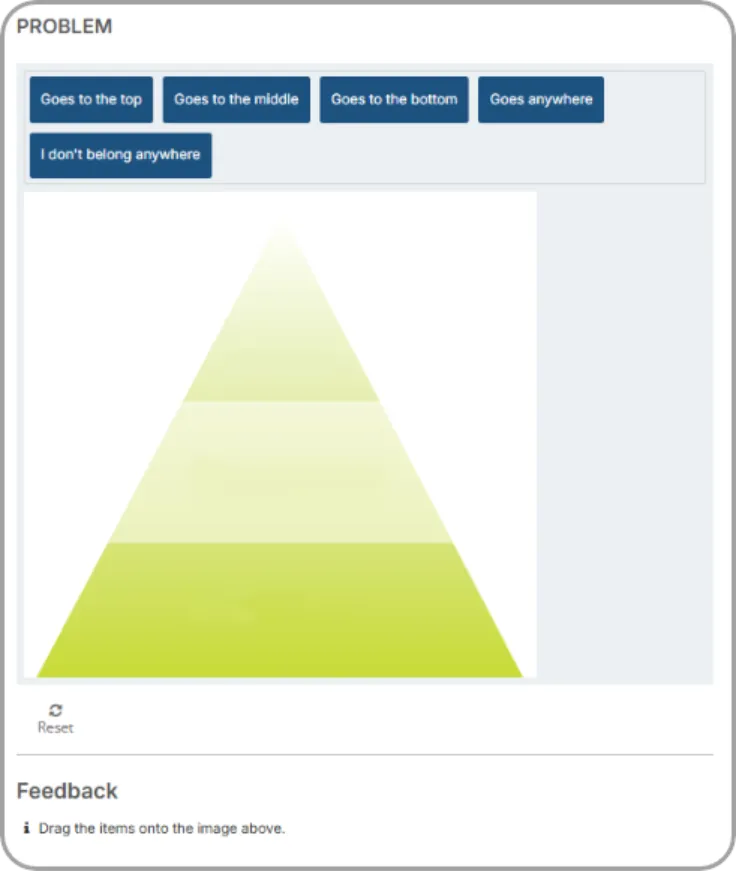
Section titled “Drag and Drop”Use Drag and Drop for activities where learners place items onto a target image — labelling a diagram, sorting items into categories, sequencing steps.
-
Choose Drag and Drop and click Add component.
-
Upload a background image — the diagram or layout learners drag onto.
-
Define drop zones on the background: position and size each one, and give it a label.
-
Create the draggable items, either text or image, and assign each to the zone or zones where it belongs.
-
Add feedback shown for correct and incorrect placements.
-
Set the maximum score and number of attempts.
-
Click Save.
Tip: Keep the background image simple and make drop zones generous. Zones that are too small are frustrating on touchscreens.
Managing components in a Unit
Section titled “Managing components in a Unit”Each saved component appears as a card in the Unit, with a live preview of what learners will see.
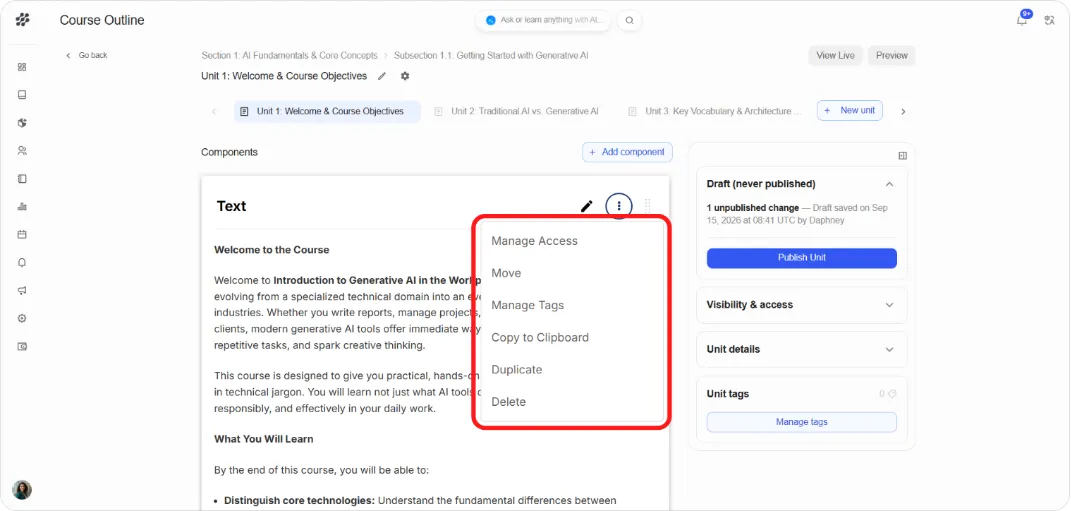
-
Pencil icon — reopen the editor.
-
⋮ menu — manage access,copy to clipboard,duplicate, manage tags, or delete.
-
Drag handle — reorder components within the Unit.
Add as many components to a Unit as you need. A common pattern is a Text component to introduce a topic, a Video to teach it, and a Problem to check understanding.
Publishing your changes
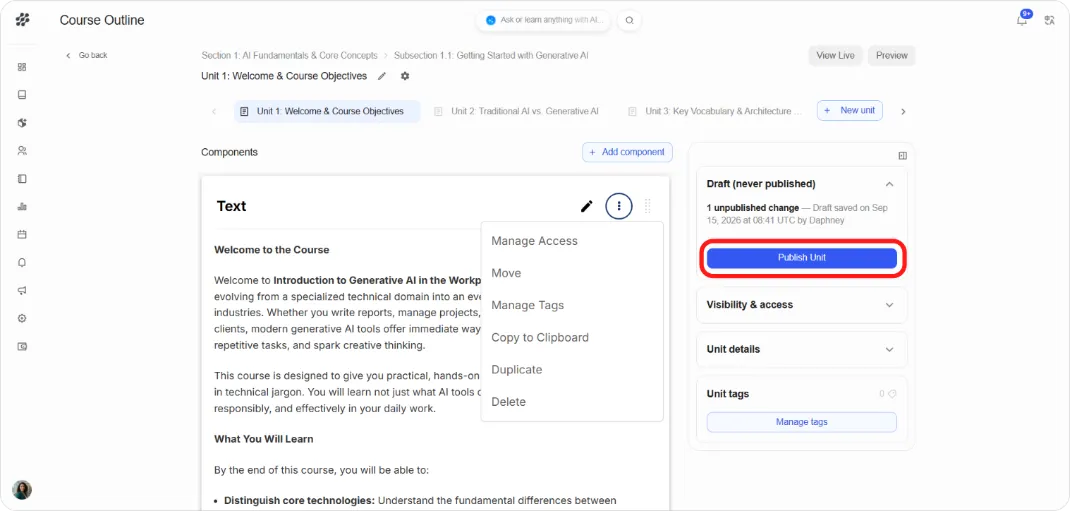
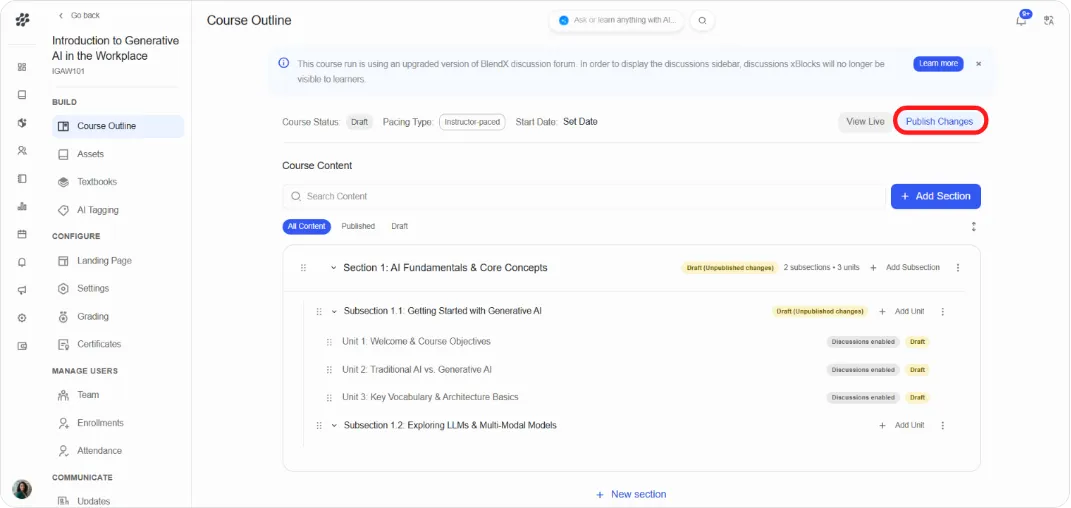
Section titled “Publishing your changes”New and edited components are saved as drafts. Learners don’t see them until you publish.
-
Publish Unit in the Unit sidebar publishes that Unit.
-
Publish Changes on the Course Outline page publishes everything outstanding.
The sidebar shows the draft status and how many unpublished changes are waiting.
What’s next
Section titled “What’s next”-
Embed richer content: Enhancing Your Course with Advanced Content
-
Reuse content you’ve already built: Using the Library
-
Make your questions count toward a grade: Setting Up Grading