
How to edit notification email templates
Who can do this: Super Admin, Admin, or Staff with the Platform Settings permission
Change the wording and layout of the emails your platform sends.
Before you start
Section titled “Before you start”Switch on Notification templates under Platform Settings > Features.
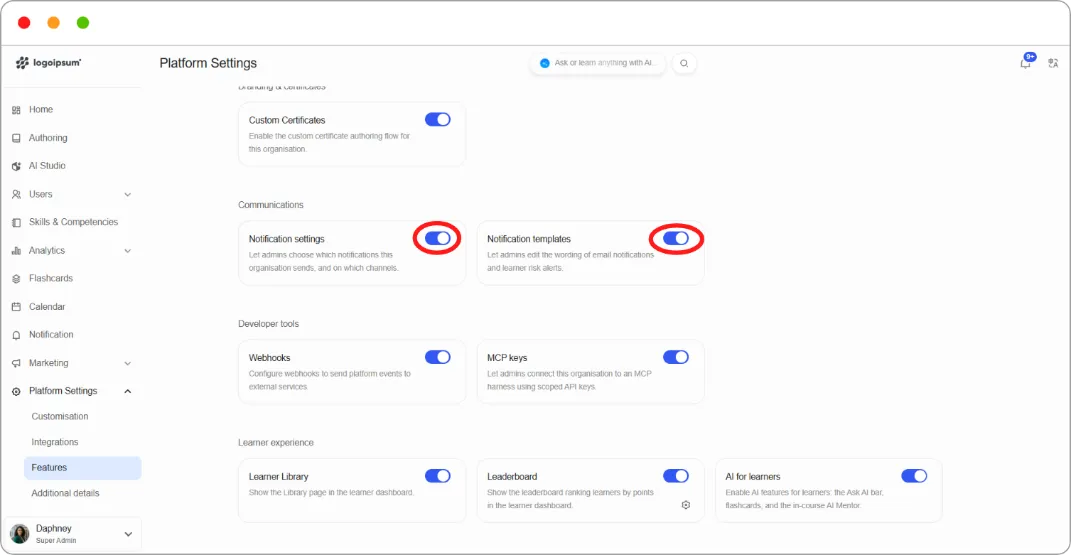
Step 1: Go to Platform Settings > Notification settings and open the Email templates tab.
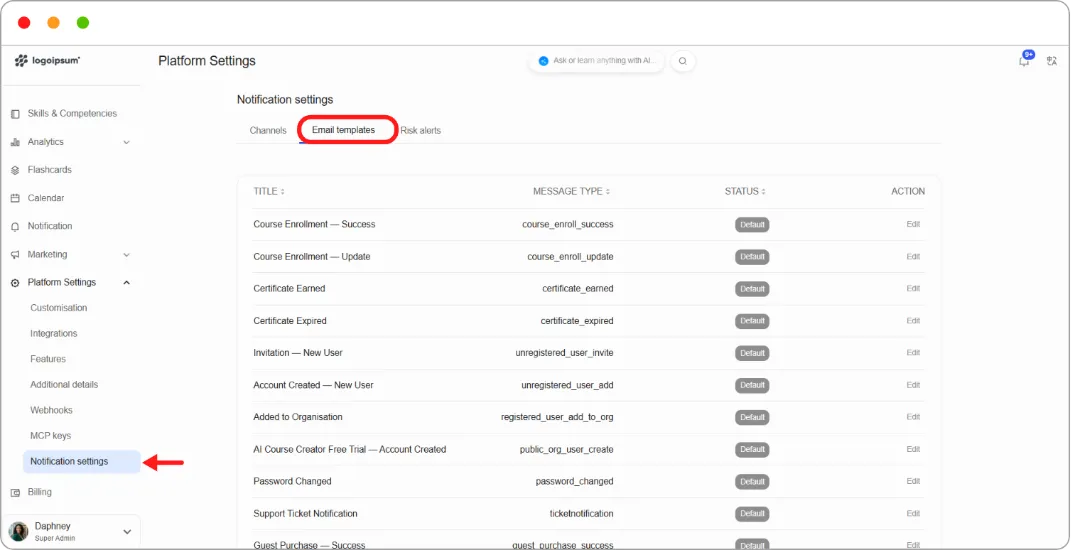
Step 2: Choose the template you want to edit, for example Course Enrollment — Success.
Step 3: Edit the Subject line.
Step 4: Edit the HTML below it. The Preview panel on the right renders your changes as the learner will see them.
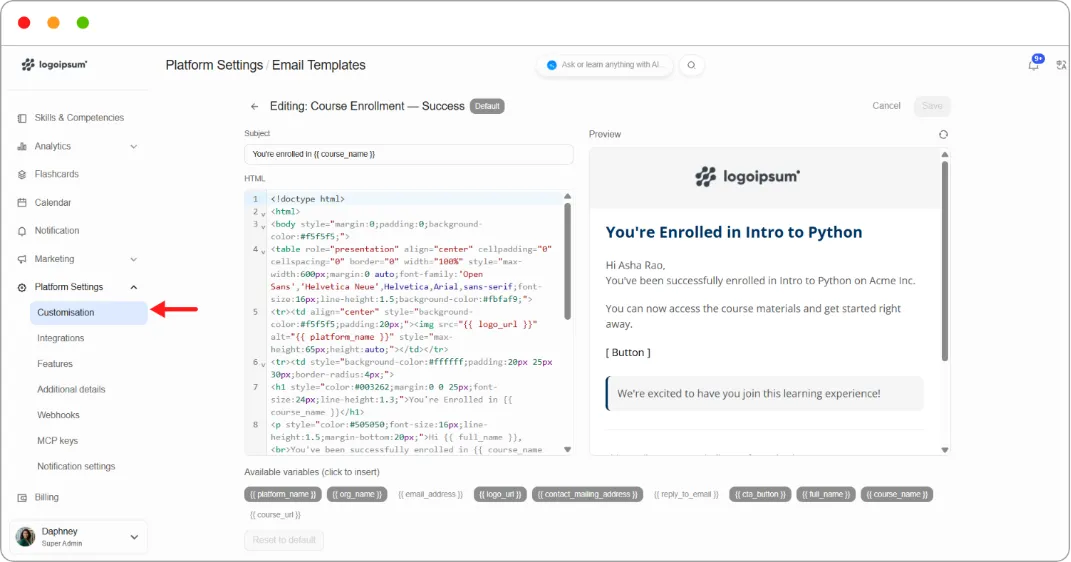
Step 5: Insert variables by clicking a chip under Available variables. These fill in with real values when the email is sent:
| Variable | Fills in |
|---|---|
| {{ platform_name }} | Your platform name |
| {{ org_name }} | Your organisation name |
| {{ full_name }} | The learner’s name |
| {{ email_address }} | The learner’s email address |
| {{ course_name }} | The course name |
| {{ course_url }} | A link to the course |
| {{ logo_url }} | Your logo |
| {{ cta_button }} | The call-to-action button |
| {{ contact_mailing_address }} | Your mailing address |
| {{ reply_to_email }} | Your reply-to address |
Step 6: Click Save.
To undo your changes, click Reset to default.
Note: These are HTML emails, and email clients are far less forgiving than browsers. Make small changes and check the preview each time rather than rewriting the whole template.
Tip: Send yourself a test before rolling out a change. A template that looks right in the preview can still break in Outlook.