
How to set up your platform banner
Who can do this: Super Admin, Admin, or Staff with the Platform Settings permission
The platform banner sits at the top of the learner dashboard. Use it to point learners at a course, a campaign, or an announcement.
Step 1: Go to Platform Settings > Customisation and open the Appearance tab.
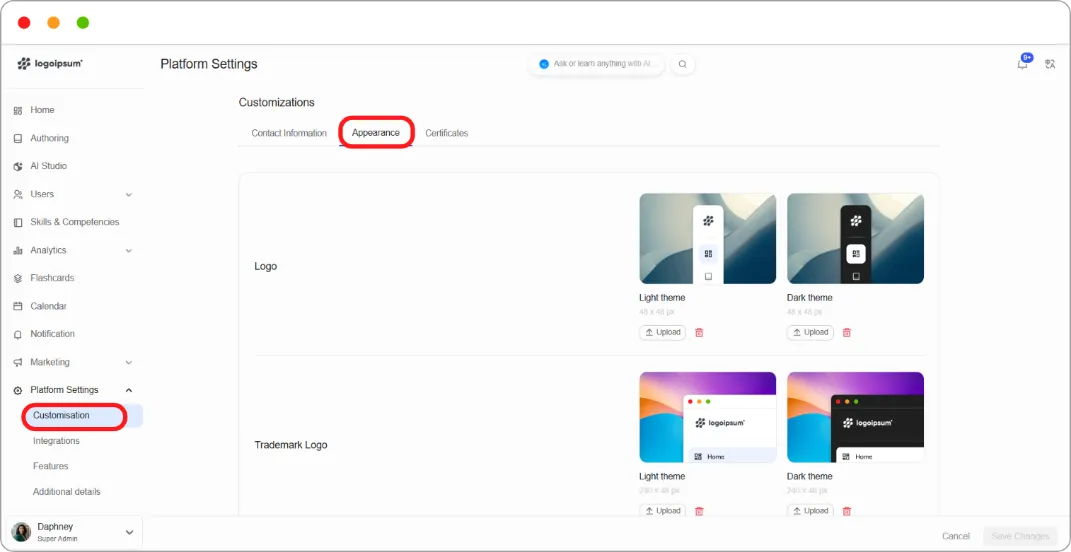
Step 2: Scroll to Platform Banner.
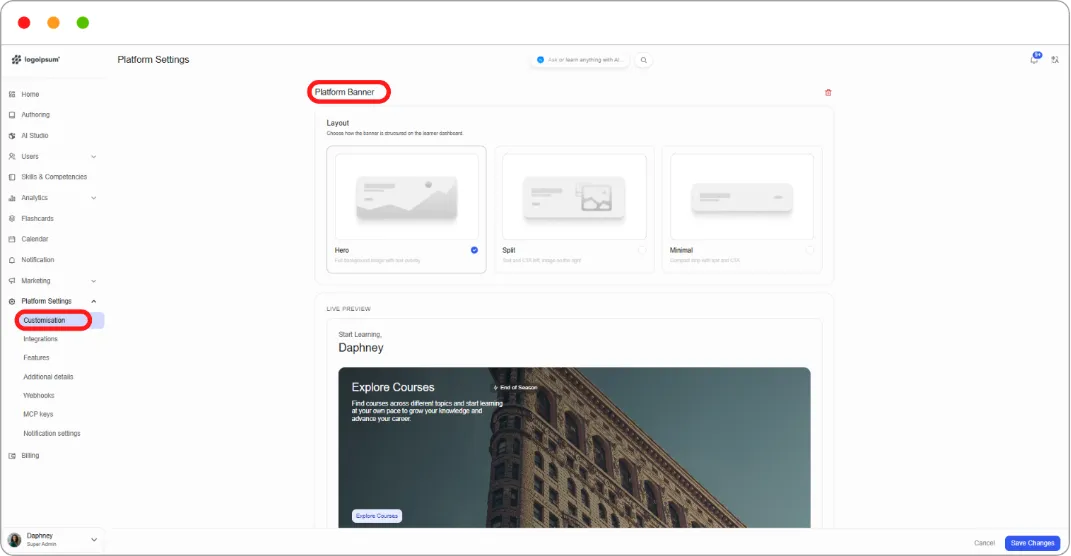
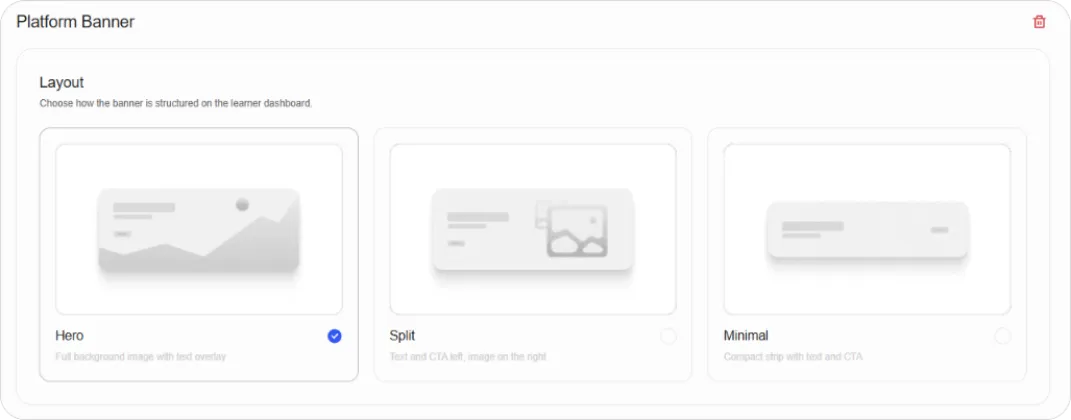
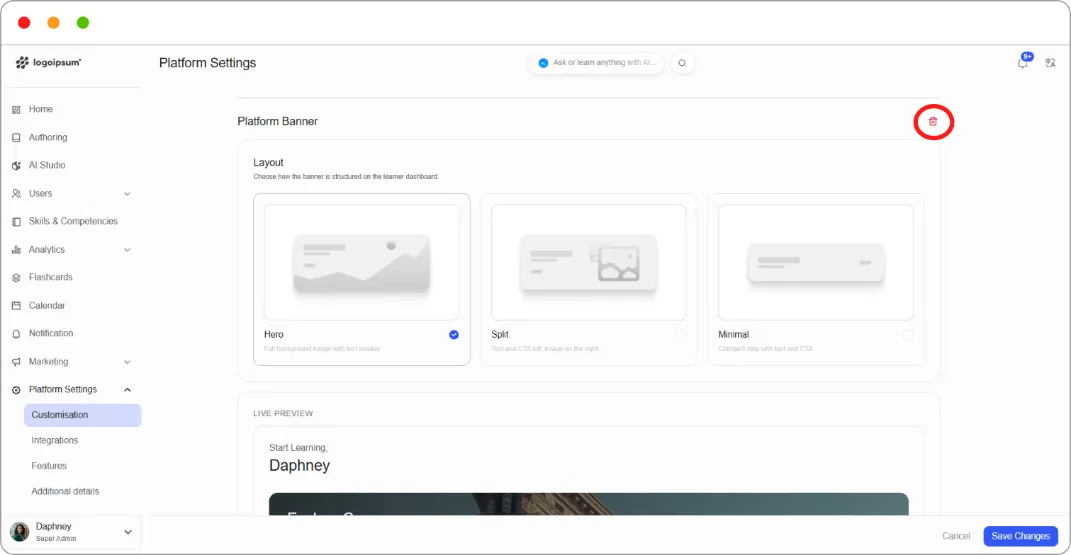
Step 3: Choose a Layout:
| Layout | Description |
|---|---|
| Hero | Full background image with text overlay |
| Split | Text and call to action on the left, image on the right |
| Minimal | Compact strip with text and a call to action |
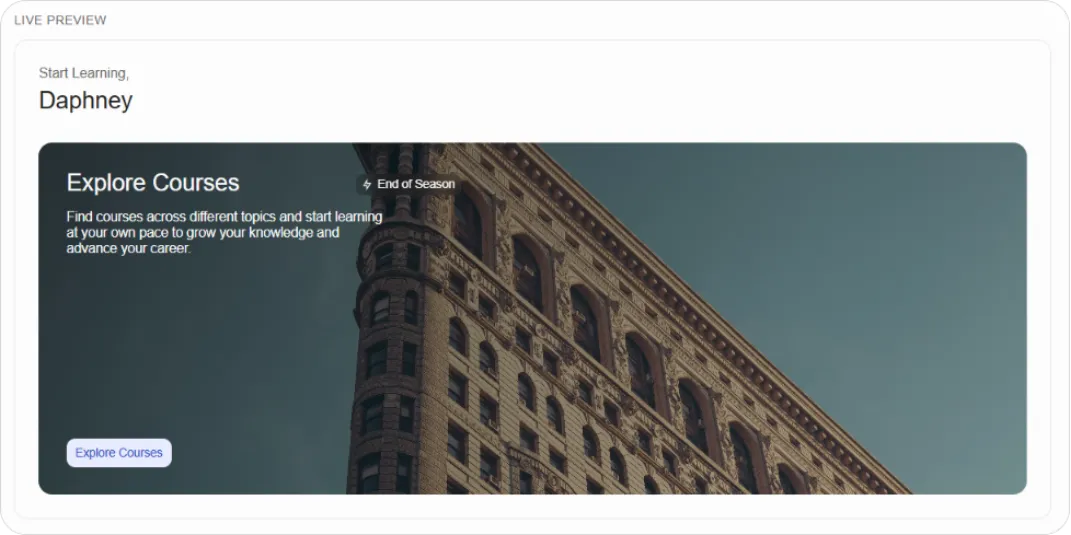
Step 4: Check the Live Preview below. It updates as you edit.
Step 5: Under Content, fill in:
| Field | Limit |
|---|---|
| Banner Title | 36 characters |
| Badge Text | Short label shown alongside the title |
| Description | 120 characters |
| Primary Button Text | The call to action |
| Primary Button URL | Where it goes, for example /discover |
Click + Add secondary button for a second call to action.
Step 6: Upload a Banner image.
Step 7: Click Save Changes.
To remove the banner entirely, use the trash icon beside the Platform Banner heading.
Tip: Write the title first and watch the preview. At 36 characters the Hero layout wraps differently from Minimal, and the preview is the only reliable way to see it.
Tip: Use a relative URL like /discover for destinations inside your platform. A full address works but breaks if your domain changes.