
How to Create a Course with AI Studio
AI Studio lets you generate a full course — structure, content, and assessment questions — from a simple description or an existing document, through a guided conversation with the AI.
Step 1: Start a new AI Studio course
Section titled “Step 1: Start a new AI Studio course”- From the left navigation, click AI Studio.
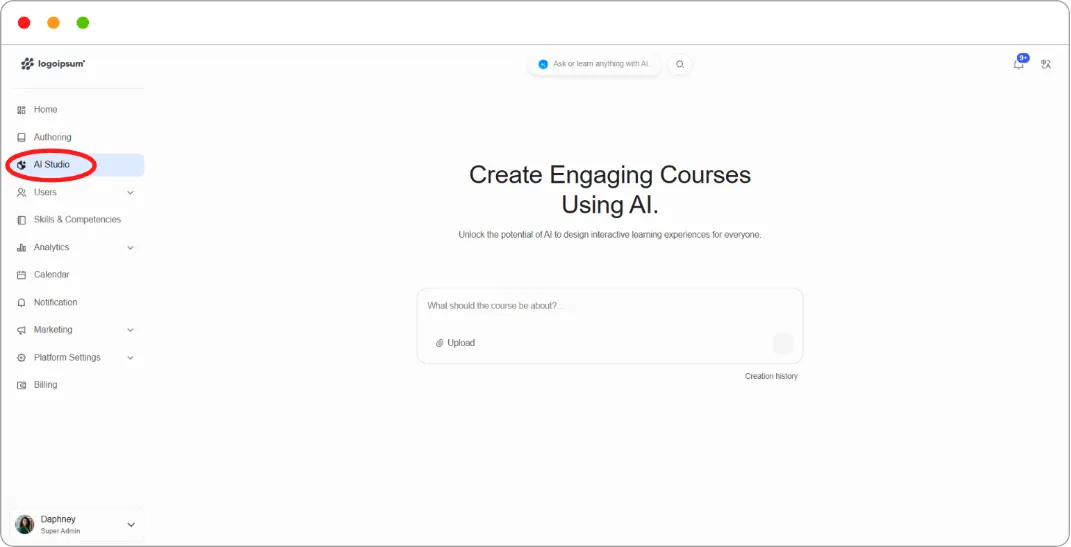
[AI Studio landing page: “Create Engaging Courses Using AI” heading, the prompt box with placeholder text, and the Upload button]
-
In the prompt box, either:
-
Type a description of your course — e.g. “create a simple course on digital marketing”, or
-
Click Upload to attach a source document (PDF, DOCX, or PPTX) for the AI to build the course from.
-
-
Click the send arrow to submit.
Tip: You can combine both — describe what you want and upload a reference document — for the most accurate result.
Step 2: Confirm the course brief
Section titled “Step 2: Confirm the course brief”The AI proposes a course brief covering:
-
Topic
-
Target Audience
-
Proficiency (e.g. Beginner)
-
Language
-
Tone (e.g. Technical Training)
This appears both in the chat and in the Course Brief checklist on the right, which fills in with a green checkmark as each item is confirmed.
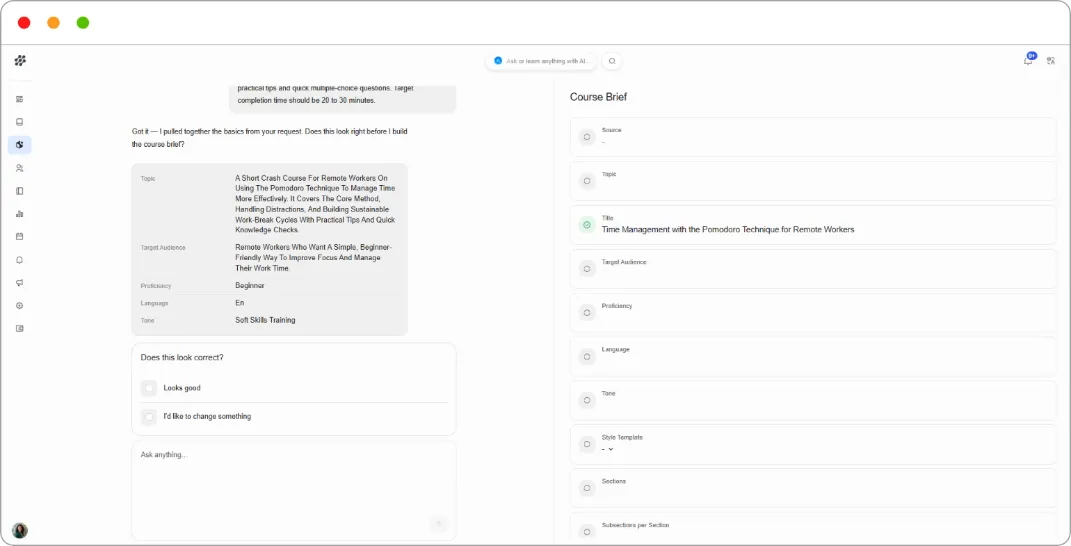
[The course brief moment: AI’s proposed brief in the chat on the left, Course Brief checklist on the right with green checkmarks, and the Looks good / I’d like to change something buttons]
Review it and choose:
-
Looks good — to continue, or
-
I’d like to change something — to adjust before moving on
Step 3: Answer the guided setup questions
Section titled “Step 3: Answer the guided setup questions”The AI will walk you through a few more choices, one at a time:
| Question | Example options |
|---|---|
| How should this course teach the content? | Explain then Practice, Problem First, Narrative Scenario |
| What kinds of components should this course include? | Text, Video, etc. |
| What kinds of questions should this course include? | Multiple Choice,Multi select,Short Answer,Dropdown,Numerical (skippable) |
| What visual style should the course use? | Default/Custom |
| Recommended or custom course size? | Recommended / Custom |
| (if Custom) How many sections? | 2–6 sections |
| (if Custom) How many subsections per section? | 2–5 subsections |
| (if Custom) How many units per subsection? | 2-4 units / your choice |
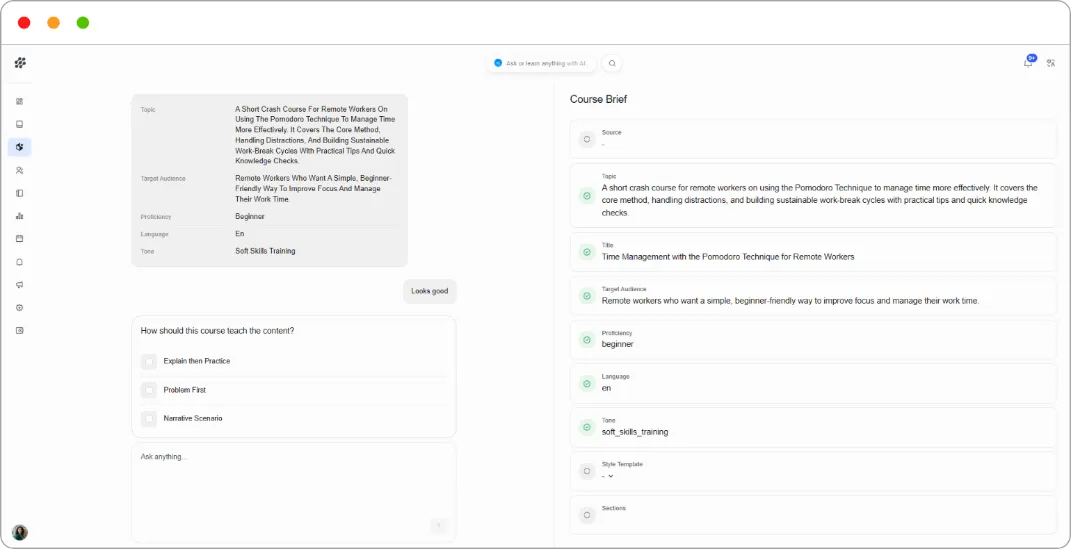
Note: You can type a custom answer into the chat box at any point instead of picking a suggested option.
Step 4: Review and edit the course outline
Section titled “Step 4: Review and edit the course outline”Once setup is complete, the AI generates a full Course Outline in the right-hand panel — Sections, Subsections, and Units, each with its content components already mapped out.
At this stage you can:
-
Click any title (Section, Subsection, or Unit) to edit it directly
-
Click the + on a Unit to add a component — Image, Video, Multiple Choice, Multiple Select, Short Answer, Dropdown, Numerical, or Interactive
-
Remove a component by clicking the × next to it
-
Use + Add Unit / + Add Subsection to expand the structure
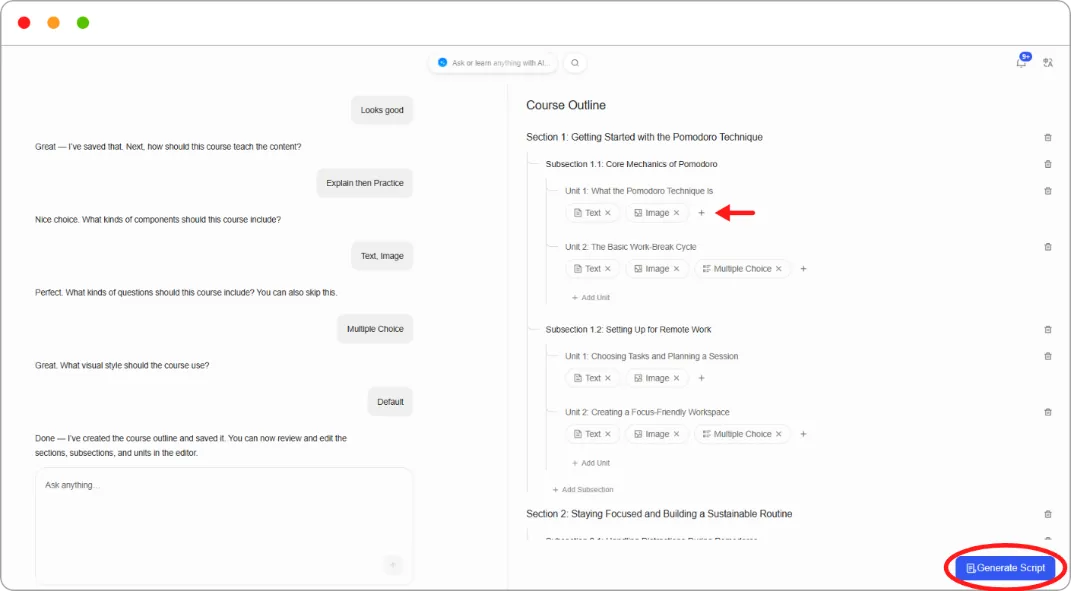
[The Course Outline panel populated, with a Unit expanded showing its component chips and the + button visible]
Step 5: Generate the content
Section titled “Step 5: Generate the content”-
Once you’re happy with the outline, click Generate Script (bottom right).
-
The panel switches to Script Generation, showing each component’s status (queued → generated).
-
As each script completes, you can read and edit the generated text directly before finalizing.
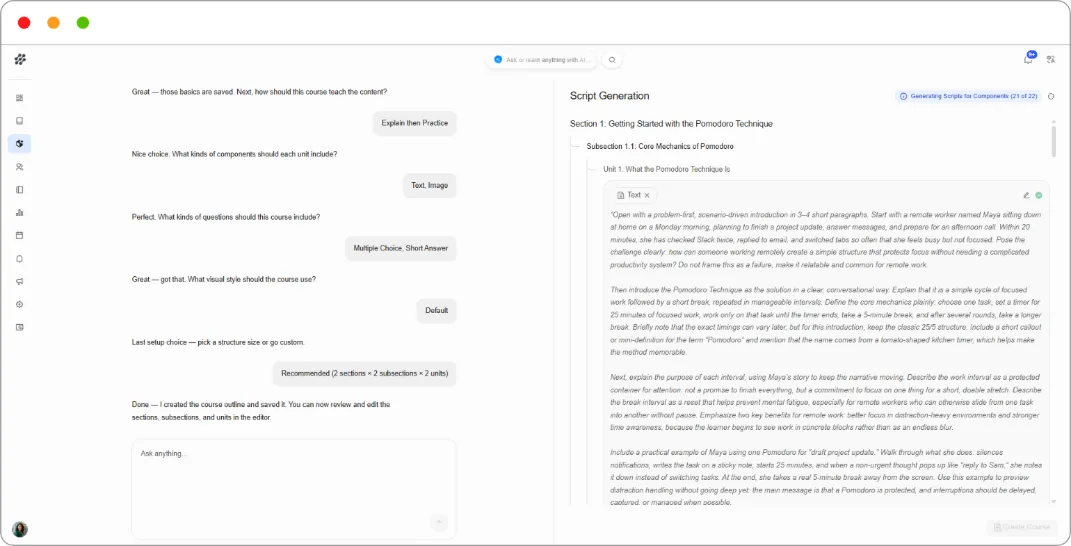
*[*Script Generation screen mid-run: some components showing generated with checkmarks, others still queued. Capture it partway so the progressive state is visible]
Step 6: Create the course
Section titled “Step 6: Create the course”Once all components have finished generating (each shows a green checkmark), click Create Course.
Your course is built and ready — you can now open it in the regular Course Outline editor to fine-tune structure, add certificates, set up grading, and publish.
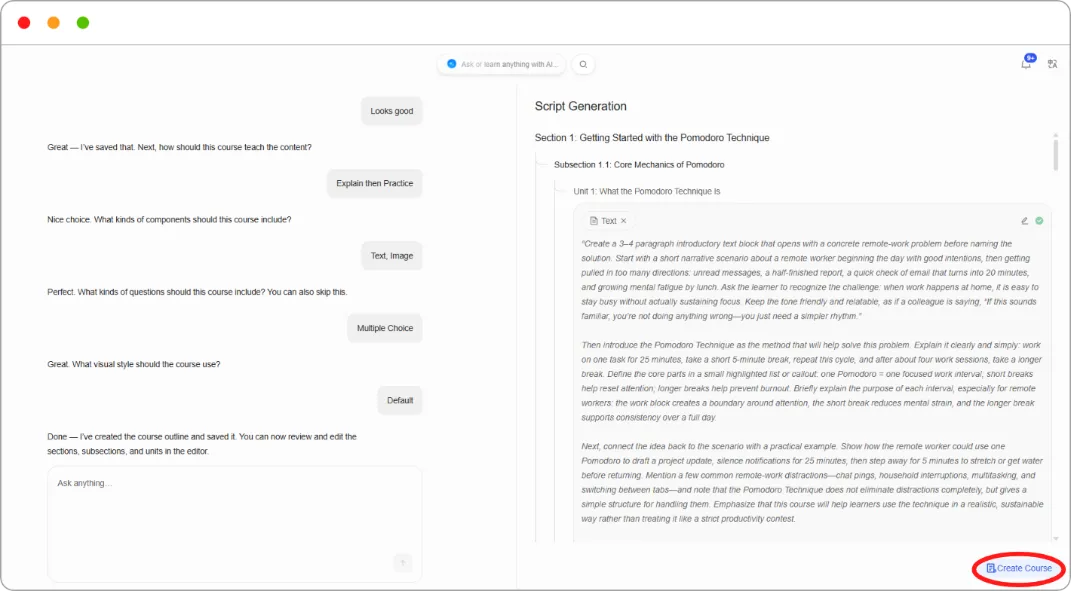
[All components complete with green checkmarks and the Create Course button now active]
What’s next
Section titled “What’s next”-
Fine-tune structure: Understanding Course Structure (Studio Basics)
-
Set up grading before certifying learners: Setting Up Grading
-
Add a certificate: Adding a Certificate to Your Course