
How to create and manage coupons
Who can do this: Super Admin, Admin, or Staff with the Platform Settings permission
Coupons give learners a discount at checkout.
Before you start
Section titled “Before you start”Switch on Coupon Management under Platform Settings > Features.
Creating a coupon
Section titled “Creating a coupon”Step 1: Go to Marketing > Coupons.
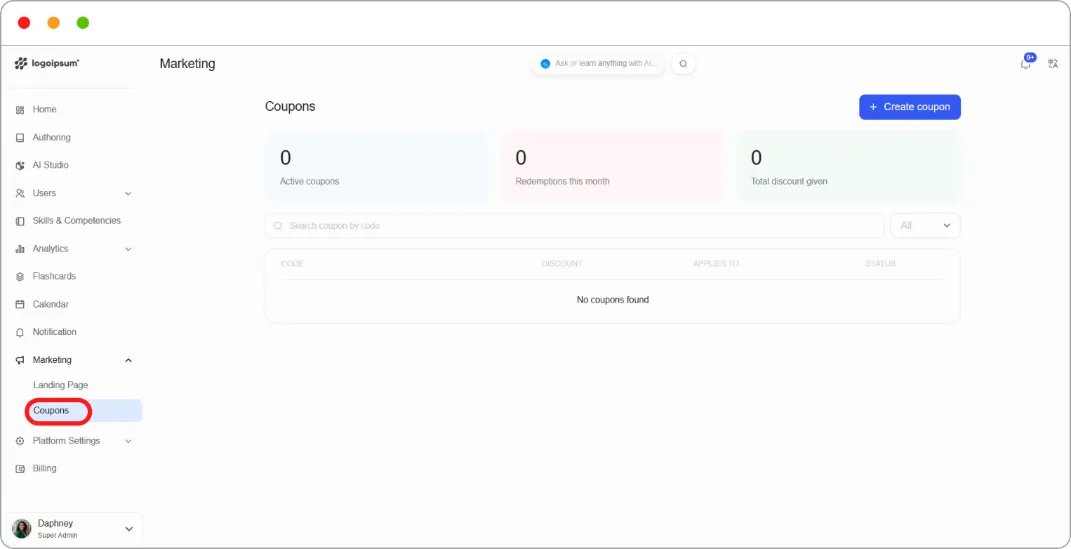
Step 2: Click + Create coupon.
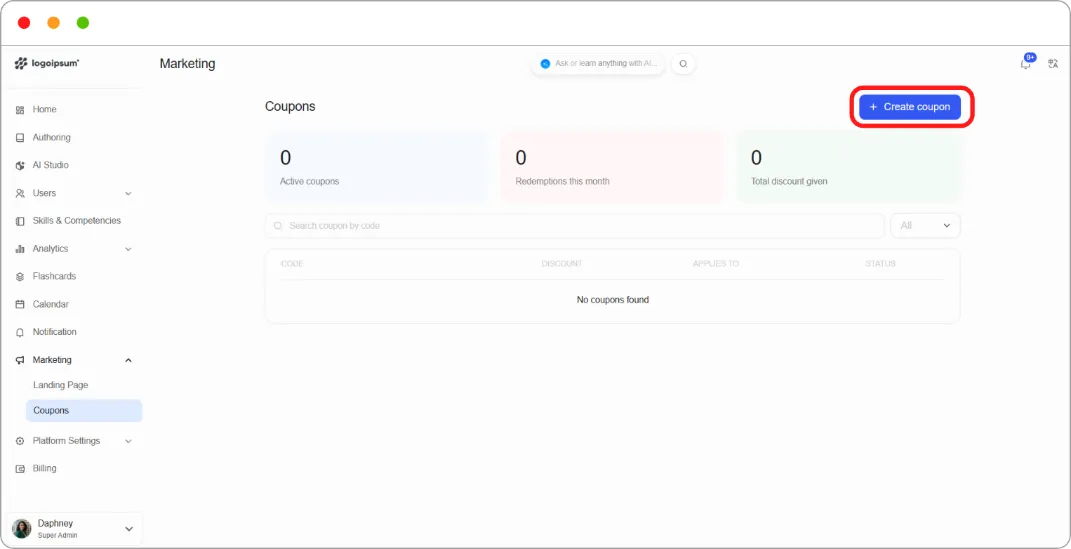
Step 3: Enter a Code, or click Generate to have one created for you.
Step 4: Choose a Type and enter a Value:
| Type | Value |
|---|---|
| Percentage off | A percentage, for example 20 |
| Fixed amount | An amount in your currency |
Step 5: Set Starts on and Ends on.
Step 6: Under Applies to, choose:
-
All courses & programs — the coupon works on everything
-
Specific items — tick the individual courses and programs it applies to
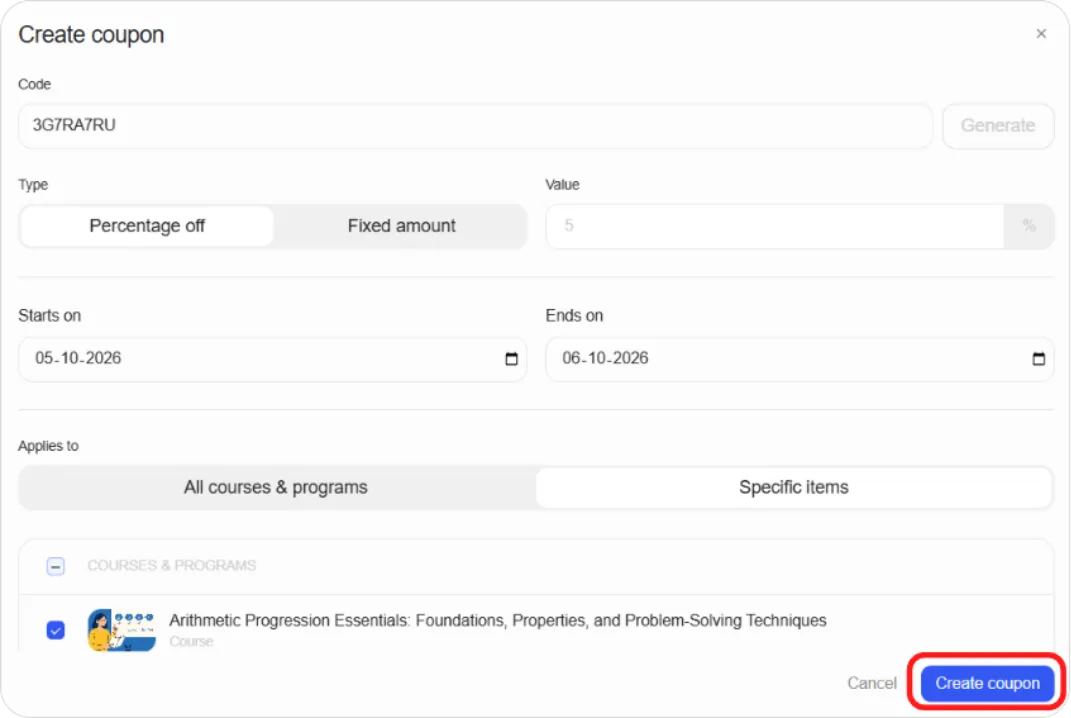
Step 7: Click Create coupon.
Managing coupons
Section titled “Managing coupons”The Coupons page shows three figures at the top: Active coupons, Redemptions this month, and Total discount given.
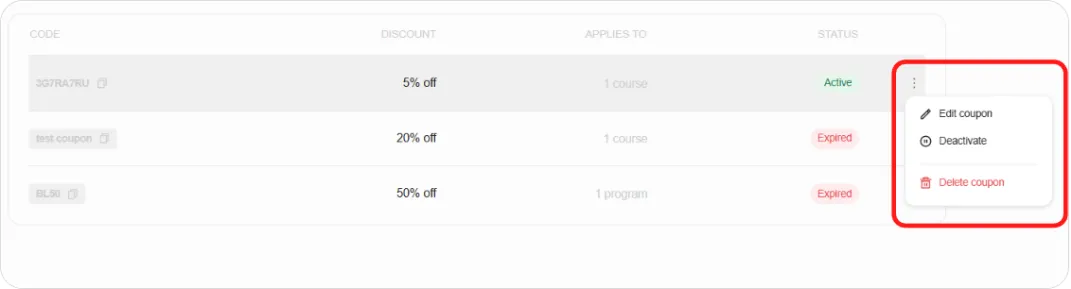
Below them, every coupon is listed with its Code, Discount, what it Applies to, and Status. Coupons past their end date show as Expired.
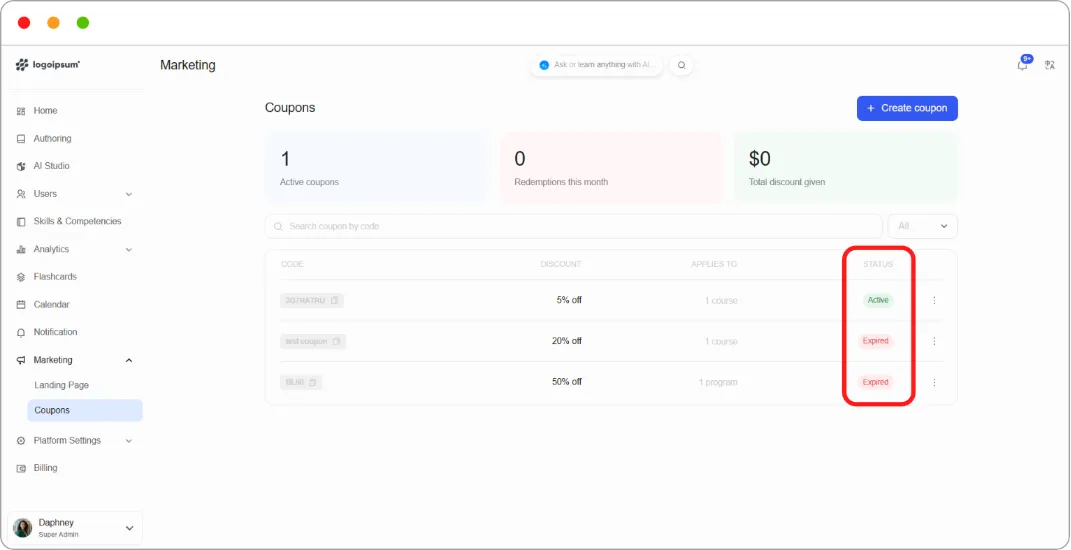
Use the search box to find a coupon by code, or the filter to narrow by status. Click the copy icon beside a code to copy it.
The ⋮ menu on each row offers:
| Action | What it does |
|---|---|
| Edit coupon | Change the discount, dates, or which items it applies to |
| Deactivate | Stop the coupon working without deleting it |
| Delete coupon | Remove the coupon permanently |
Tip: Deactivate rather than delete when a campaign ends. The coupon stays in your list with its redemption history intact, and you can reactivate it if the campaign runs again.
Tip: Use Generate for codes going to a wide audience and a memorable code for a specific campaign. A generated code is harder to guess and share; a readable one is easier to put on a slide.
Tip: Always set an end date. A percentage coupon with no expiry that leaks onto a deals site is difficult to deal with after the fact.