
Using the Library
A library is a store of reusable content that lives outside any course. Build a question, a unit, or a whole section once, then pull it into as many courses as you need.
Blend-ed has two library systems running side by side:
-
Library (Beta) — the current experience. Holds components, units, subsections, and sections, all reusable across courses.
-
Legacy Libraries — the older system, which holds components only. Still supported, but being retired.
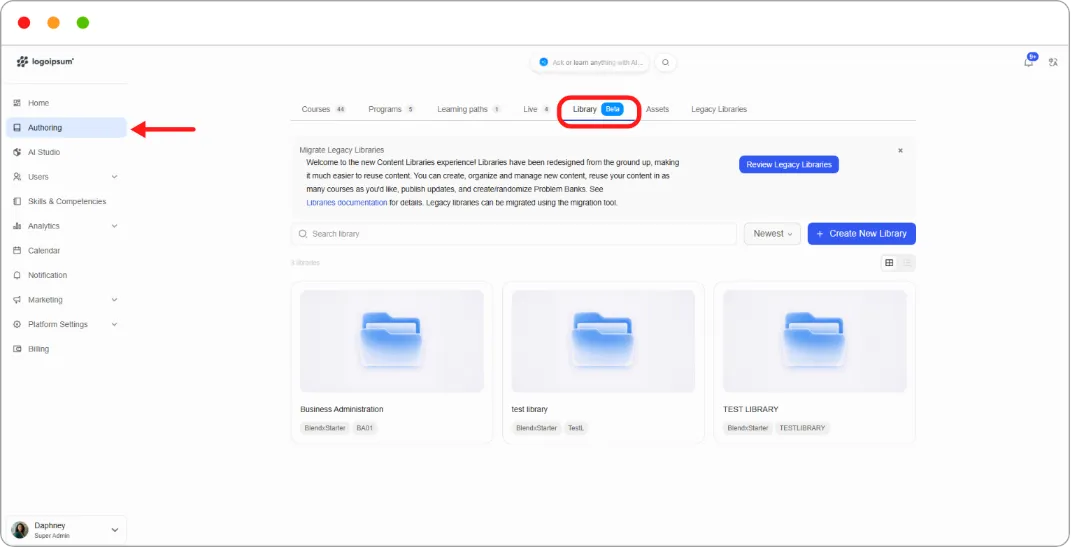
Both live under Authoring in the main left navigation, rather than inside a course. This is the main difference from standard Open edX Studio, where libraries sit inside the course authoring tool. Putting them at the Authoring level makes it clearer that library content belongs to your organisation, not to any one course.
Part 1: Creating a library
Section titled “Part 1: Creating a library”- From the main left navigation, click Authoring, then open the Library tab.
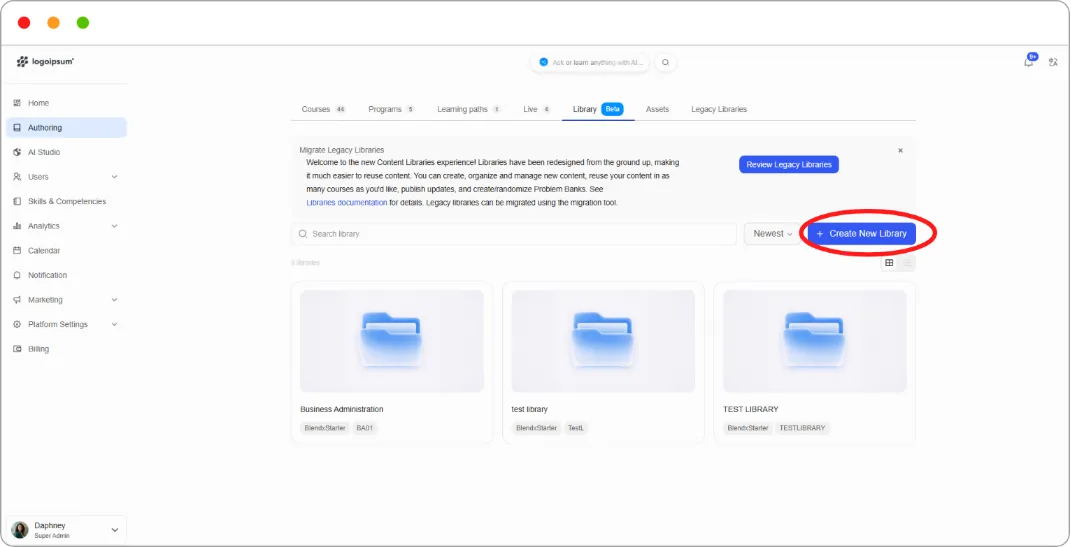
- Click + Create New Library.
-
Fill in:
-
Library name — for example, Computer Science Problems
-
Organization — choose from the dropdown
-
Library ID — a short unique code, for example CSPROB
-
-
Click Create Library.
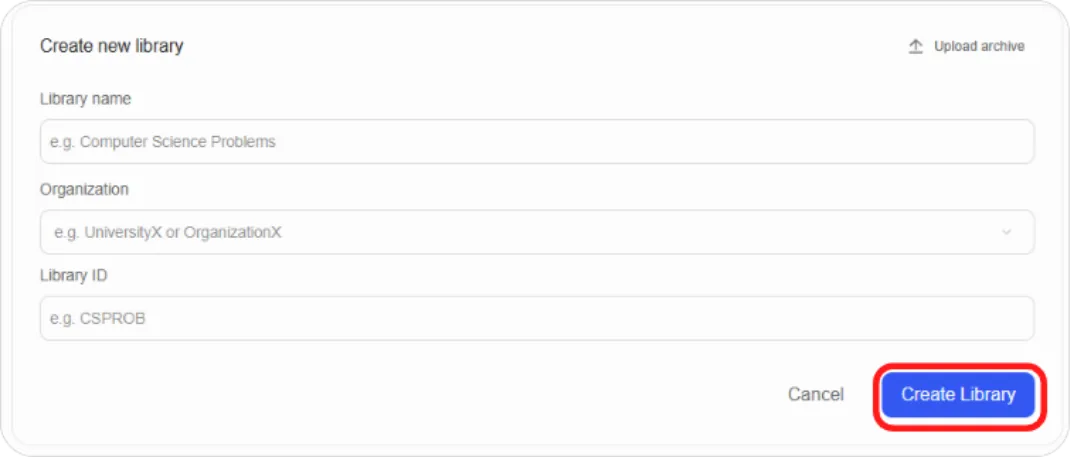
Note: Like a Course ID, the Library ID is difficult to change afterwards. Choose something short and meaningful.
Importing an existing library
Click Upload archive at the top right of the Create new library form to import a library exported from elsewhere.
Finding your libraries
The Library tab lists everything you’ve created, with search, a sort control (Newest, Oldest, Name A-Z, Name Z-A), and a grid or list view toggle. Each card shows the library name with its organisation and ID.
Part 2: Adding content to a library
Section titled “Part 2: Adding content to a library”Open a library and you’ll see tabs for All Content, Collections, Components, Units, Subsections, and Sections, plus search and filters for Tags, Type, and Status.
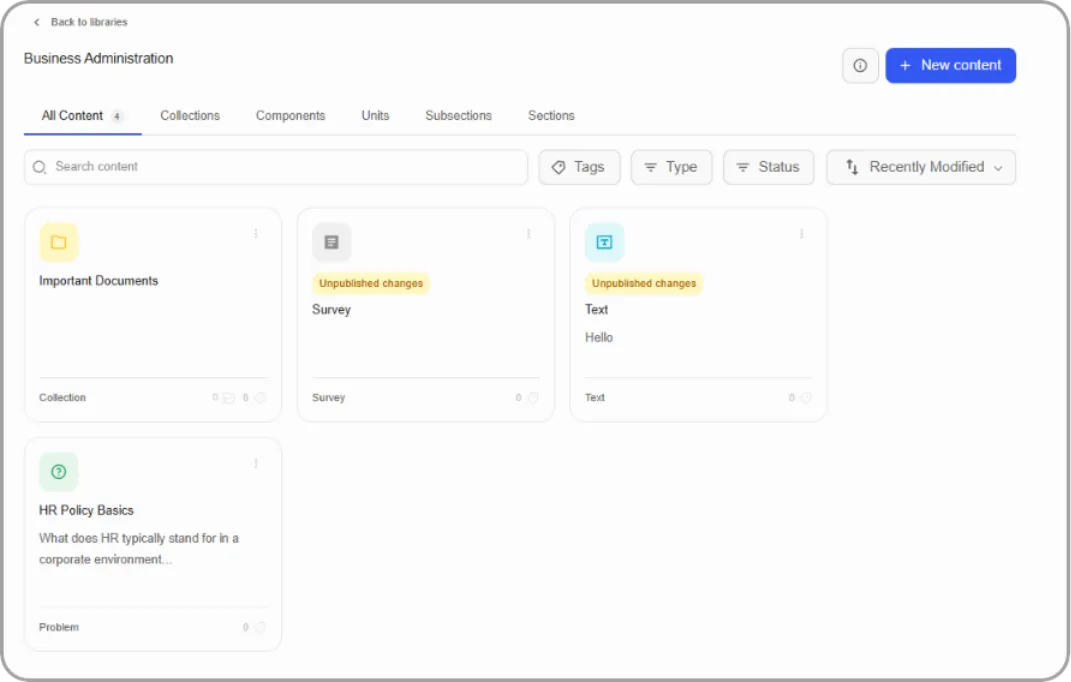
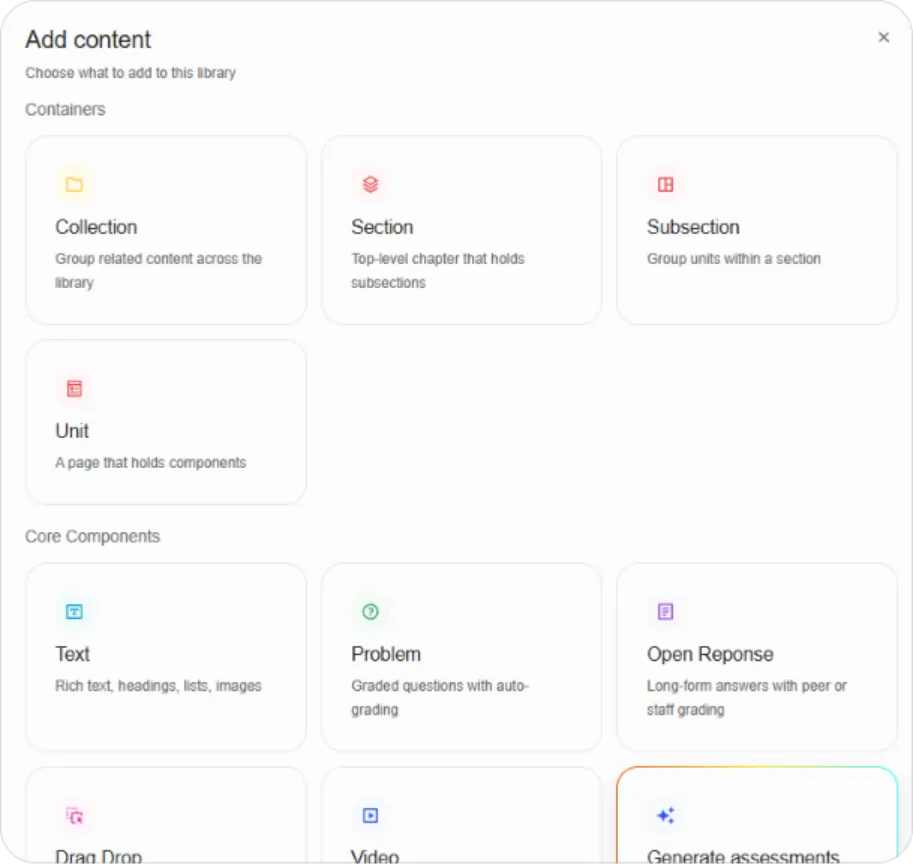
Click + New content to open the Add content window.
Containers
| Type | What it is |
|---|---|
| Collection | Groups related content across the library |
| Section | Top-level chapter that holds subsections |
| Subsection | Groups units within a section |
| Unit | A page that holds components |
Core Components
Text, Problem, Open Response, Drag Drop, and Video — the same component types you use inside a course.
Generate assessments
Drafts a batch of questions from a source document or topic using AI. Useful for building a question bank quickly from material you already have.
Building a section
Sections work the same way they do in a course, with one addition:
-
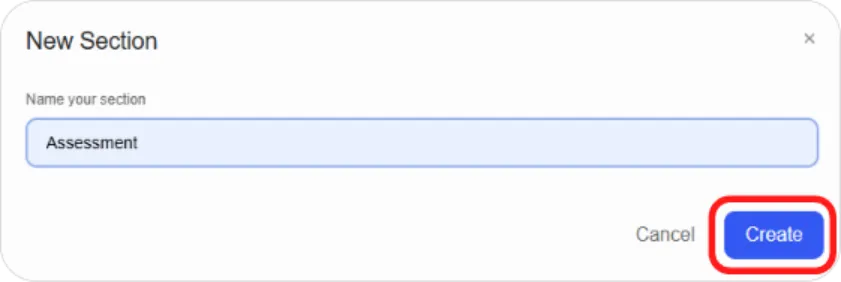
Create a Section and name it.
-
Inside it, choose + Add New Subsection to build something fresh, or + Add Existing Subsection to reuse a subsection already in this library.
-
Repeat for units and components.
That Add Existing option is what makes libraries efficient. One subsection can appear in several sections without being duplicated.
Collections
A Collection is an organising layer rather than a content type. It groups related items so your team can find them.
-
Choose Collection from the Add content window.
-
Name it and add an optional description.
-
Click Create.
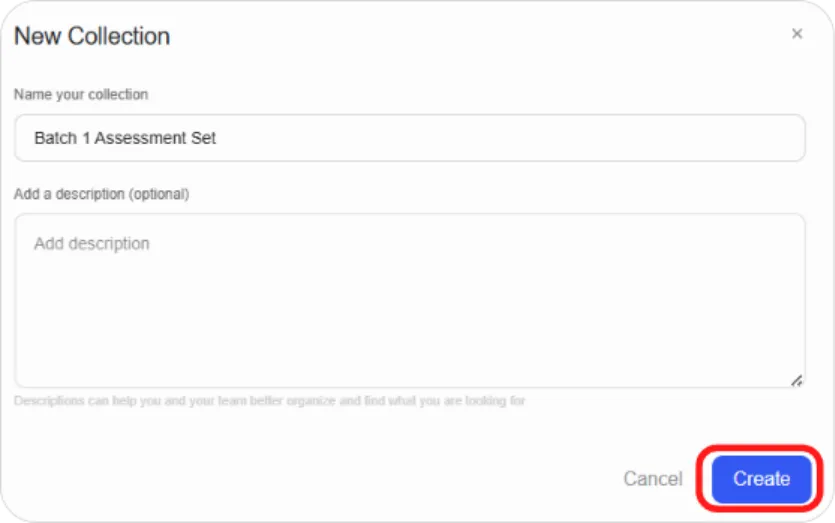
Inside a collection, the Add content window replaces the Collection tile with Existing Library Content, letting you pull in items already in the library.
Tip: Write the description. On a library with hundreds of items, a collection called “Module 3 Assessments” with no explanation is nearly as hard to navigate as no collection at all.
Part 3: Publishing library content
Section titled “Part 3: Publishing library content”Nothing you create in a library can be used in a course until you publish it.
New and edited content carries an Unpublished changes badge. While that badge is showing, the item is invisible to every course, and the library browser inside a course will report that the library is empty.
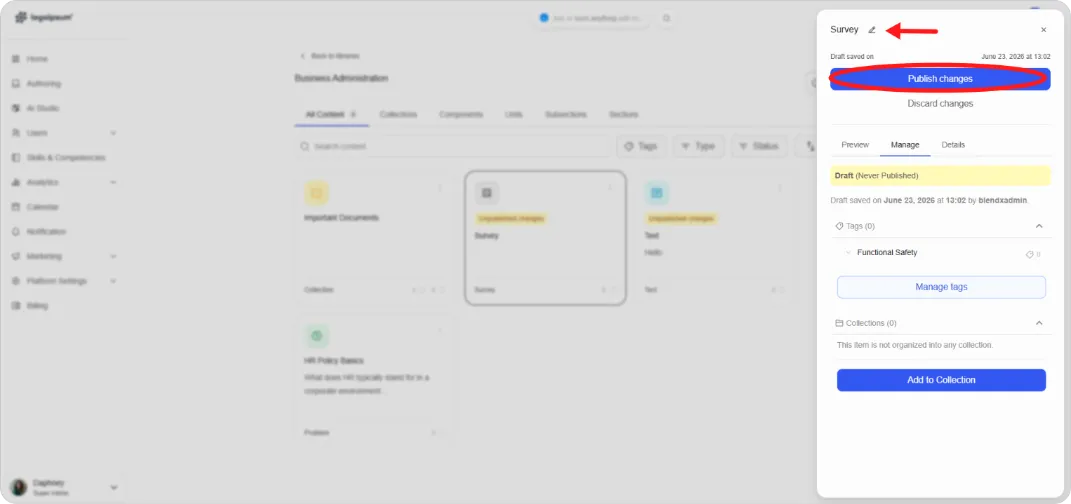
This is the most common problem people hit with libraries: content that looks finished in the library but doesn’t appear when they go to use it. If a library looks empty from inside a course, publishing is almost always the reason.
Publish your content before switching over to the course you want to use it in.
Part 4: Using library content in a course
Section titled “Part 4: Using library content in a course”There are three routes, depending on how much you want to bring in.
Adding a whole section
Section titled “Adding a whole section”-
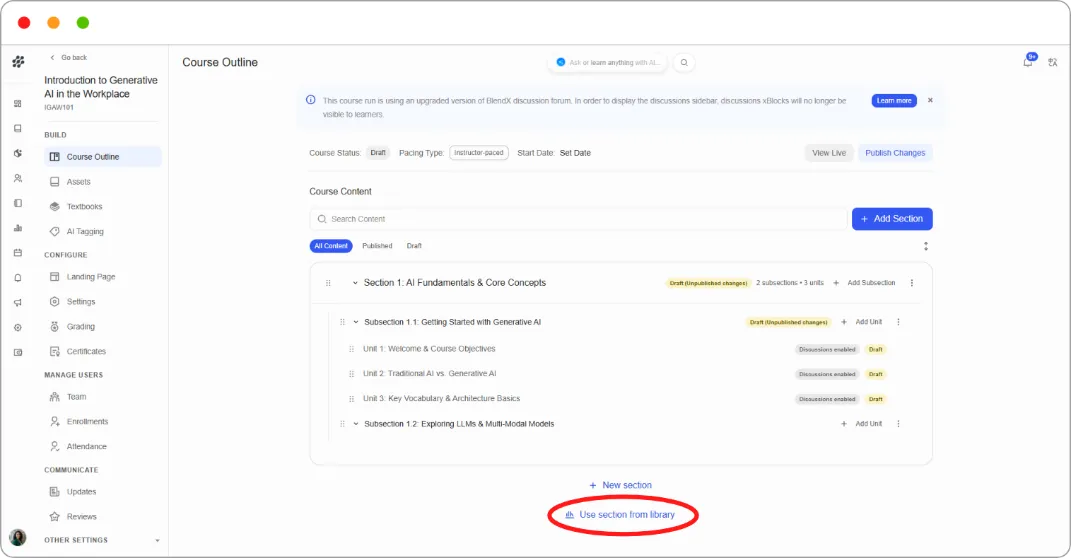
Open the course and go to BUILD > Course Outline.
-
At the bottom of the outline, click Use section from library.
-
Choose a library from the list, or search for one.
-
Browse the library’s published sections and select the one you want.
-
Confirm.
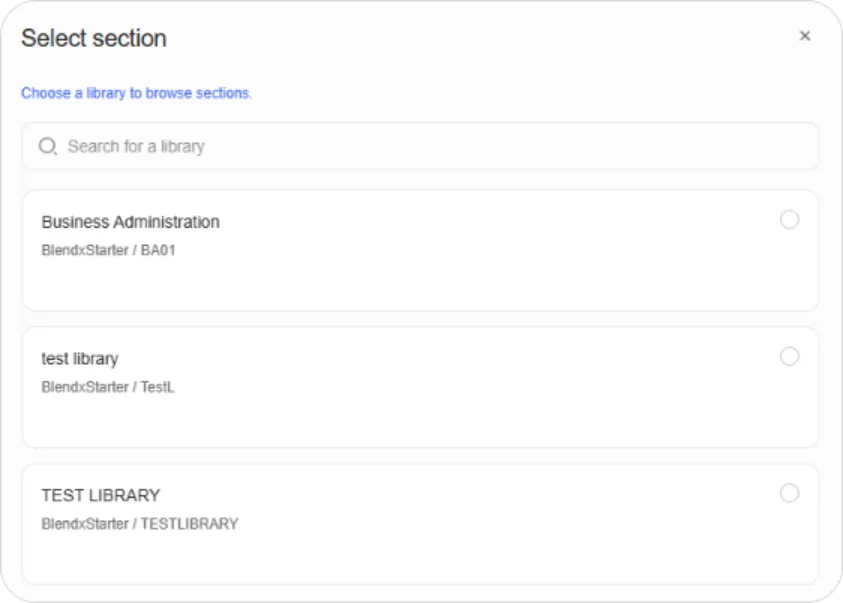
The browser shows a reminder that only published content is available for reuse, along with search, Tags and Status filters, and a sort control.
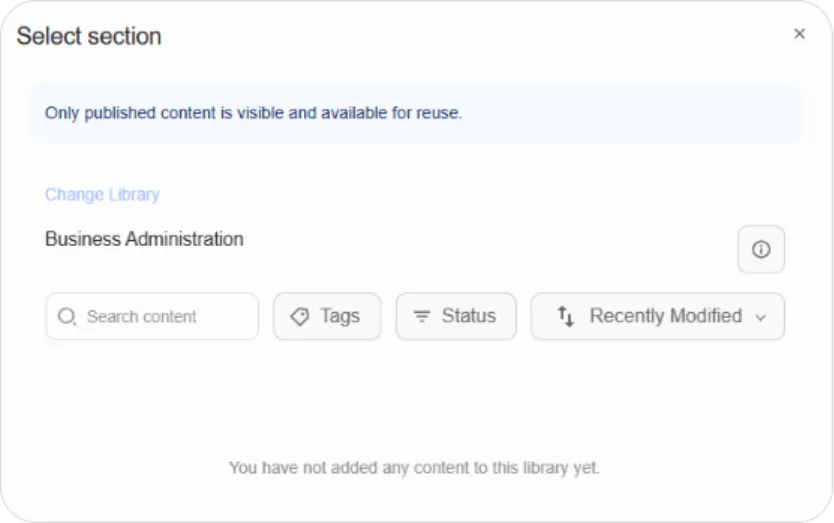
Change Library at the top switches to a different library without closing the window.
Adding library content to a unit
Section titled “Adding library content to a unit”For a single component or unit rather than a whole section:
-
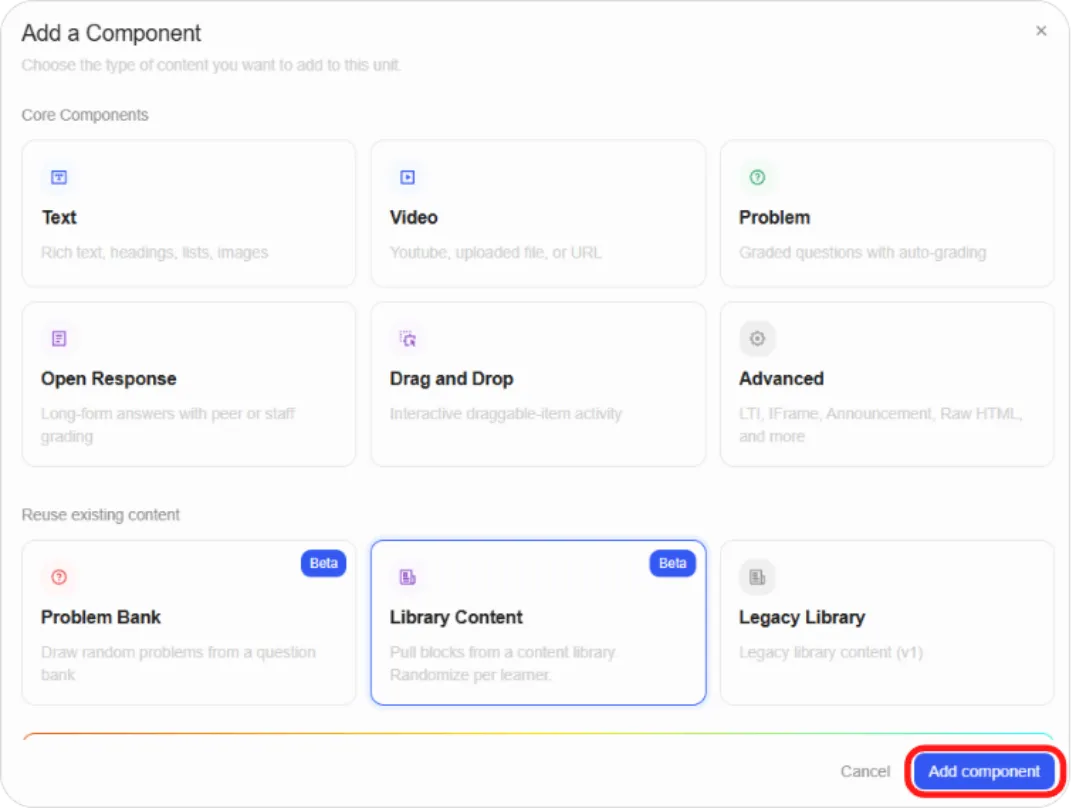
Open the Unit and click + Add component.
-
Under Reuse existing content, choose one of:
| Option | What it does |
|---|---|
| Library Content (Beta) | Pulls blocks from a library. Can randomise which block each learner sees |
| Problem Bank (Beta) | Draws random problems from a question bank, so learners get different questions |
| Legacy Library | Pulls content from the older library system |
- Click Add component, choose the library, and select what you want.
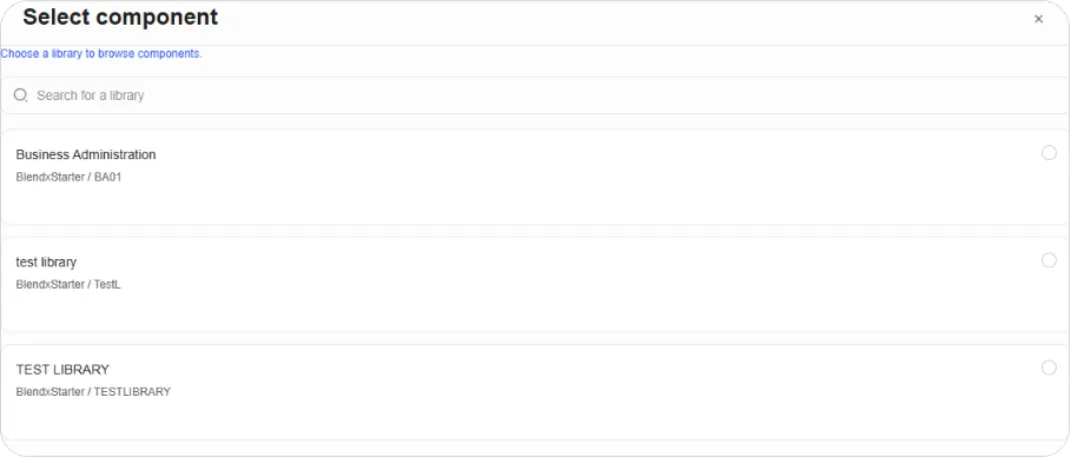
Problem Bank
Section titled “Problem Bank”A Problem Bank draws a random selection from a pool of questions, so each learner sees a different set. Two uses:
-
Practice — learners who retry an exercise get fresh questions rather than the ones they’ve memorised.
-
Assessment integrity — learners sitting the same quiz see different questions.
Build the pool as Problem components in a library, publish them, then point a Problem Bank at that library and set how many questions to draw.
Part 5: Legacy Libraries
Section titled “Part 5: Legacy Libraries”Legacy Libraries are the older system, holding individual components rather than full sections and units. They’re accessible under Authoring > Legacy Libraries.
The tab lists your legacy libraries with search and a migration status filter.
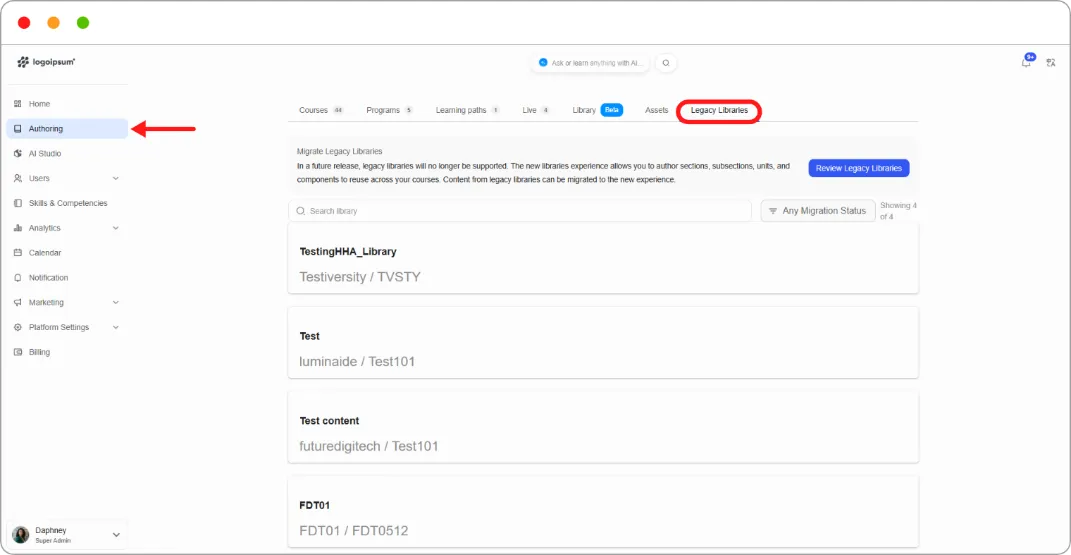
Migration
Legacy libraries will stop being supported in a future release. Content can be migrated to the new libraries experience, where it gains the ability to hold units, subsections, and sections rather than loose components.
Click Review Legacy Libraries in the banner to begin.
Tip: Migrate sooner rather than later. Everything new is being built on the current library system, and migrated content becomes considerably more reusable once it’s moved.
Note: While a legacy library is still in use, pull its content into courses through the Legacy Library option in the Add a Component window.
Working effectively with libraries
Section titled “Working effectively with libraries”Structure the library the way you’ll reuse it. If you reuse whole modules, build sections. If you reuse individual questions, build components and group them in collections.
Publish deliberately. Treat publishing as the moment content is ready for other people to build on, not as an afterthought.
Use tags. Search across a large library gets slow without them, and Tags is one of the filters available on every tab.
Name for the library, not the course. Content in a library will appear in courses you haven’t built yet. A component called “Week 3 Quiz Q4” is meaningless in a different course; “Regression Analysis: Interpreting R-Squared” travels well.
What’s next
Section titled “What’s next”-
Build the content types your library holds: Adding Content Components
-
Set up grading for reused assessments: Setting Up Grading
-
Structure the course you’re pulling content into: Understanding Course Structure (Studio Basics)