
How to Create a Course (Manual)
This article walks you through creating a course from scratch and building out its structure — sections, subsections, and units — with your own names.
Step 1: Create the course
Section titled “Step 1: Create the course”-
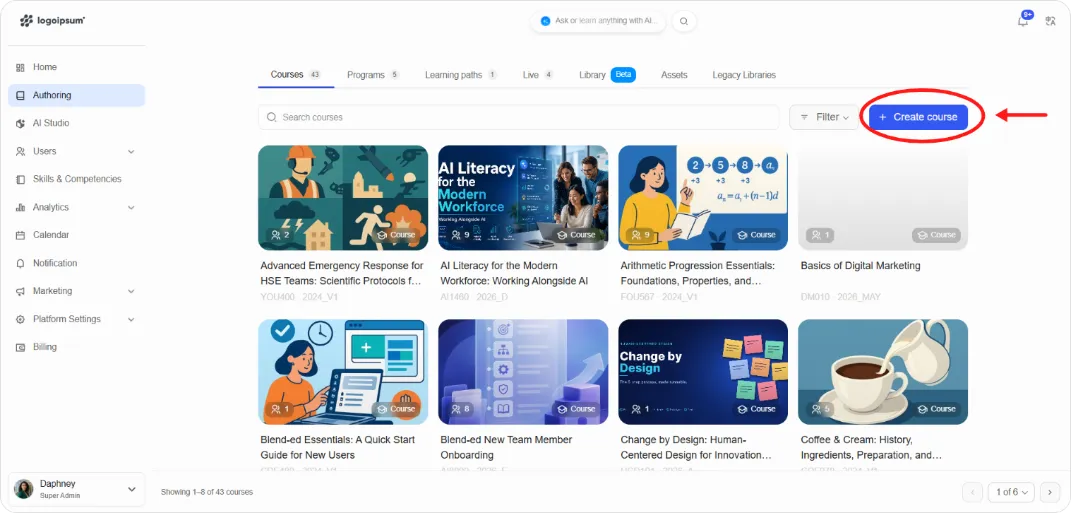
From the left navigation, click Authoring.
-
On the Courses tab, click + Create course (top right).
-
In the Course details window, fill in:
-
Course name — e.g. The Essential Leader: A Program for Culture and Growth
-
Course ID — a short unique code, e.g. TEL101
-
Course run — the run/term identifier, e.g. 2024_T2
-
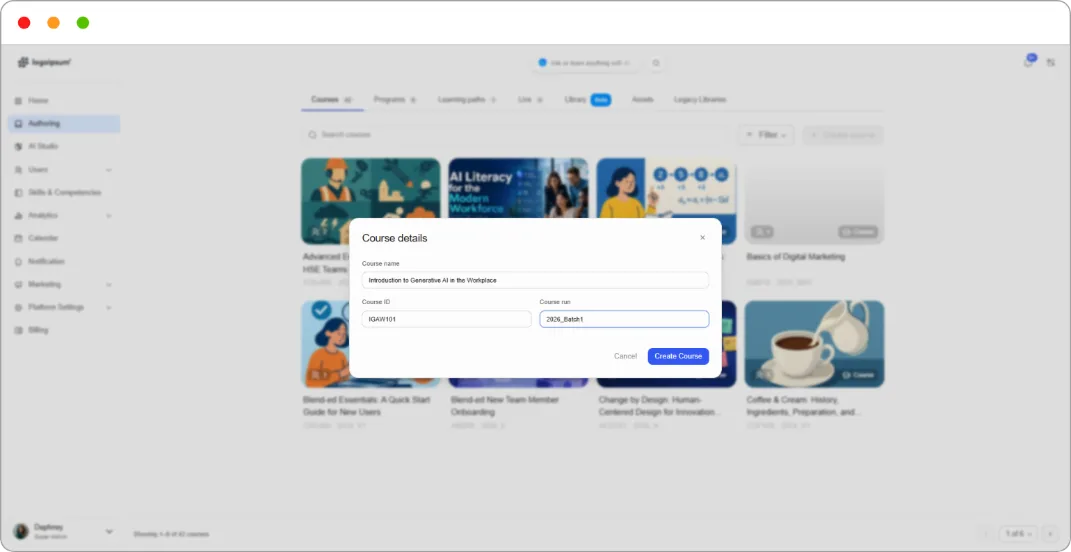
*[*Course details modal with all three fields filled in: Course name, Course ID (TEL101), Course run (2024_T2)]
- Click Create Course.
Note: Course name and Course ID identify the course itself. Course run identifies this particular offering of it, so the same course can be delivered again to a new group. Course ID is difficult to change later, so choose it carefully. See Re-running a course for a new term below.
Your course opens to the Course Outline page, empty and ready for structure.
Step 2: Add and name a Section
Section titled “Step 2: Add and name a Section”Sections are the top-level building blocks of your course (think of them as modules or chapters).
-
Click + Add Section.
-
A new section appears, named “Section” by default.
-
Click the pencil (edit) icon next to the name to rename it — e.g. Module 1: Introduction.
-
Press Enter or click away to save.
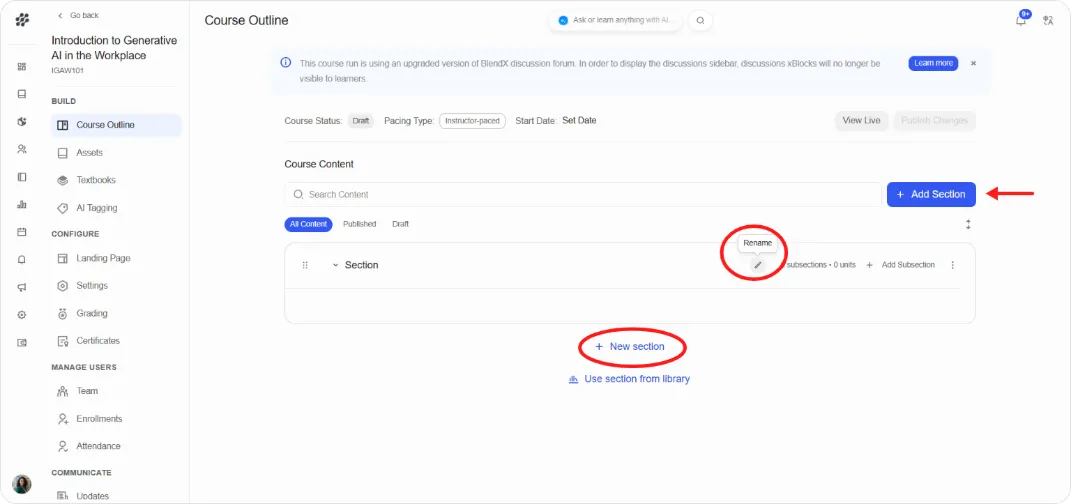
[Empty Course Outline with + Add Section visible, and a section being renamed with the pencil icon active. Ideally captured mid-rename so the edit state is obvious]
Tip: Repeat this step to add as many sections as your course needs — click + New section at the bottom of the outline.
Step 3: Add and name a Subsection
Section titled “Step 3: Add and name a Subsection”Subsections sit inside a section and group related units together (think of them as lessons within a module).
-
On the section you just created, click + Add Subsection.
-
A new subsection appears, named “Subsection” by default.
-
Click the pencil icon next to its name to rename it — e.g. Lesson 1.1: Getting Started.
Step 4: Add and name a Unit
Section titled “Step 4: Add and name a Unit”Units are where actual content lives — text, video, assessments, and other components.
-
On the subsection you just created, click + Add Unit.
-
This opens the unit editor directly. The unit is named “Unit” by default.
-
Click the pencil icon next to “Unit” at the top to rename it — e.g. Welcome to the Course.
-
Click Go back (top left) to return to the Course Outline and continue building.
Note: The rename pattern (pencil icon next to the name) is the same at every level — Section, Subsection, and Unit.
Result
Section titled “Result”You now have a named structure: Section → Subsection → Unit, ready for content. Repeat Steps 2–4 to build out your full course outline.
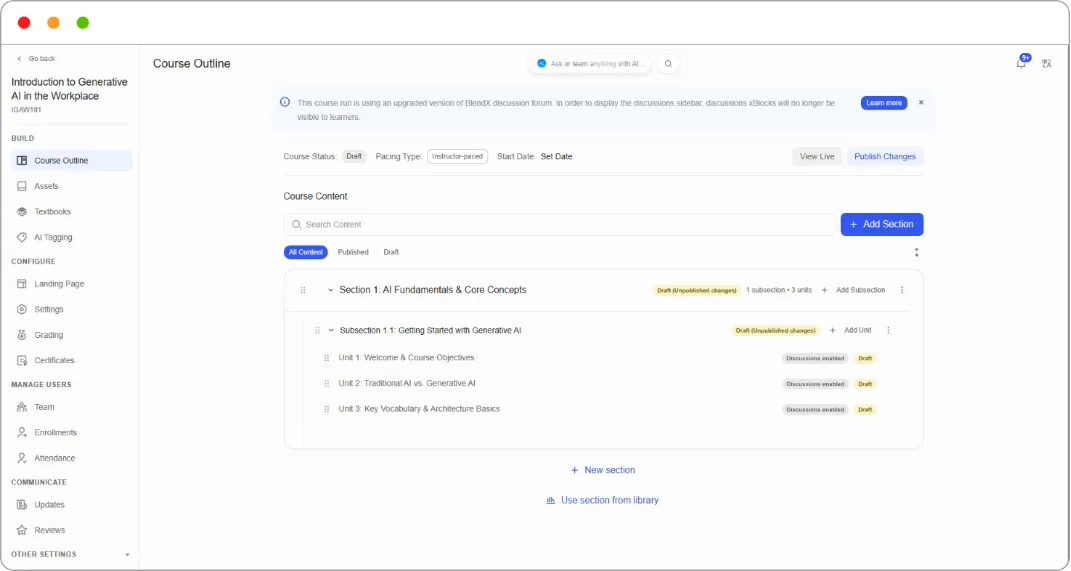
[Completed structure: one named Section containing a named Subsection containing a named Unit, all expanded]
Re-running a course for a new term
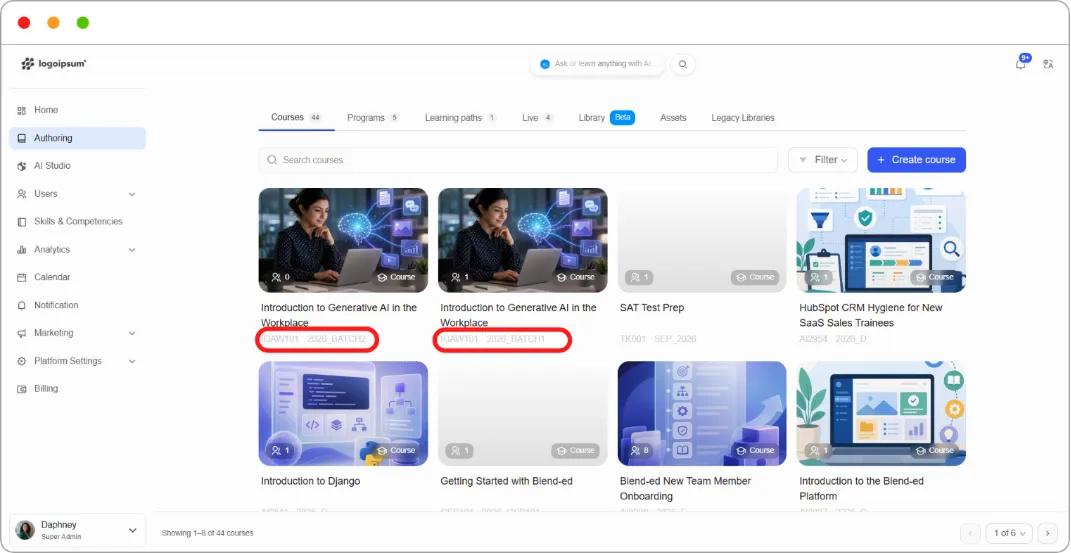
Section titled “Re-running a course for a new term”If you teach the same course each term, semester, or intake, you don’t rebuild it. You create a new run.
A run is a separate delivery of the same course, with its own learners, dates, grades, and certificates. The content starts as a copy of what you already built.
Why it matters
Each run keeps its own records. Last term’s learners stay attached to last term’s run with their grades and certificates intact, while this term’s group works through a clean copy. You can adjust dates, deadlines, and even content for the new run without touching the completed one.
How to name runs
Keep a consistent pattern so runs sort sensibly and your team can tell them apart:
| Pattern | Example | Suits |
|---|---|---|
| Year and term | 2026_T1, 2026_T2 | Termly delivery |
| Year and month | 2026_Jan, 2026_Apr | Monthly intakes |
| Year and cohort | 2026_Cohort3 | Rolling cohorts |
The Course ID stays the same across every run. Only the run changes.
Tip: Decide your run naming convention before you create your second run. Changing it later leaves you with a course list where 2024_T2 sits next to Spring25 and nobody can tell which came first.
Note: Learners enrolled in one run don’t see the others. If someone needs to retake the course with a new intake, enrol them in the new run rather than resetting their progress in the old one.
What’s next
Section titled “What’s next”-
Add content inside your units: Adding Content Components
-
Add richer content types: Enhancing Your Course with Advanced Content
-
Set up a certificate: Adding a Certificate to Your Course