
Managing Your Course Team & Learner Communication
Once a course is built, the work shifts to running it: deciding who can edit it, tracking who turns up, telling learners what’s happening, and handling the feedback that comes back.
Four pages in the course navigation cover this, under MANAGE USERS and COMMUNICATE.
The Team page controls who can work on the course. Open it under MANAGE USERS.
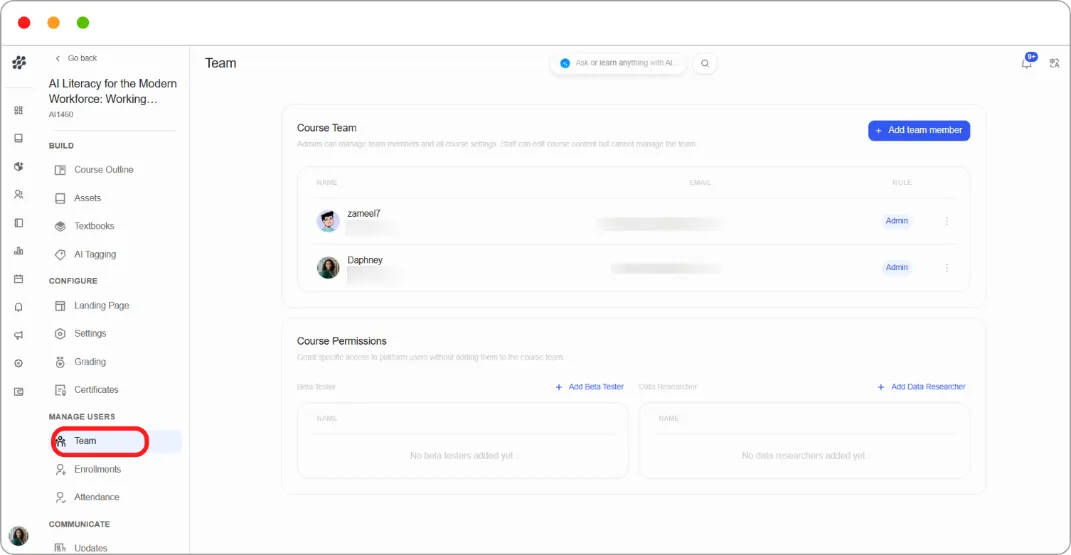
Course Team
Everyone with access to build or manage the course, listed with their name, email, and role.
| Role | Can do |
|---|---|
| Admin | Manage team members and all course settings |
| Staff | Edit course content, but not manage the team |
Tip: Give people Staff unless they genuinely need to add and remove others. Admin is about controlling access, not about how much of the course someone can edit — Staff can already edit everything.
Adding a team member
-
Click + Add team member.
-
Choose the person and their role.
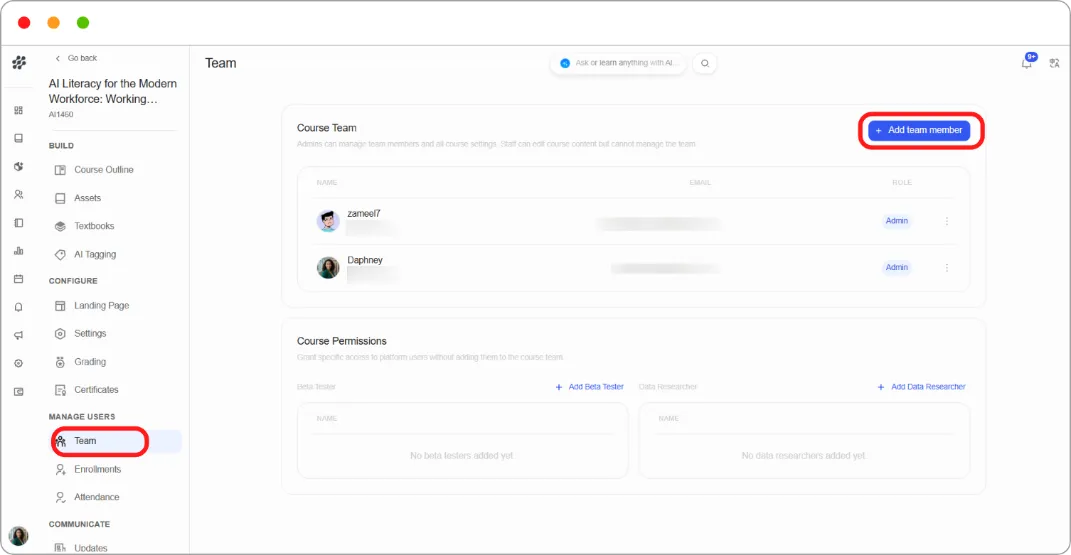
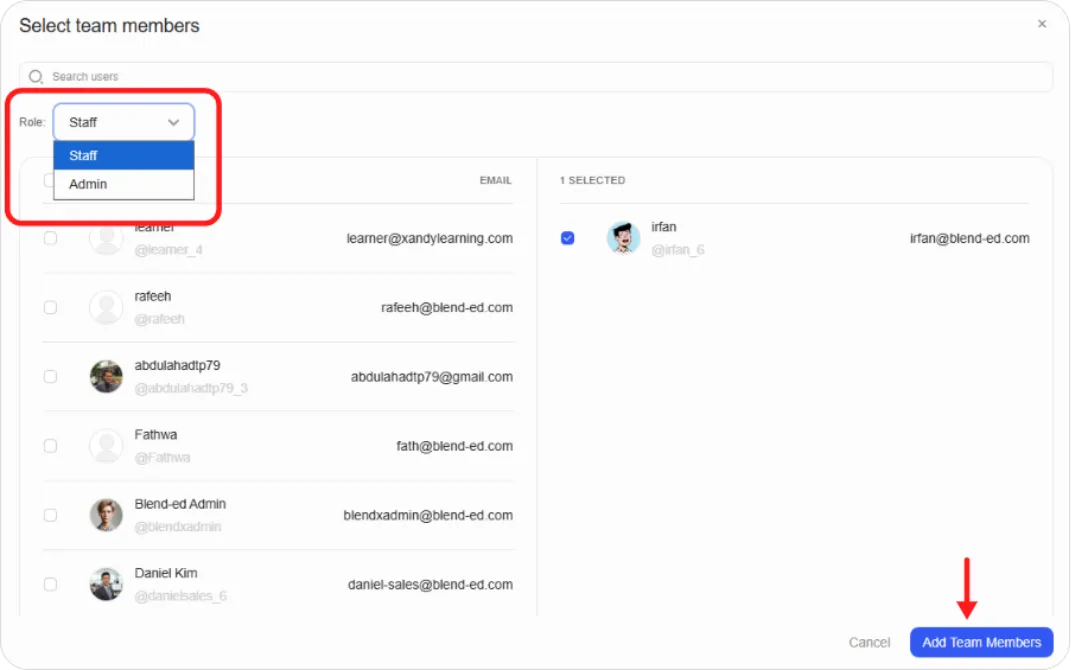
Each member’s row has a ⋮ menu for changing their role or removing them.
Note: Course team roles are separate from platform-wide roles. Someone can be a platform admin without being on this course’s team, and adding them here grants access to this course only.
Course Permissions
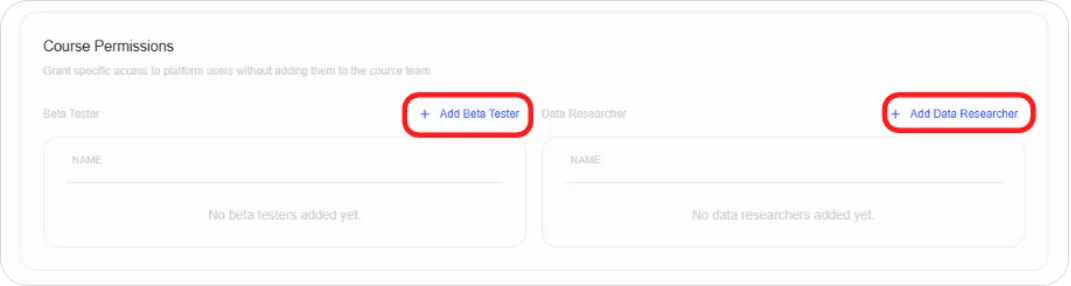
Below the team, this section grants specific access to platform users without adding them to the course team.
| Permission | What it’s for |
|---|---|
| Beta Tester | Early access to the course before it’s released, so people can test content and flag problems |
| Data Researcher | Access to the course’s data for analysis |
Click + Add Beta Tester or + Add Data Researcher, then search and select users. Selections gather on the right with a running count.
Tip: Beta testers are the cheapest quality check you have. Add two or three people before you publish, and they’ll find the broken video and the confusing question that you’ve stopped being able to see.
Attendance
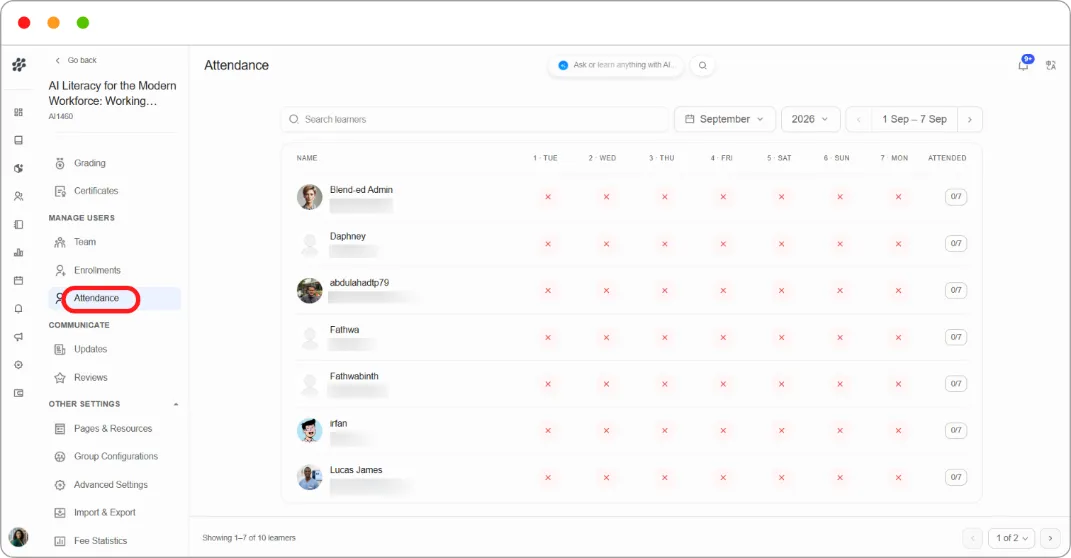
Section titled “Attendance”The Attendance page tracks learner attendance day by day, for courses with live or in-person components.
Reading the grid
Learners run down the left. Days run across the top, labelled with the date and weekday. Each cell shows that learner’s status for that day, and the ATTENDED column on the right gives a running total, such as 0/4.
Navigating
-
Month and Year dropdowns jump to a period. Months after the current one are greyed out.
-
The ‹ and › arrows step through weeks, with the current range shown between them.
-
Search learners finds someone in a large cohort.
Note: Days that haven’t happened yet show a dash rather than an attendance mark, so an empty future column doesn’t mean anyone is absent.
Updates
Section titled “Updates”The Updates page under COMMUNICATE is where you post announcements and handouts. Both appear to learners inside the course.
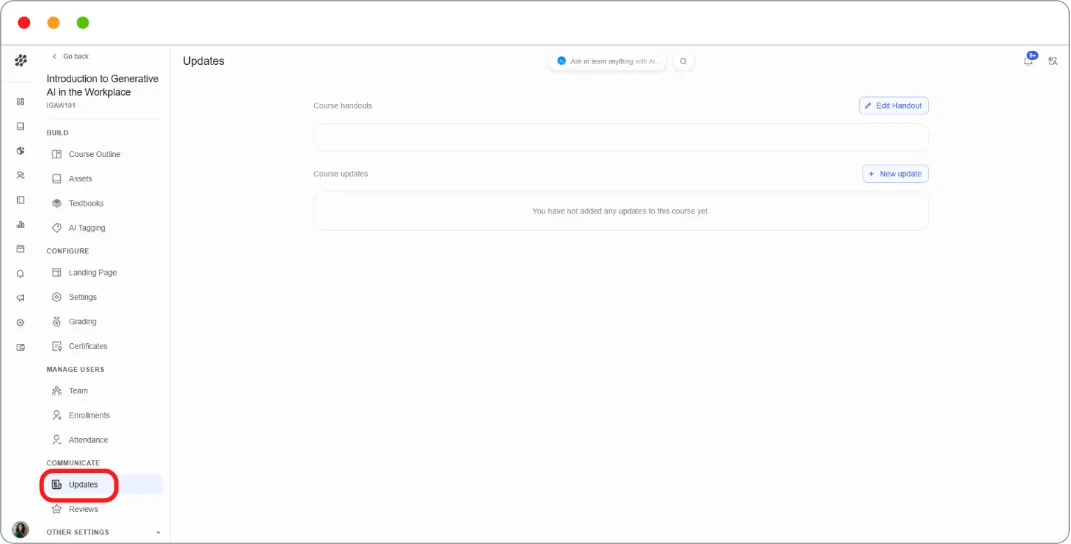
Course handouts
A persistent panel of material learners can reach at any time: syllabus links, reference sheets, joining instructions, contact details.
Click Edit Handout, add your content, and save.
Tip: Handouts sit still while updates scroll away. Anything a learner might need in week six belongs here, not in an announcement they’ll have to hunt for.
Course updates
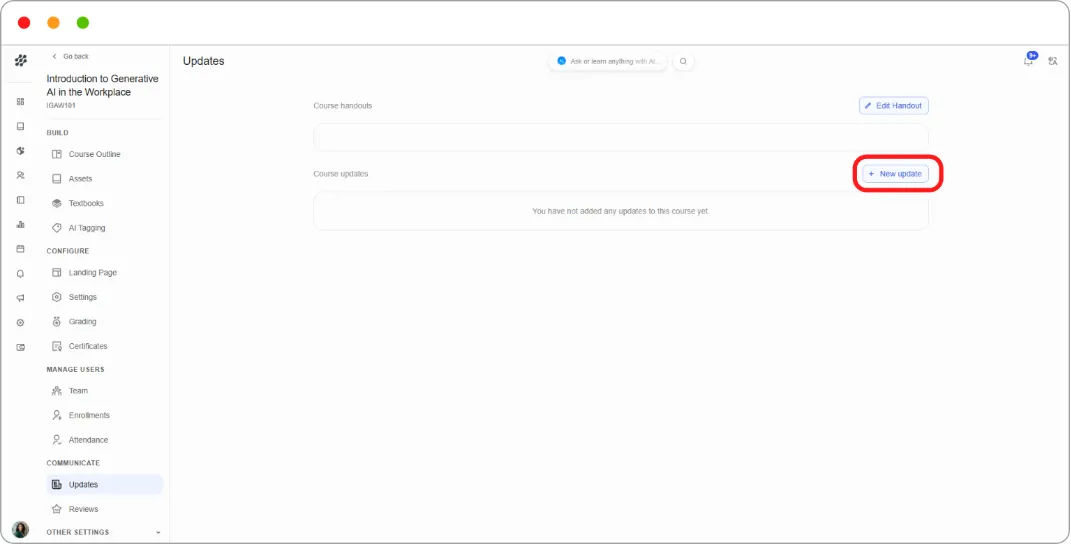
Dated announcements, newest first. Use them for schedule changes, reminders, and anything time-bound.
- Click + New update.
-
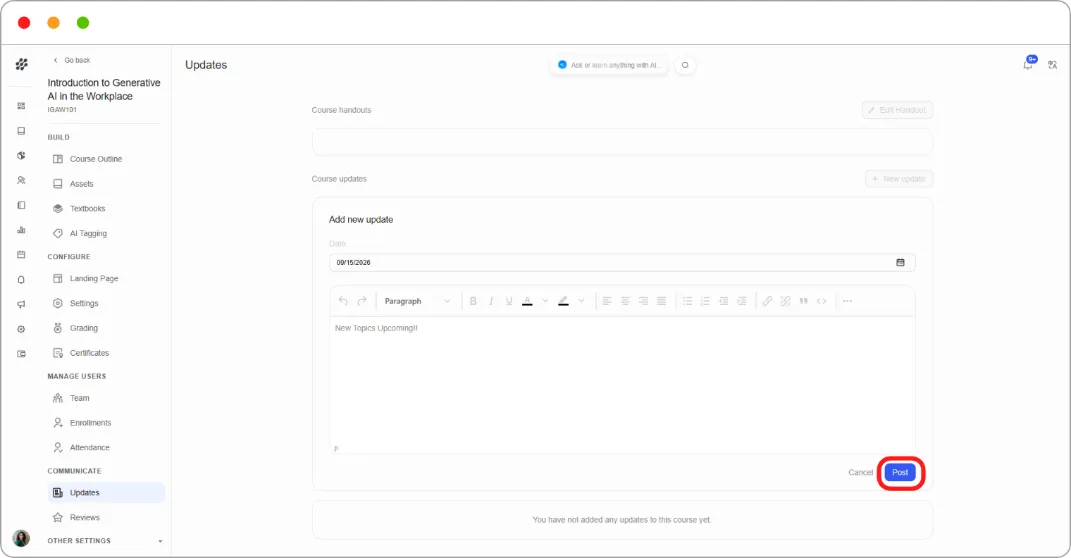
Set the Date, using the date picker. It defaults to today.
-
Write the update in the rich text editor. Formatting works as it does in a Text component.
-
Click Post.
Tip: The date is what learners use to judge whether an update still matters. Backdating one to match the event it describes reads more clearly than posting everything as today.
Reviews
Section titled “Reviews”The Reviews page shows learner ratings and written feedback for the course.
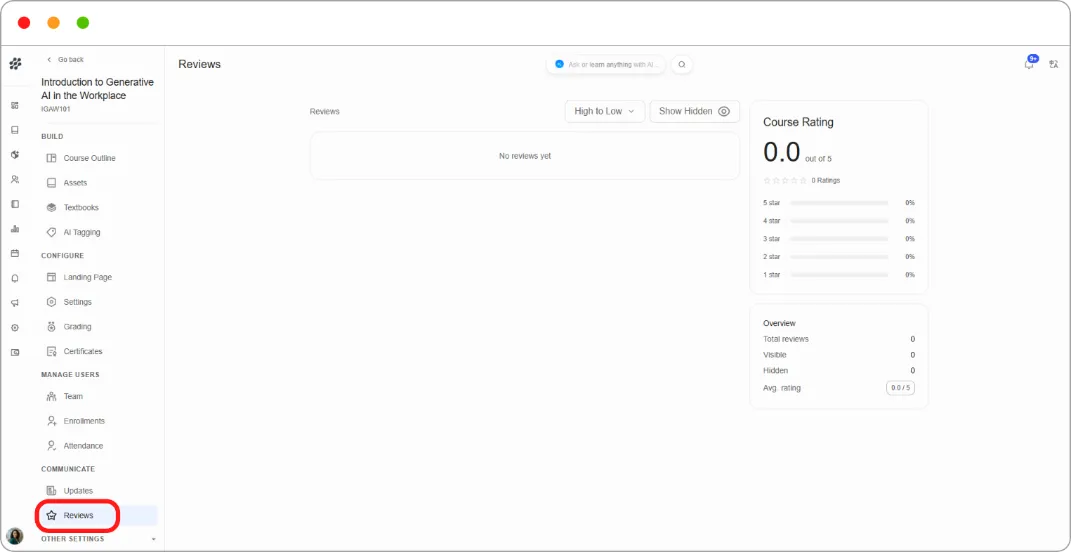
The review list
Each review shows the learner’s name, star rating, title, body, and date. Two controls sit above the list:
-
High to Low — change the sort order.
-
Show Hidden — reveal reviews you’ve hidden.
The ⋮ menu on each review lets you act on it, including hiding it.
Course Rating
The panel on the right summarises the picture:
-
The average rating out of 5, with stars and a total count
-
A distribution bar for each star level, showing what percentage of reviews sit there
-
An Overview block with total reviews, how many are visible, how many are hidden, and the average rating
Tip: Read the distribution, not just the average. A 4.0 built from mostly 4-star reviews means something quite different from a 4.0 built from 5s and 1s, and only the second one is telling you something is wrong for a particular group.
Note: Hiding a review removes it from the learner-facing course page but keeps it here, counted separately in the Overview. Use it for spam and abuse. Hiding critical but legitimate feedback hides the problem from you as much as from anyone else.
What’s next
Section titled “What’s next”-
Enrol learners into the course: Enrollment & Publishing
-
Schedule the live sessions you’re tracking attendance for: Creating & Managing Live Sessions
-
Announce events to a wider audience: [Calendar]