
Advanced Course Configuration
This article covers the remaining course-level configuration: settings, the public landing page, page and feature toggles, group configurations, advanced platform settings, and the Instructor Dashboard used while a course is running.
Course Settings
Section titled “Course Settings”Under CONFIGURE, click Settings.
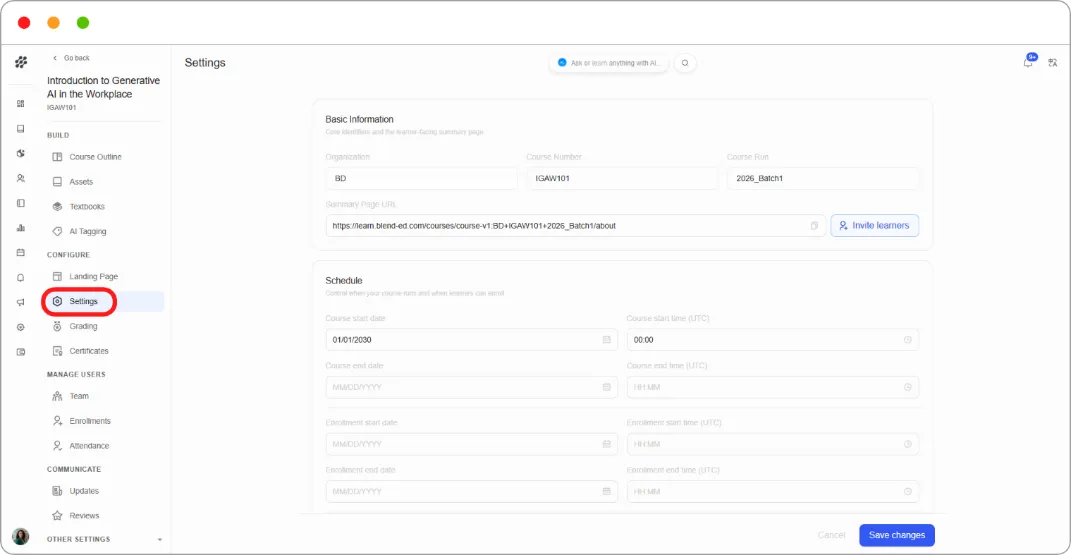
Schedule
Controls when the course runs and when learners can enrol.
| Field | What it sets |
|---|---|
| Course start date and time (UTC) | When the course opens |
| Course end date and time (UTC) | When it closes |
| Enrollment start date and time (UTC) | When enrolment opens |
| Enrollment end date and time (UTC) | When enrolment closes |
| Certificate display behavior | When certificates appear: immediately upon passing, at the course end date, or on a date after it |
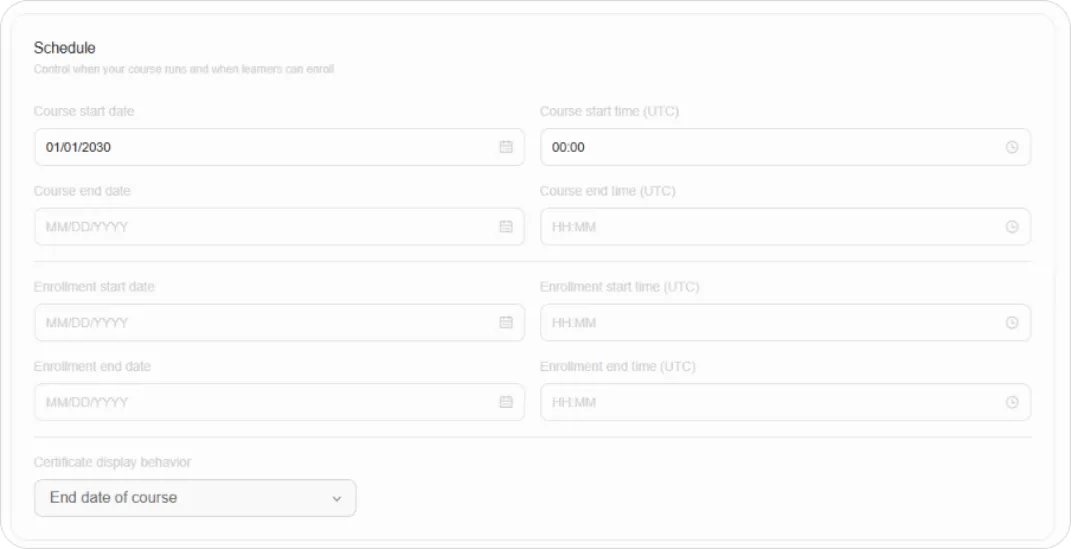
Note: All times are UTC. If your cohort is in one timezone, convert before entering, or a 9am deadline will land somewhere unexpected.
Course Pacing
-
Instructor-paced — content releases on a fixed schedule you set, and deadlines apply to all learners equally.
-
Self-paced — learners move at their own pace, with no fixed release dates or deadlines.
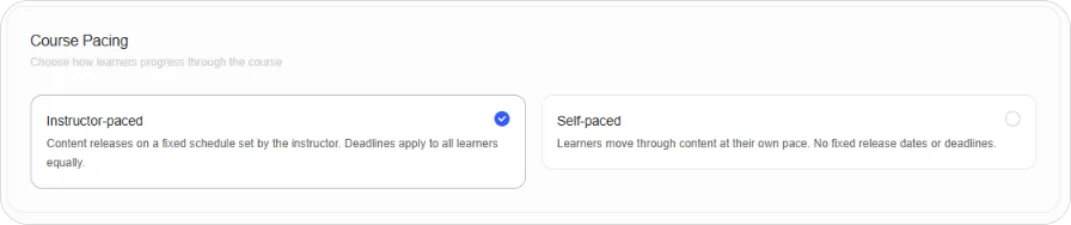
Note: On a self-paced course, subsection release dates and due dates have no effect. Set pacing before you build out a schedule.
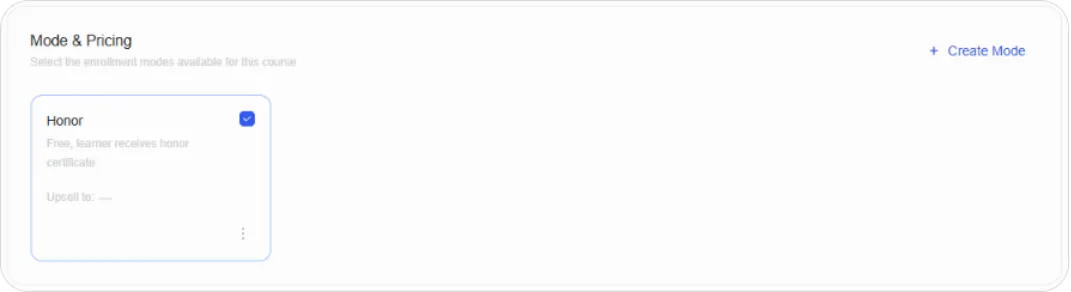
Mode & Pricing
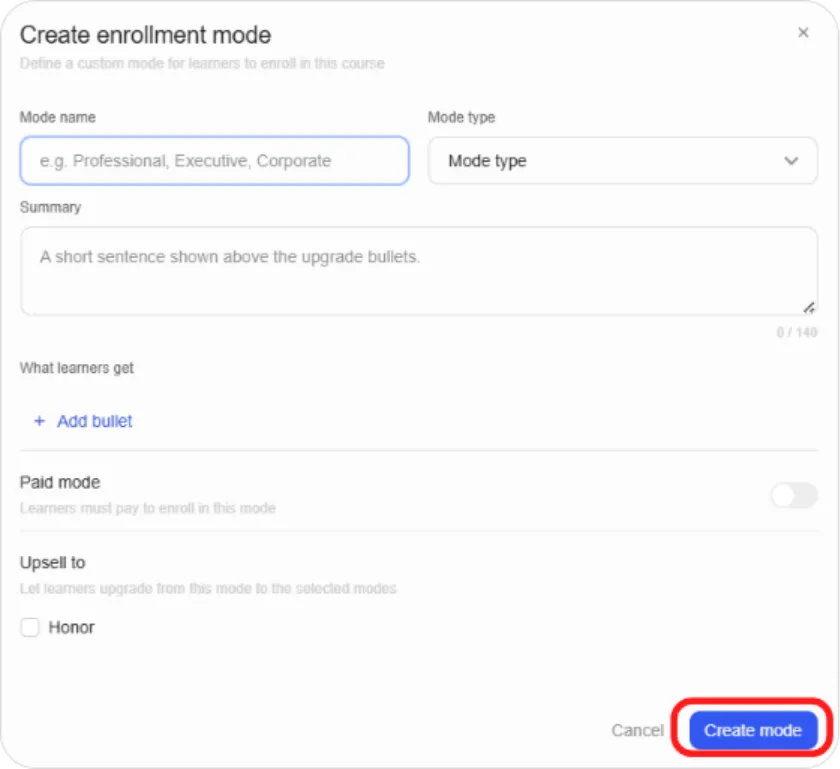
The enrolment modes available for this course. The default is Honor: free, with the learner receiving an honor certificate. Click + Create Mode to add others, and use the ⋮ menu on a mode card to edit it.
Subscription
Charge a recurring fee for course access. This requires a paid enrolment track, so add one under Mode & Pricing first.

Visibility & Access
| Setting | Effect |
|---|---|
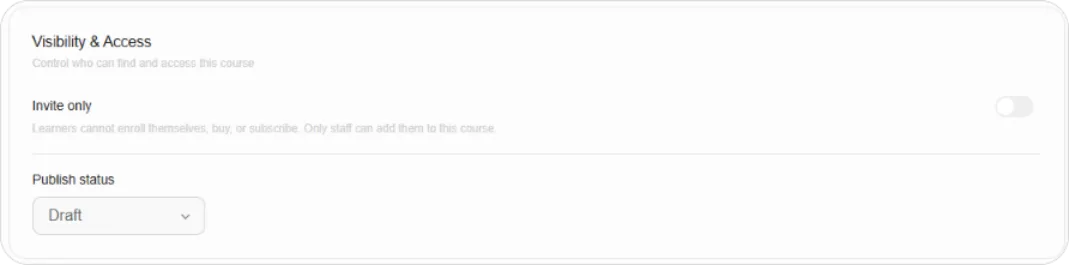
| Invite only | Learners cannot enrol themselves, buy, or subscribe. Only staff can add them |
| Publish status | Whether the course is published and discoverable |
Competencies
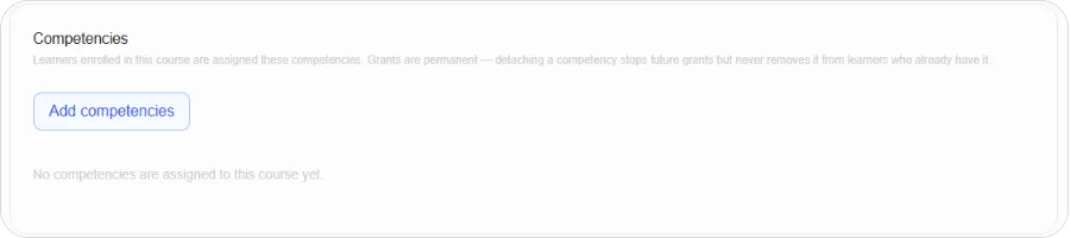
Assign competencies to the course. Learners enrolled in the course are granted them.
Warning: Competency grants are permanent. Detaching a competency stops future grants but never removes it from learners who already have it.
Course Language
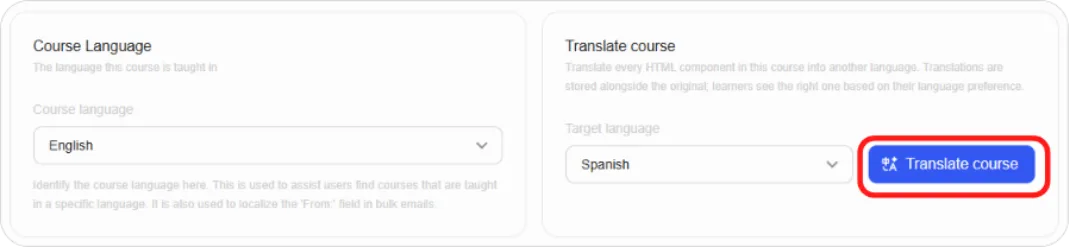
The language the course is taught in. This helps learners find courses in their language, and localises the “From:” field on bulk emails.
Translate course
Translates every HTML component in the course into another language. Translations are stored alongside the original, and learners see the right one based on their language preference.
-
Choose a Target language.
-
Click Translate course.
Tip: Translate after the content is settled. Running it on a course you’re still editing means re-translating anything you change.
Knowledge Base
Click Add course to Knowledge Base to make this course’s content available to the AI Tutor, so it can answer learner questions from your own material rather than generic knowledge.

Landing Page
Section titled “Landing Page”Under CONFIGURE, click Landing Page. This is what learners see in the catalogue and on the course detail page before they enrol.
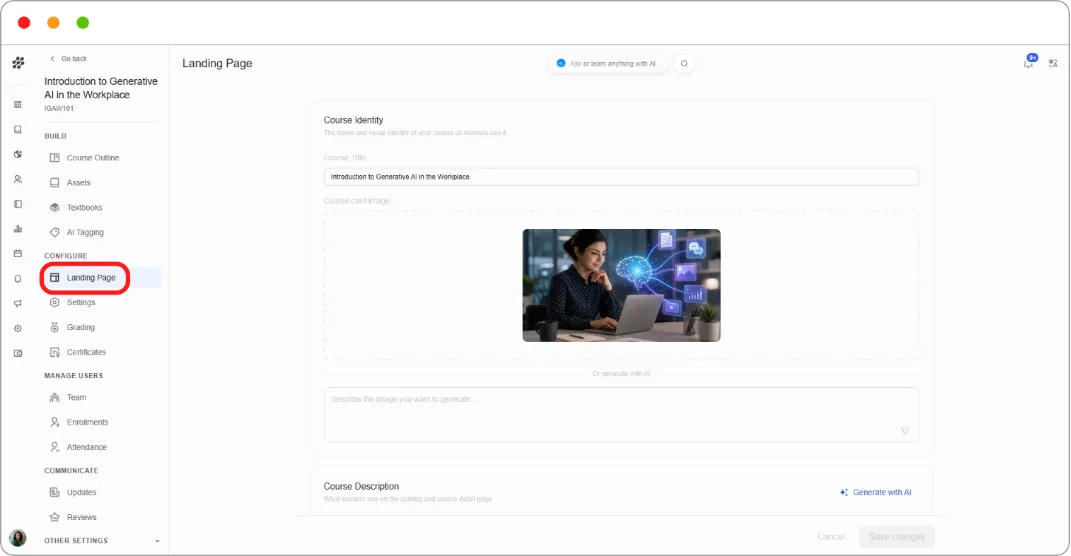
Course Identity
-
Course Title — the name learners see.
-
Course card image — upload an image, or describe one and generate it with AI.
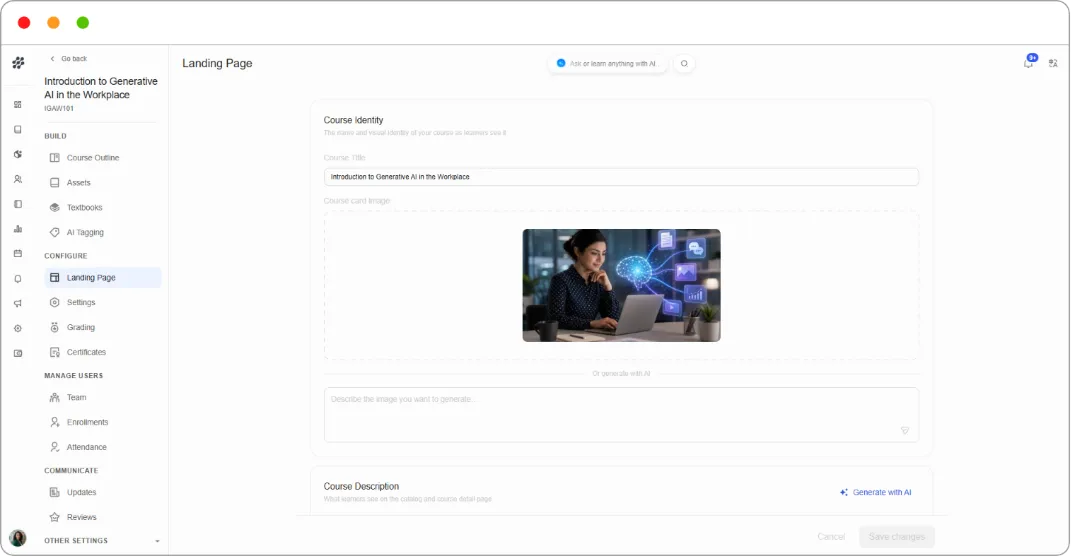
Course Description
-
Short description — 150 characters or fewer, shown in the catalogue.
-
Course overview — the full detail page, edited as rich text. It arrives pre-filled with a template covering About This Course, Requirements, Course Staff with photos and biographies, and Frequently Asked Questions.
Generate with AI drafts the description for you.
Tip: Replace every part of the template. Half-filled placeholder text on a public page reads worse than a short description written properly.
Course Media
Introduction video — paste a YouTube video ID to show an intro video at the top of the detail page. Preview video checks it before saving.
Requirements
Prerequisites and effort expectations shown on the course detail page.
| Field | What it does |
|---|---|
| hours / week | Expected effort |
| Prerequisite course | A course learners must complete before enrolling in this one. Defaults to None |
| Require entrance exam | Learners must pass an assessment before enrolling. Configure the exam in the Course Outline |
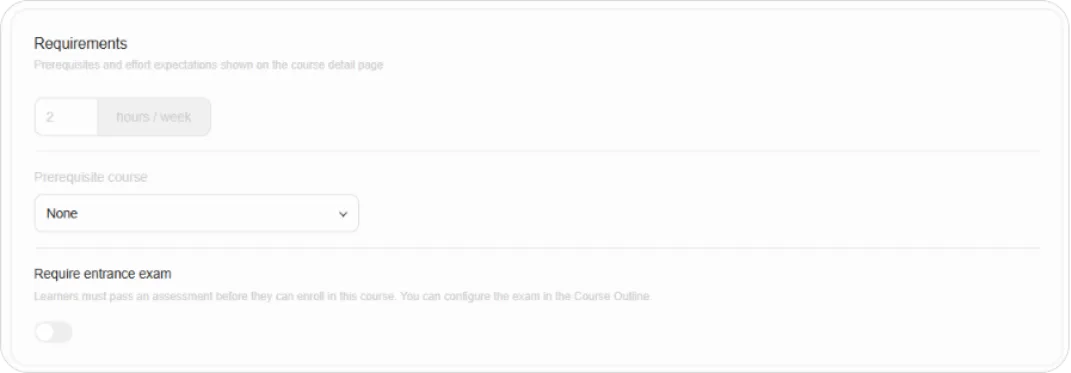
Note: Prerequisite course is how you control progression through a bundle of courses. Set it here on the dependent course rather than inside the program. See Creating & Managing Programs.
AI Tagging
Section titled “AI Tagging”Under BUILD, click AI Tagging.
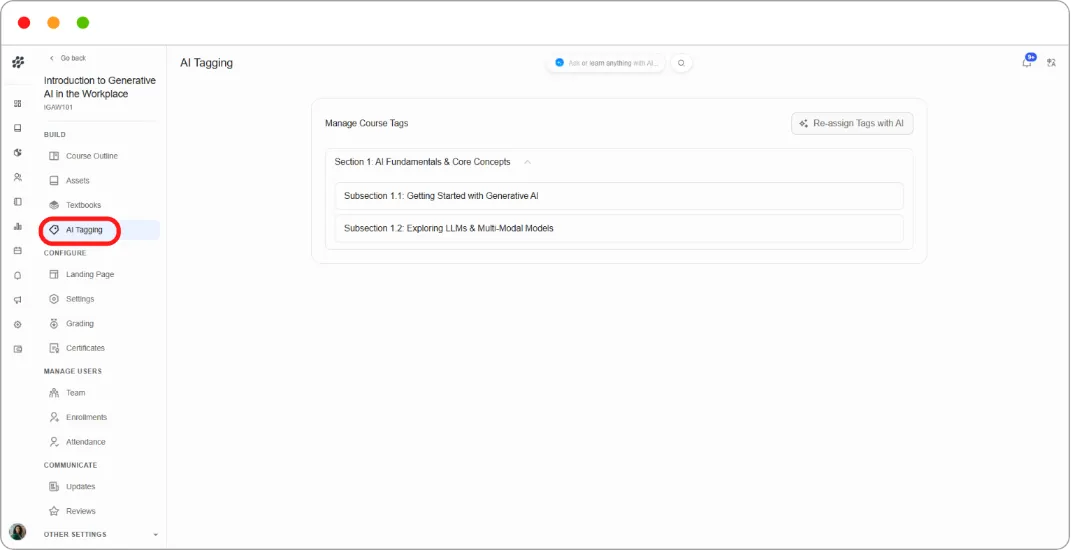
Tags describe what each part of your course is about. Blend-ed generates them automatically with AI, so you don’t have to tag content by hand.
Tags make your content findable. As a course library grows, tags are what let you and your team locate the subsection that covers a particular topic, rather than opening courses one by one to look.
Reviewing your course tags
The Manage Course Tags panel lists your course structure as a collapsible tree. Click a section to expand it and see its subsections.
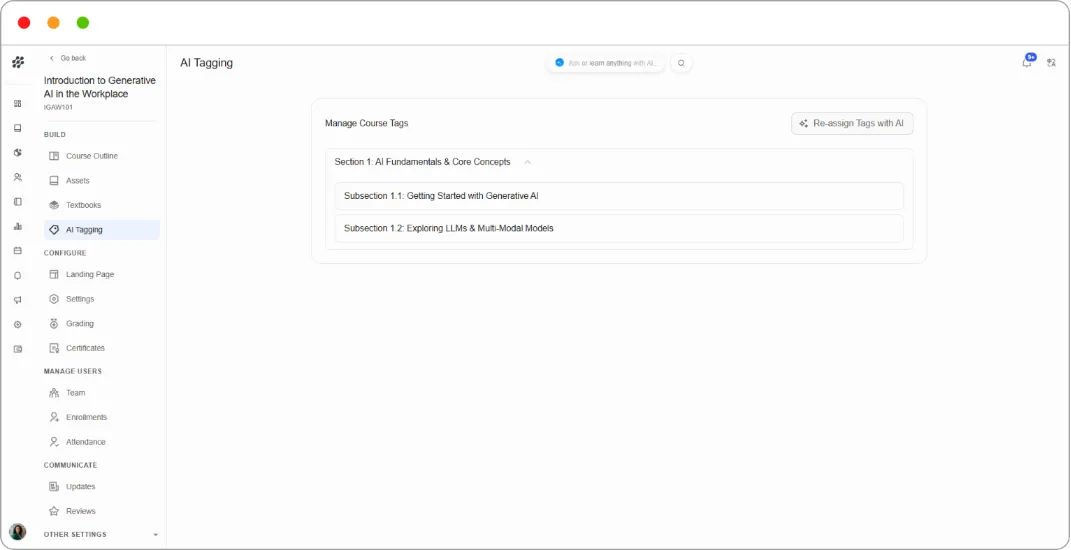
Click any subsection to review the tags assigned to it.
Re-assigning tags
Click Re-assign Tags with AI to have Blend-ed analyse the course again.
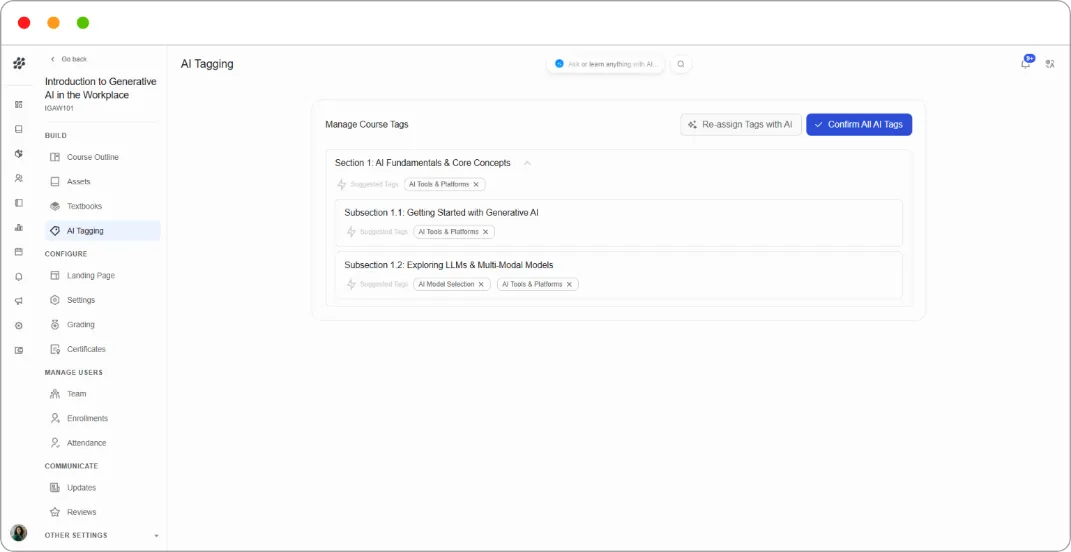
The page refreshes with a new set of suggestions in place of the previous ones, and Confirm All AI Tags appears at the top right. Nothing is applied until you confirm, so you can review and prune first as you would with the original suggestions.
Re-run this after substantial content changes. Tags generated from an early draft won’t describe content you added or rewrote afterwards.
Note: Re-assigning replaces the current suggestions rather than adding to them. Any tag you removed before re-running may come back, so do your pruning after the final re-assign rather than before it.
Pages & Resources
Section titled “Pages & Resources”Under OTHER SETTINGS, click Pages & Resources. This is where you switch course features on and off.
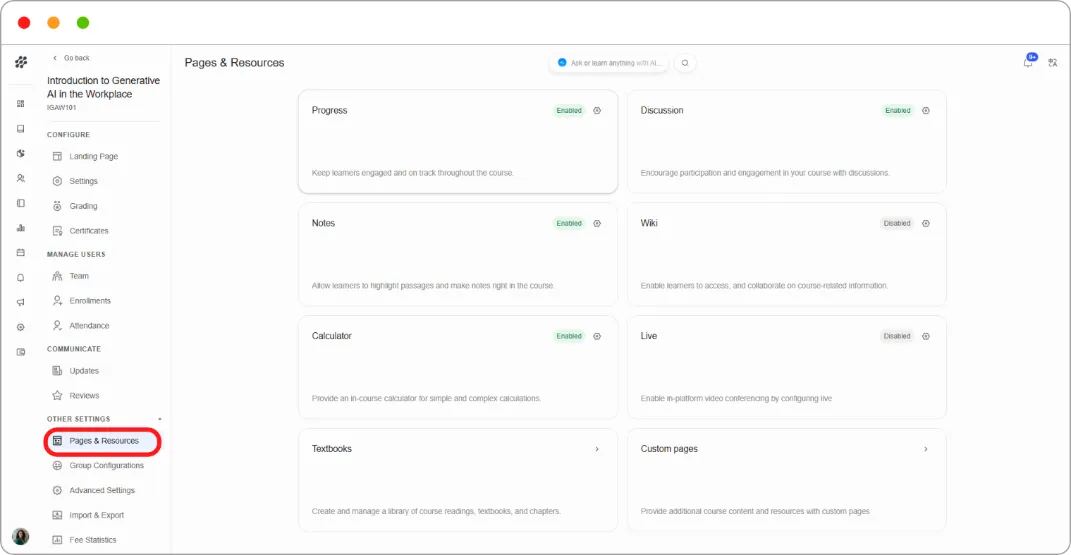
| Feature | What it gives learners |
|---|---|
| Progress | A progress page keeping them on track through the course |
| Discussion | Course discussions |
| Notes | The ability to highlight passages and make notes in the course |
| Wiki | A collaborative space for course-related information |
| Calculator | An in-course calculator for simple and complex calculations |
| Live | In-platform video conferencing |
| Textbooks | The course readings library |
| Custom pages | Additional course content and resources on their own pages |
Each card shows Enabled or Disabled. Click the gear icon to open its configuration, switch the toggle, and click Save.
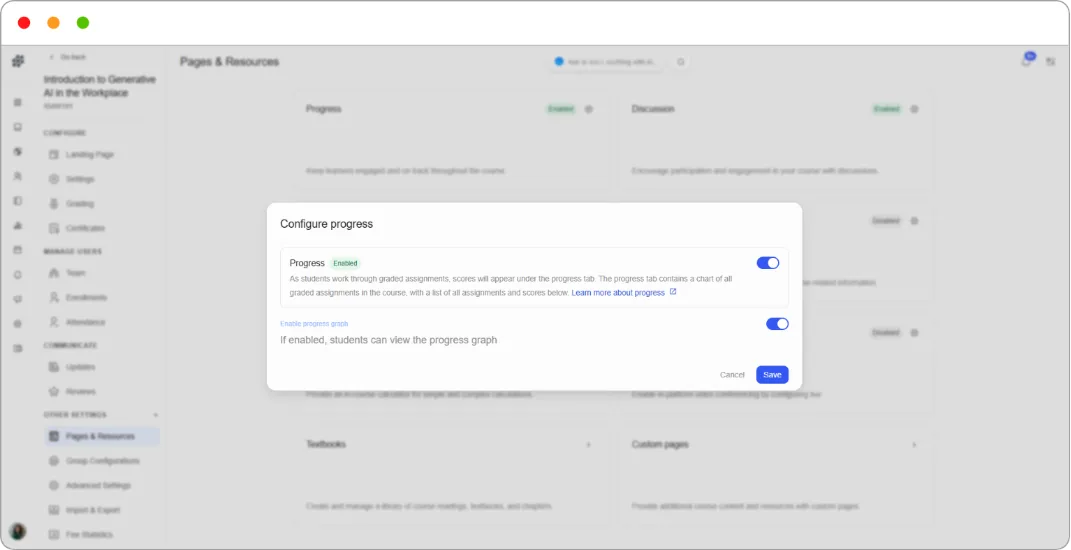
Tip: Turn off what you won’t use. Every enabled feature is another tab in the learner’s course, and an empty Wiki teaches learners that parts of your course are dead space.
Group Configurations
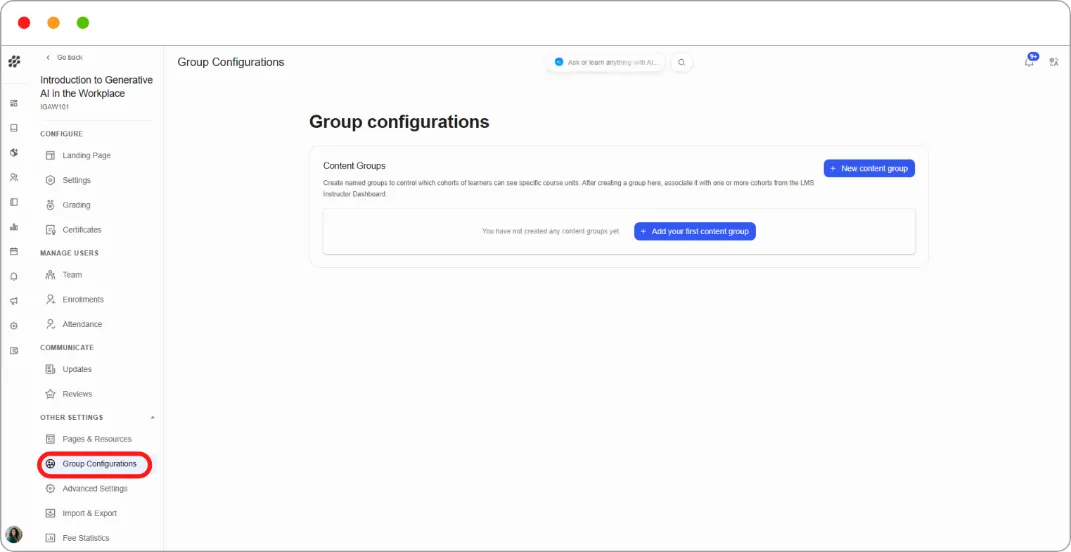
Section titled “Group Configurations”Under OTHER SETTINGS, click Group Configurations.
What content groups do
A content group is a virtual grouping of learners who see a particular set of course content. You create the group here, then in the Course Outline you use a component’s access settings to mark it as available only to one or more content groups.
Any component you don’t explicitly restrict stays available to every learner, whatever cohort they’re in.
Content groups do nothing on their own. A group has no effect on what learners see until you associate it with at least one cohort. The chain is:
-
Create the content group here.
-
Restrict a component to that group in the Course Outline.
-
Associate the group with one or more cohorts on the Instructor Dashboard.
Only when all three are in place do learners in those cohorts see the restricted content, and nobody else does.
Creating a content group
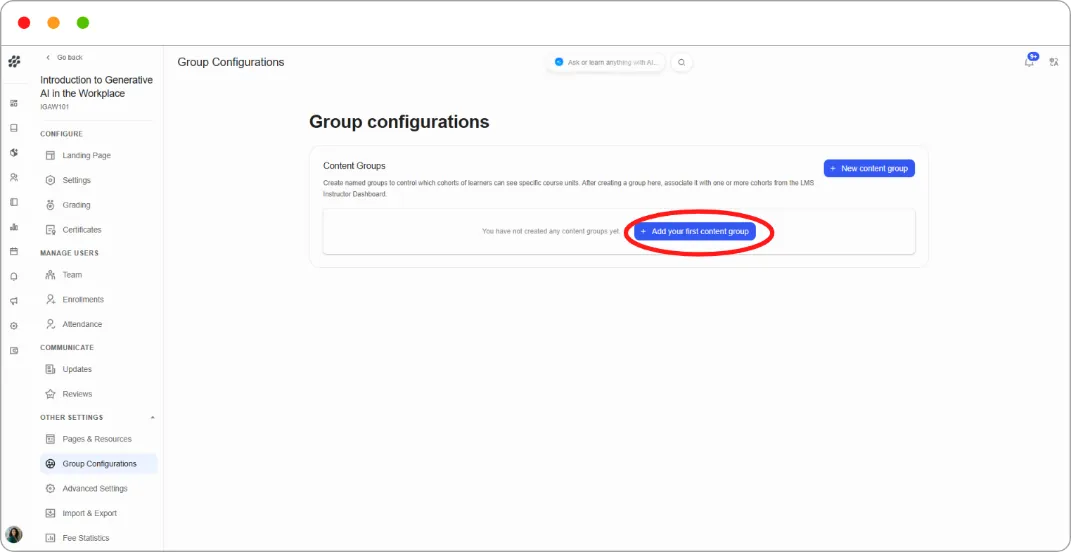
- Click + New content group (or + Add your first content group on an empty page).
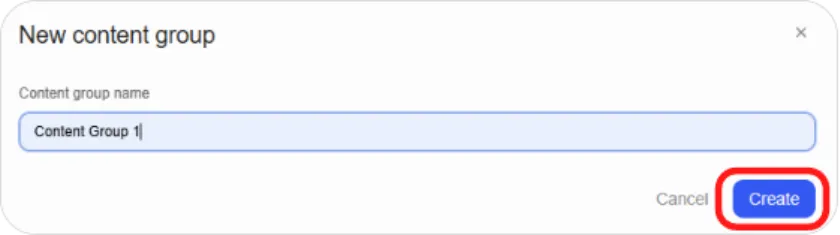
- Name the group and save.
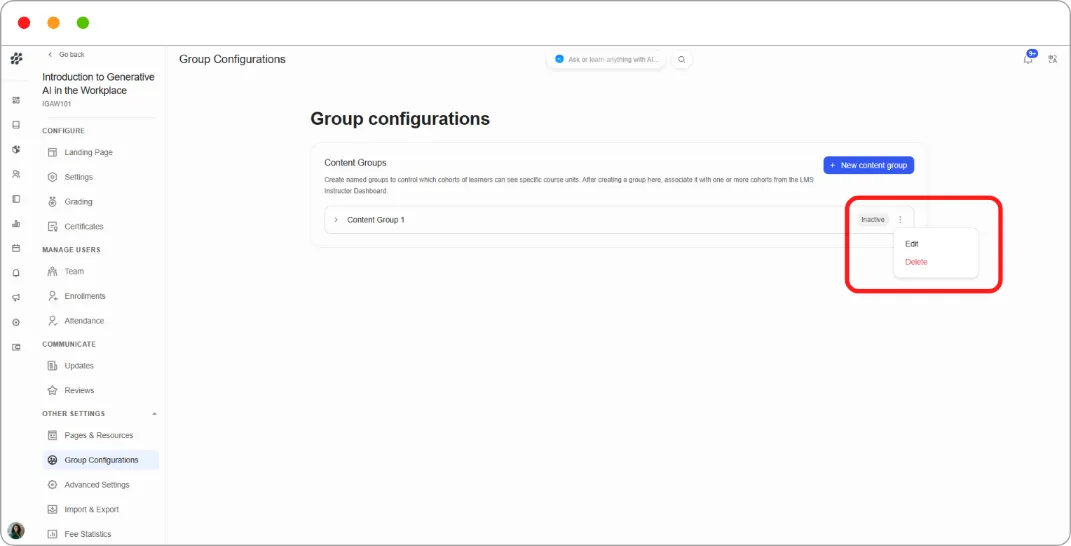
Each group shows an Active or Inactive badge and expands to show where it’s used. A group not yet applied to any component reads Not in use.
Tip: Name groups after the audience, not the content. “New starters” tells your team who the group is for; “Module 2 alternate” only makes sense to whoever set it up.
Content groups are also what make Content Experiment components work. See Enhancing Your Course with Advanced Content.
Advanced Settings
Section titled “Advanced Settings”Under OTHER SETTINGS, click Advanced Settings.
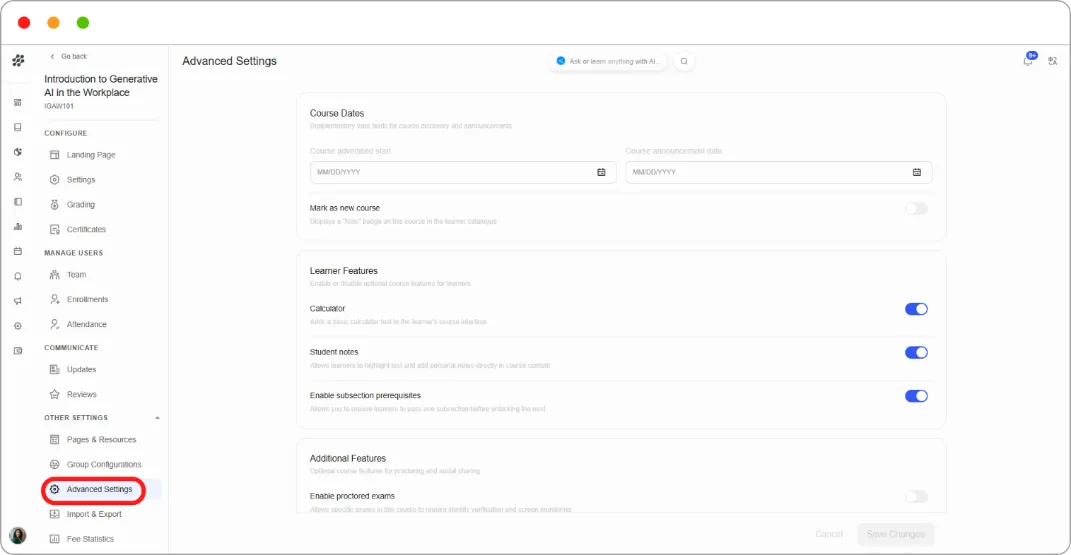
Course Dates
Supplementary date fields for course discovery and announcements: Course advertised start, Course announcement date, and a Mark as new course toggle that shows a New badge in the learner catalogue.
Learner Features
| Setting | What it does |
|---|---|
| Calculator | Adds a basic calculator to the learner’s course interface |
| Student notes | Lets learners highlight text and add personal notes in course content |
| Enable subsection prerequisites | Lets you require learners to pass one subsection before the next unlocks |
Additional Features
-
Enable proctored exams — lets specific exams require identity verification and screen monitoring.
-
Enable social media sharing — adds sharing buttons to the learner’s course and certificate pages.
Advanced Module List
Enables non-standard XBlock components for this course. Covered in full in Enhancing Your Course with Advanced Content.
Course Customization
| Setting | What it does |
|---|---|
| Course-wide custom CSS | Stylesheet URLs loaded globally across the course pages |
| Course-wide custom JavaScript | Script URLs loaded globally across the course pages |
| LTI passports | Credentials for course LTI tools, in the format id:client_key:client_secret |
| Other course settings | Extra settings shared with the platform or external systems such as CRM software, as name/value pairs |
Use + Add link, + Add passport, and + Add field to add more entries, and the trash icon to remove them.
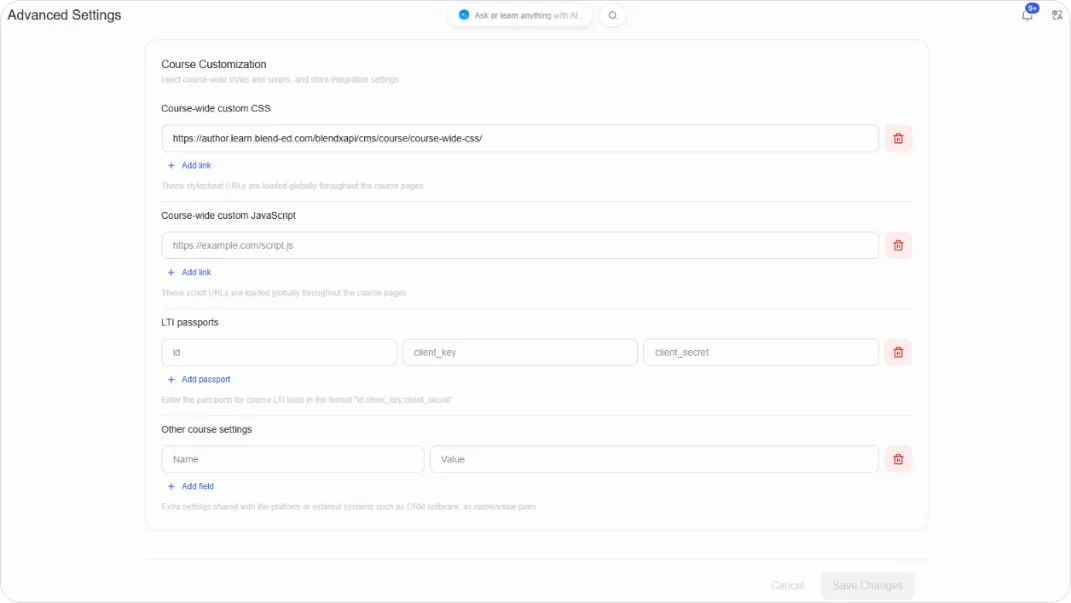
Warning: Custom CSS and JavaScript load on every course page. A broken script here breaks the course for every learner, so test on a course nobody is enrolled in first.
Import & Export
Section titled “Import & Export”Under OTHER SETTINGS, click Import & Export.
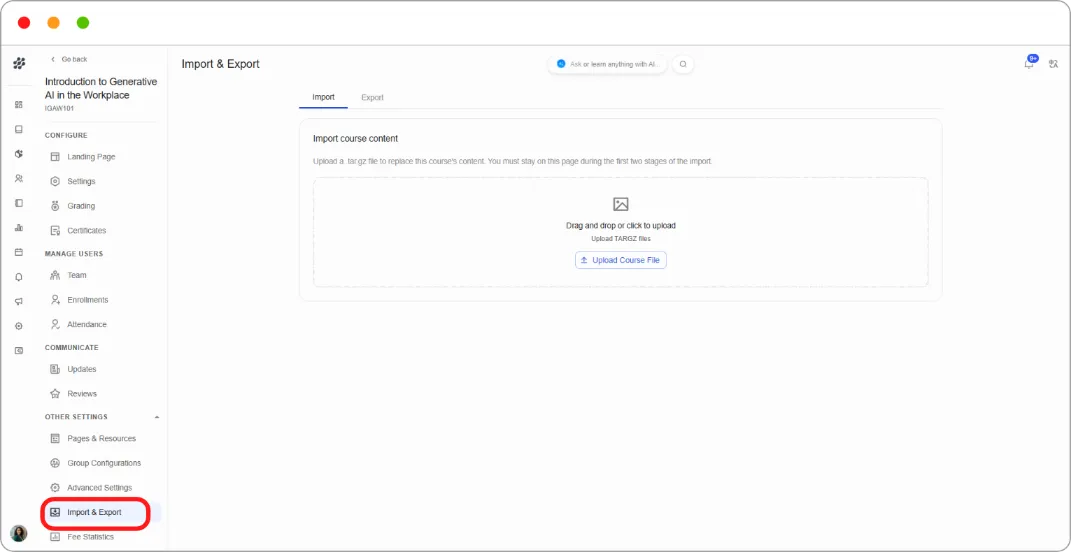
Export downloads a complete backup of your course as a single file. Import replaces a course’s content with a file you upload. Together they let you move a course between platforms, duplicate one, or keep a backup before making large changes.
The page has two tabs: Import and Export.
Exporting a course
Section titled “Exporting a course”Step 1: Open the Export tab.
Step 2: Click Export course content.
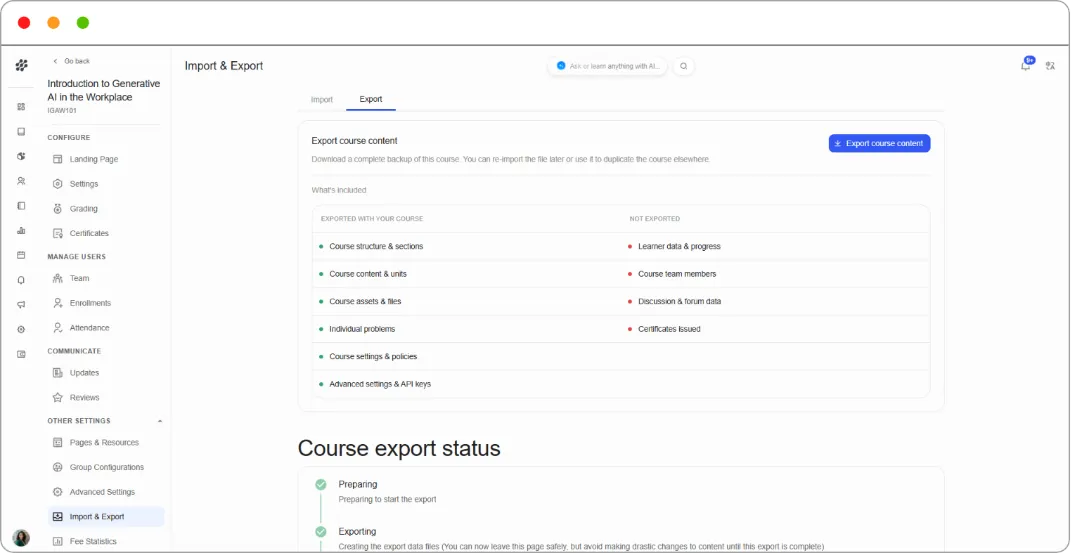
Step 3: The Course export status page shows four stages:
| Stage | What’s happening |
|---|---|
| Preparing | Getting ready to start |
| Exporting | Creating the export data files |
| Compressing | Packaging the data for download |
| Success | The file is ready, with a timestamp |
Step 4: Click Download exported course.
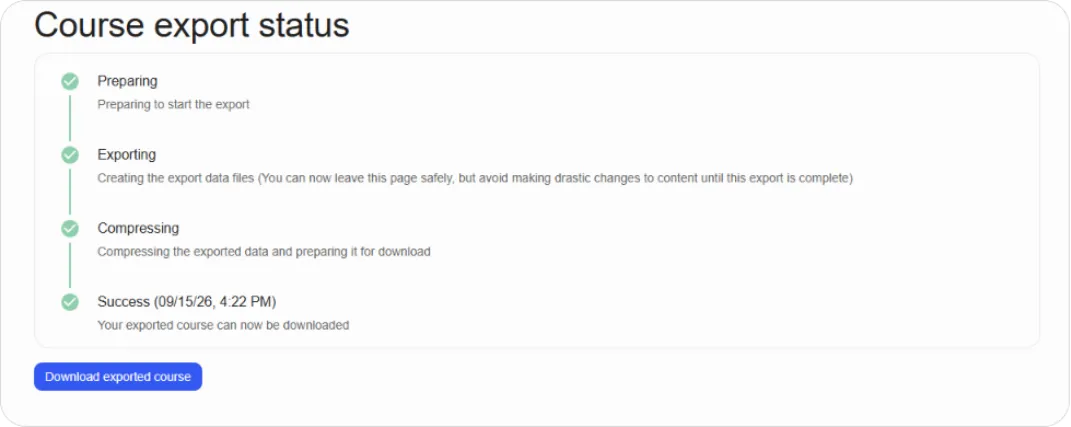
Note: You can leave the page once Exporting has started, but avoid making drastic changes to the course until the export finishes.
What’s included
| Exported with your course | Not exported |
|---|---|
| Course structure and sections | Learner data and progress |
| Course content and units | Course team members |
| Course assets and files | Discussion and forum data |
| Individual problems | Certificates issued |
| Course settings and policies | |
| Advanced settings and API keys |
Warning: The export contains your advanced settings and API keys. Treat the file as sensitive and don’t share it outside your organisation.
Tip: What isn’t exported is the useful half of that table. An export is a copy of the course, not of the delivery. Learner progress, enrolments, certificates, and discussions all stay behind, which is exactly what you want when duplicating a course but worth knowing before you rely on an export as a full backup.
Importing a course
Section titled “Importing a course”Step 1: Open the Import tab.
Step 2: Drag a .tar.gz file onto the upload area, or click Upload Course File to browse.
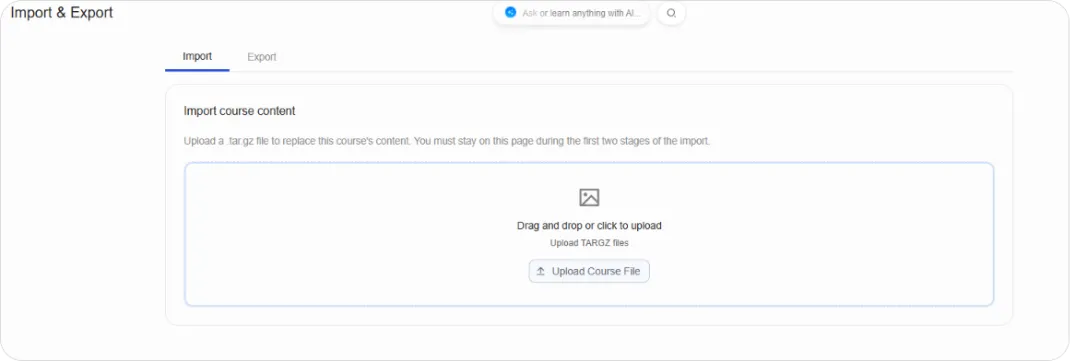
Step 3: Stay on the page during the first two stages of the import. You can leave once it moves past them.
Warning: Importing replaces this course’s content entirely. Anything currently in the course is overwritten, not merged. Export the existing course first if you might want it back.
Tip: Import into a new, empty course rather than an existing one wherever possible. That way a bad import costs you nothing.
Common uses
Section titled “Common uses”| To do this | Steps |
|---|---|
| Duplicate a course | Export it, create a new empty course, import the file into it |
| Move a course to another platform | Export it, then import the file into a course on the other platform |
| Back up before a big change | Export it and keep the file. Re-import if the change goes wrong |
| Share a course with another team | Export it and send them the file |
Note: To deliver the same course to a new group rather than duplicate it, create a new course run instead. See How to Create a Course (Manual).
Fee Statistics
Section titled “Fee Statistics”Under OTHER SETTINGS, click Fee Statistics.
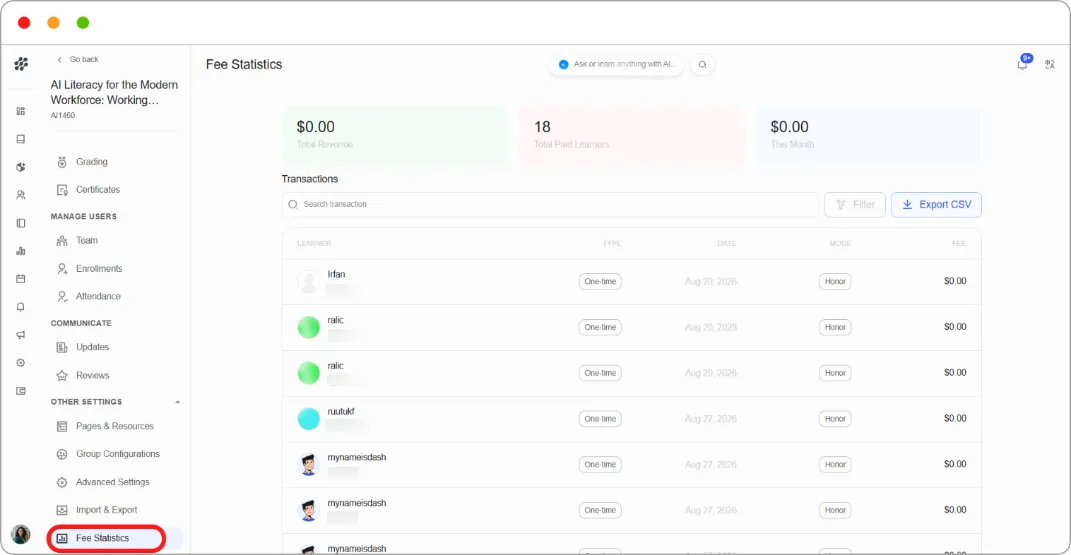
This page shows what a single course has earned and who has paid for it. Use it to check revenue for one course, confirm a learner’s payment, or export transactions for finance.
The summary cards
Three figures sit at the top:
| Card | Shows |
|---|---|
| Total Revenue | Everything this course has earned to date |
| Total Paid Learners | How many learners have a payment recorded |
| This Month | Revenue in the current month |
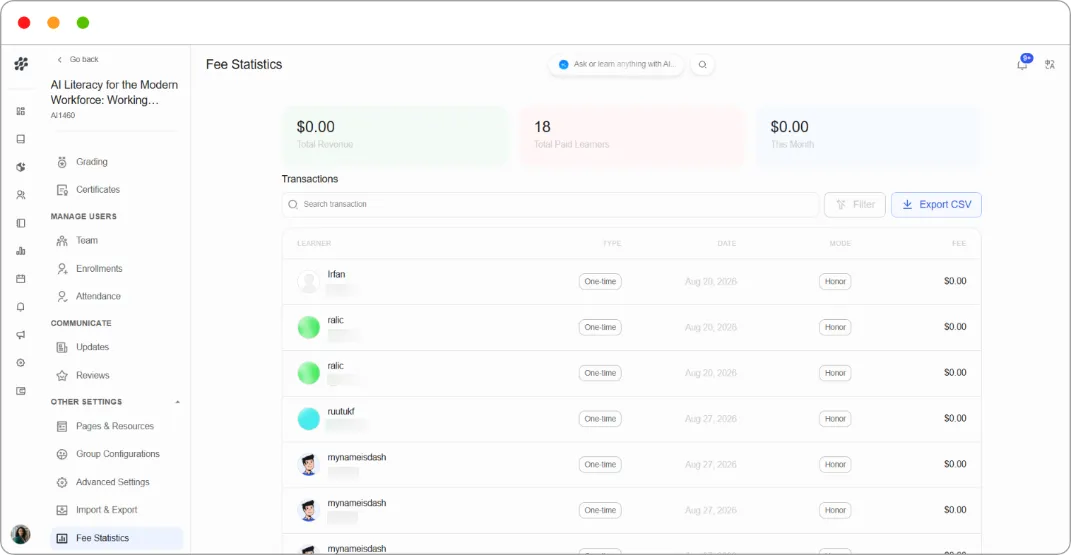
The transactions table
Below the cards, every payment for this course is listed:
| Column | Shows |
|---|---|
| LEARNER | The learner’s name and username |
| TYPE | How they paid, for example One-time |
| DATE | When the payment was recorded |
| MODE | The enrolment mode they bought, for example Honor |
| FEE | The amount |
Use Search transaction to find a particular learner, or Filter to narrow the list.
Exporting transactions
Click Export CSV to download the transactions as a spreadsheet, for reconciliation or reporting outside Blend-ed.
Note: Total Paid Learners counts learners with a payment recorded, including free enrolments. A course offered only on the Honor mode shows learners here with a fee of $0.00, so the count can be higher than the number of people who actually paid you anything.
Tip: This page covers one course. For revenue across every course, program, and subscription, use Analytics > Revenue*. For a single program’s earnings, use the program’s own Fees tab. See Creating & Managing Programs.*
The Instructor Dashboard
Section titled “The Instructor Dashboard”Everything above configures the course. The Instructor Dashboard is for running it, and lives in the learner-facing course view rather than in authoring.
Getting there
Open the course as a learner would and click the Instructor tab.
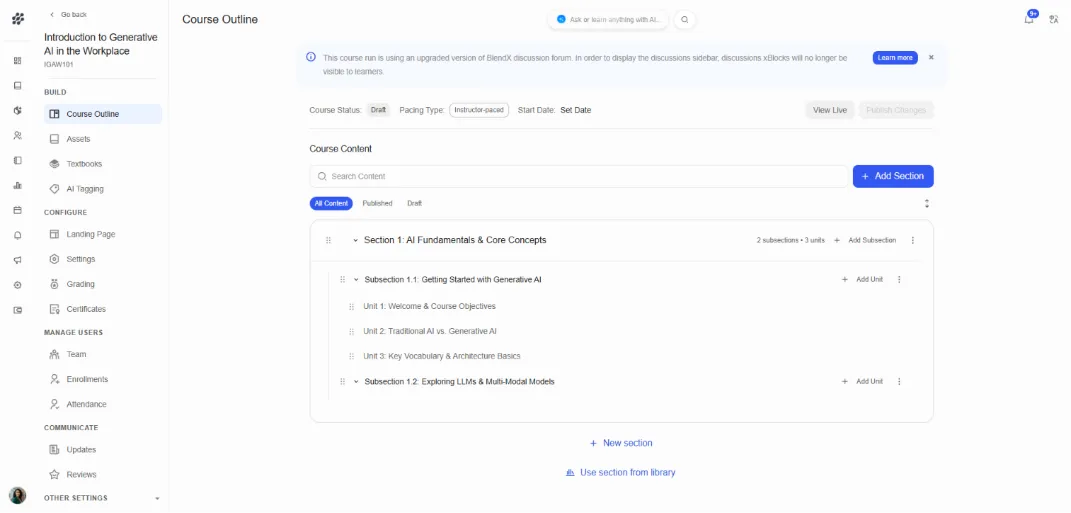
Two controls sit in the bar above:
-
View this course as — switch between Staff and learner views to check what learners actually see.
-
View course in: Studio — jump back to authoring.
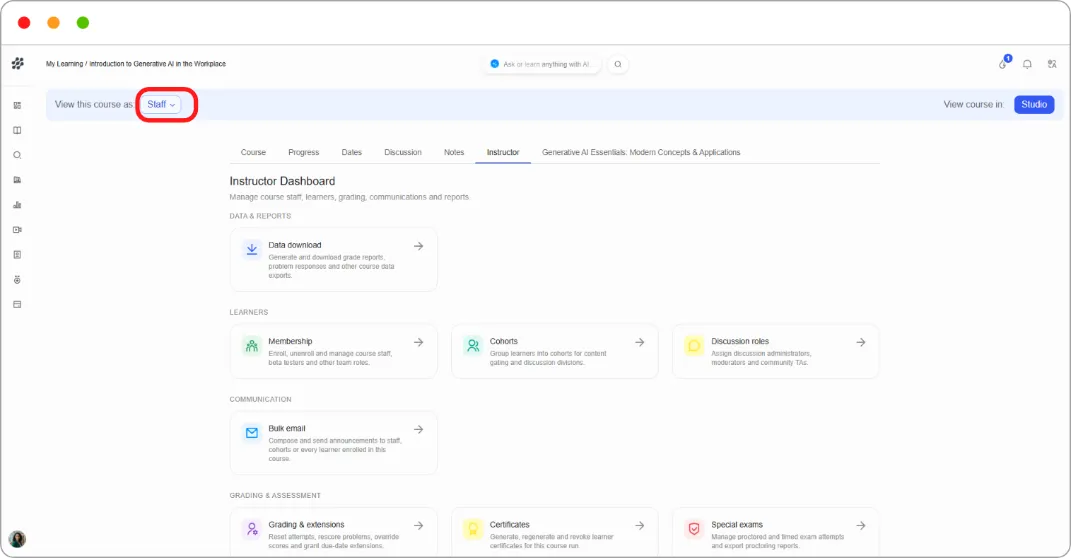
The dashboard groups its tools into four areas.
Data & Reports
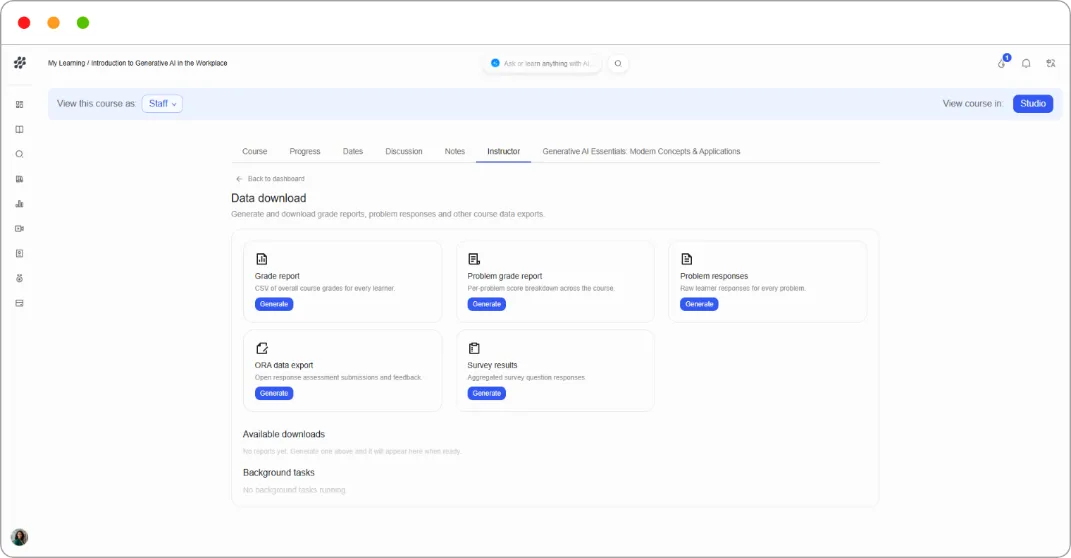
Section titled “Data & Reports”Data download generates and downloads course data exports:
| Report | Contents |
|---|---|
| Grade report | CSV of overall course grades for every learner |
| Problem grade report | Per-problem score breakdown across the course |
| Problem responses | Raw learner responses for every problem |
| ORA data export | Open response assessment submissions and feedback |
| Survey results | Aggregated survey question responses |
Click Generate on any report. Finished files appear under Available downloads, and jobs still running show under Background tasks.
Tip: Reports on a large course take time to build. Generate them before you need them rather than during a meeting.
Learners
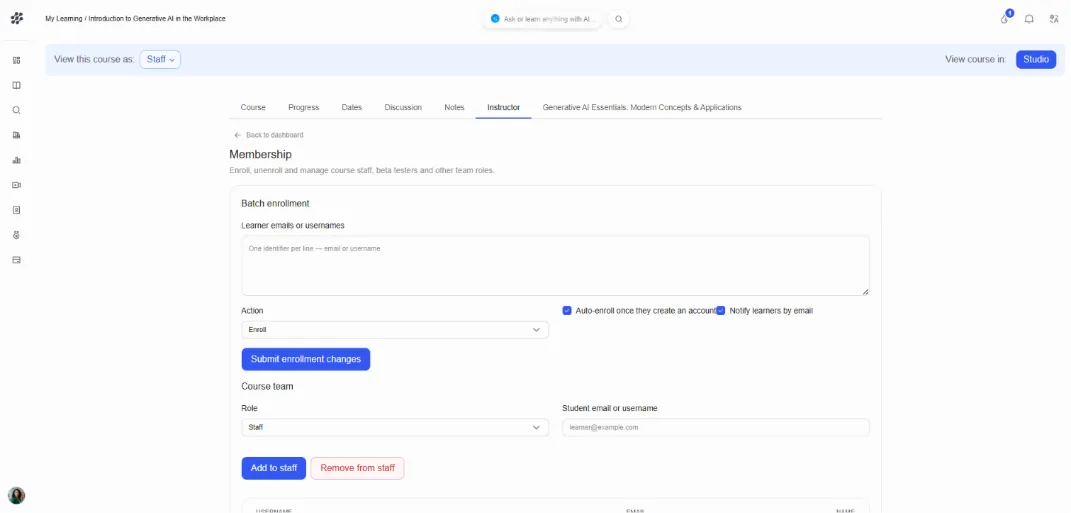
Section titled “Learners”Membership enrols, unenrols, and manages course staff, beta testers, and other team roles.
Cohorts
A cohort is a group of enrolled learners. Cohorts serve two purposes: dividing discussions, and receiving content restricted to a content group.
Creating a cohort
-
Open Cohorts.
-
Enter a Cohort name.
-
Choose an Assignment type:
-
Manual — you add learners yourself.
-
Random — learners are distributed automatically.
-
-
Click Create cohort.
To add learners, pick the cohort under Add learners, paste emails or usernames separated by commas or new lines, and click Add users.
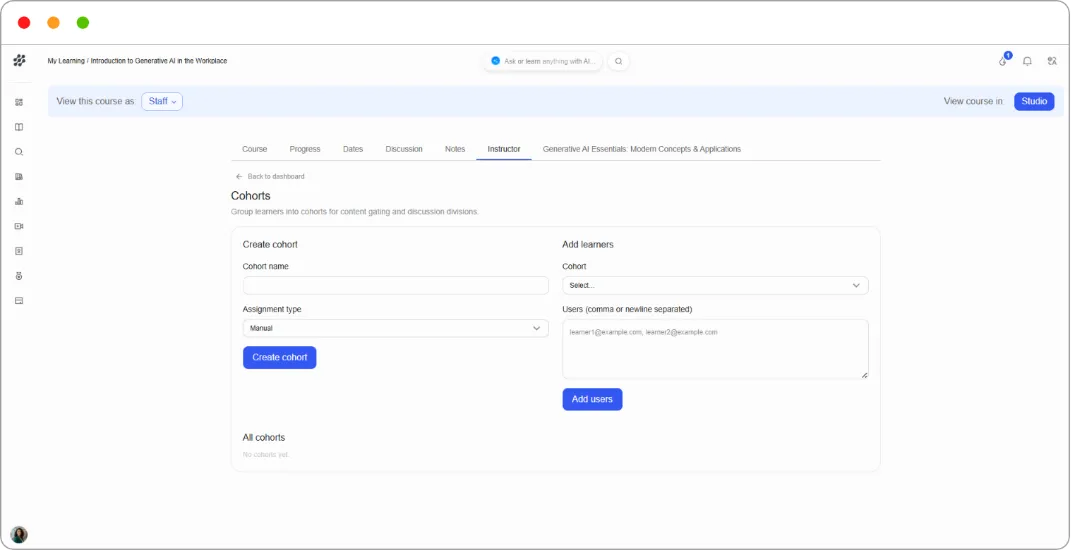
The All cohorts table lists each cohort with its assignment type and member count.
Associating a cohort with a content group
This is the step that makes content groups take effect.
-
On the Cohorts page, select the cohort you want to associate.
-
Open its Settings.
-
Under Associated Content Group, choose Select a Content Group.
-
Pick the content group from the list.
-
Click Save.
Any content you’ve restricted to that group is now visible to learners in this cohort.
Repeat for each cohort that should receive the same content.
Note: A content group can be associated with several cohorts, but a cohort can only be associated with one content group. If you need a cohort to see two different restricted sets, restrict both to the same group rather than trying to attach a second one.
Tip: Set up cohorts before learners start. Moving someone between cohorts mid-course changes what they can see, and anything they were part-way through in the old cohort’s content disappears from view.
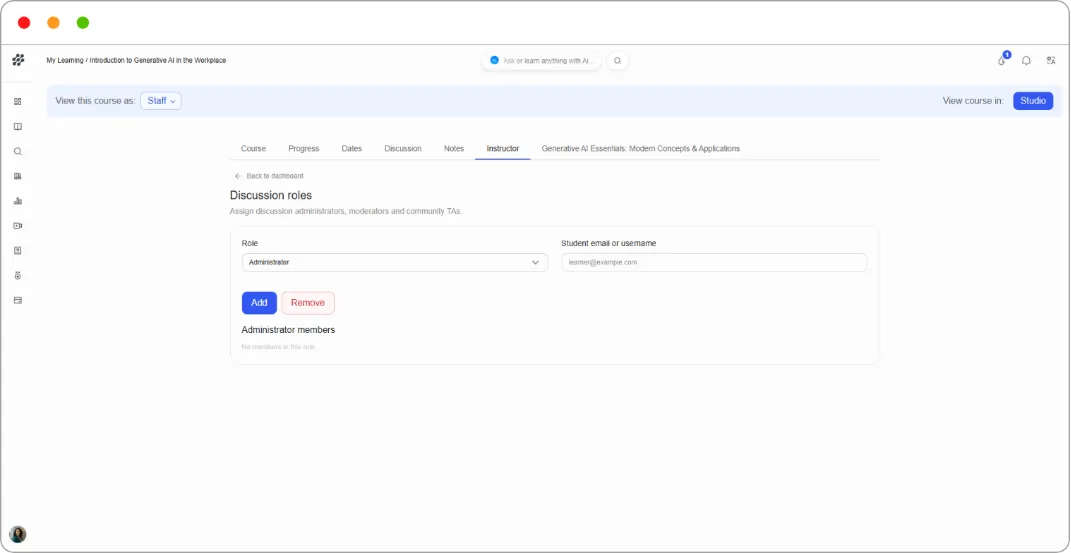
Discussion roles
Choose a Role and enter the learner’s email or username:
| Role | Scope |
|---|---|
| Administrator | Full discussion administration |
| Moderator | Moderate all discussions |
| Group Moderator | Moderate discussions within their group |
| Community TA | Community teaching assistant privileges |
Communication
Section titled “Communication”Bulk email composes and sends announcements to staff, cohorts, or every learner enrolled in the course.
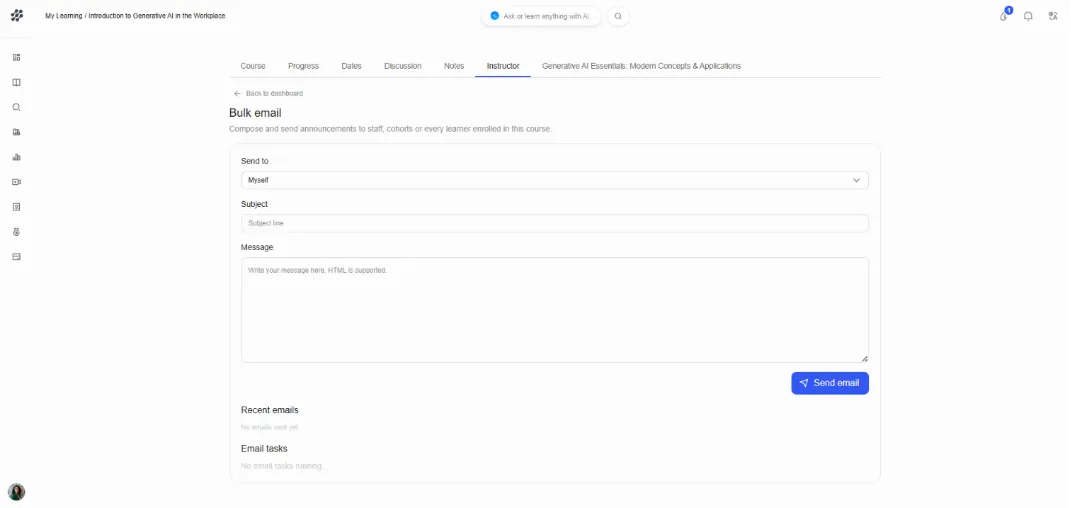
Tip: Bulk email pushes into inboxes; Updates sits inside the course. Use email when people need to know now, and Updates for anything they can read next time they log in. See Managing Your Course Team & Learner Communication.
Grading & Assessment
Section titled “Grading & Assessment”-
Grading & extensions — reset attempts, rescore problems, override scores, and grant due-date extensions to individuals.
-
Certificates — generate, regenerate, and revoke learner certificates for this course run.
-
Special exams — manage proctored and timed exam attempts, and export proctoring reports.
-
Open response — review open response submissions, peer reviews, and staff grading queues.
Tip: Grading & extensions is where you handle individual cases without changing the policy for everyone. Grant one learner an extension here rather than moving the due date for the whole cohort.
What’s next
Section titled “What’s next”-
Set the grading policy this course runs on: Setting Up Grading
-
Enable advanced component types: Enhancing Your Course with Advanced Content
-
Manage your course team and announcements: Managing Your Course Team & Learner Communication