
Calendar & Scheduling
Blend-ed handles time in two places, and they’re worth keeping apart:
-
The Calendar — a platform-wide events calendar for live sessions, orientations, deadlines, and anything else you want on people’s schedules.
-
Course scheduling — release dates, due dates, and pacing, set inside each course.
This article covers the Calendar in full, then points to where each scheduling control lives.
Part 1: The Calendar
Section titled “Part 1: The Calendar”Opening it
Click Calendar in the main left navigation.
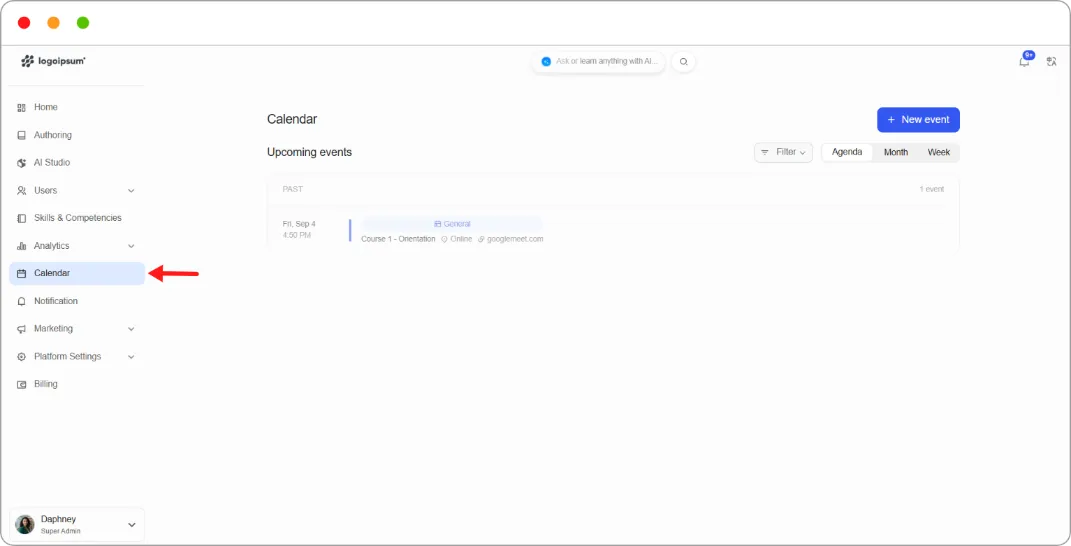
An empty calendar reads Nothing scheduled, with a prompt to create an event and put it on everyone’s calendar.
Views
Three views, switched from the toggle at the top right:
| View | What it shows |
|---|---|
| Agenda | A list grouped by day, with an event count per group. Best for seeing what’s next |
| Month | A full month grid, with today highlighted and events shown by time |
| Week | A seven-day time grid. Best when several events fall in one week |
Navigate with the ‹ and › arrows, or click Today to jump back to the current date. The range label between them shows where you are.
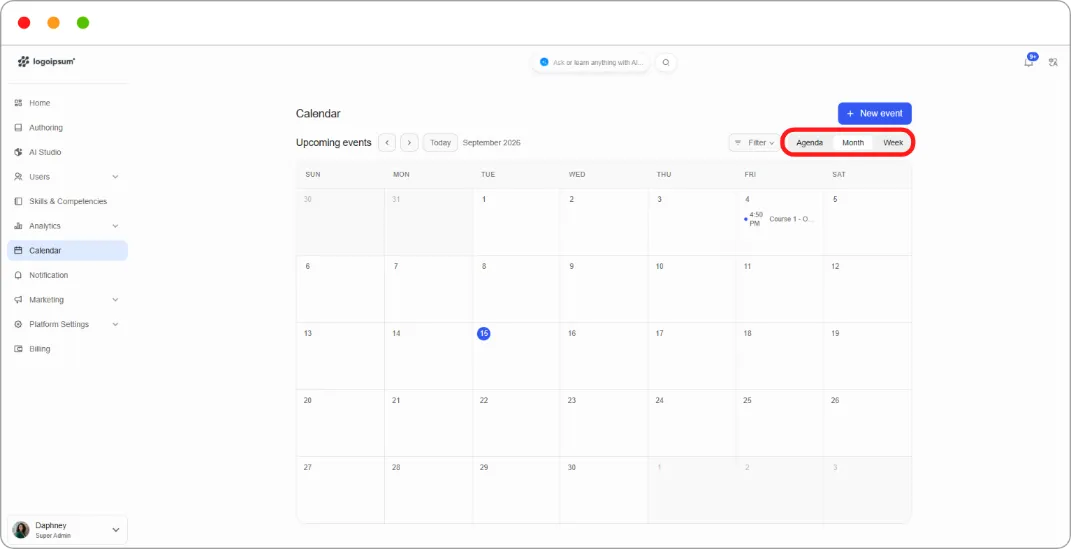
The Filter control narrows what’s displayed.
Creating an event
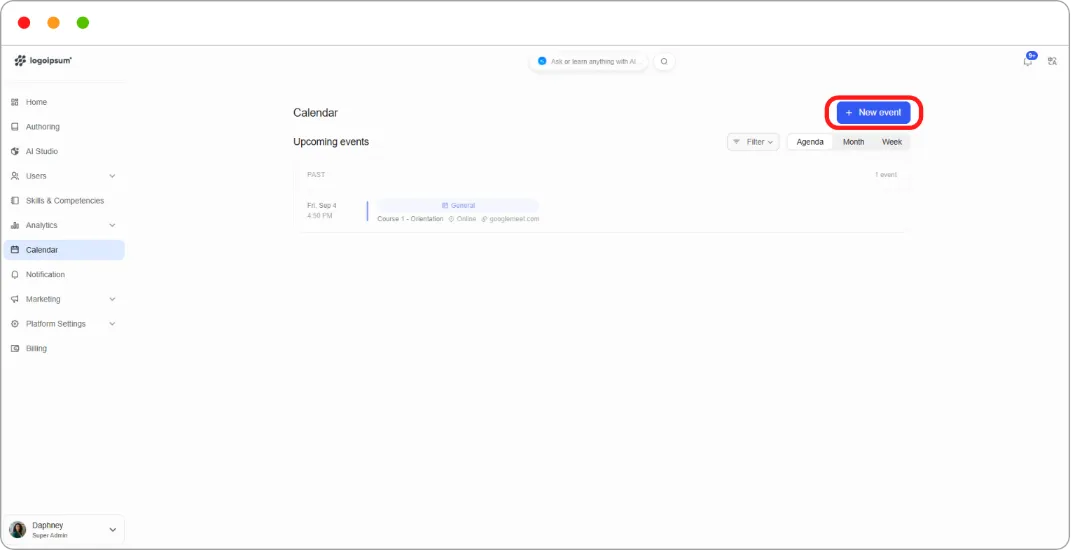
Section titled “Creating an event”Click + New event. A panel opens on the right with four sections.
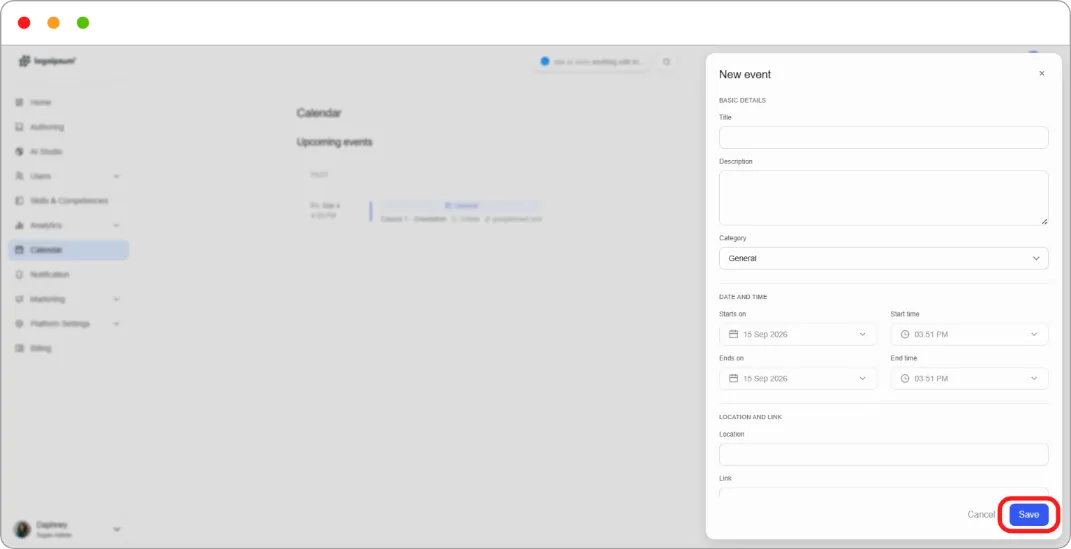
Basic details
| Field | What to enter |
|---|---|
| Title | For example, Course 1 - Orientation |
| Description | What the event is |
| Category | The event type. Defaults to General |
Date and time
Set Starts on and Start time, then Ends on and End time. Both default to the current date and time, so change them.
Location and link
-
Location — a physical venue, or Online
-
Link — the joining link for online sessions
Tip: Fill both for online events. Location tells learners at a glance whether they need to travel; Link gives them the way in. An event with a link and no location reads as ambiguous.
Audience
This is what makes the event appear on the right people’s calendars.
- Choose from the Send to dropdown:
| Option | Who it targets |
|---|---|
| Learners | Individual learners |
| Staff | Individual staff members |
| Admins | Individual admins |
| Teams | Everyone in a team |
| Courses | Everyone enrolled in a course |
| Programs | Everyone enrolled in a program |
- Search or scroll the list, and tick the recipients. A running count shows how many are selected.
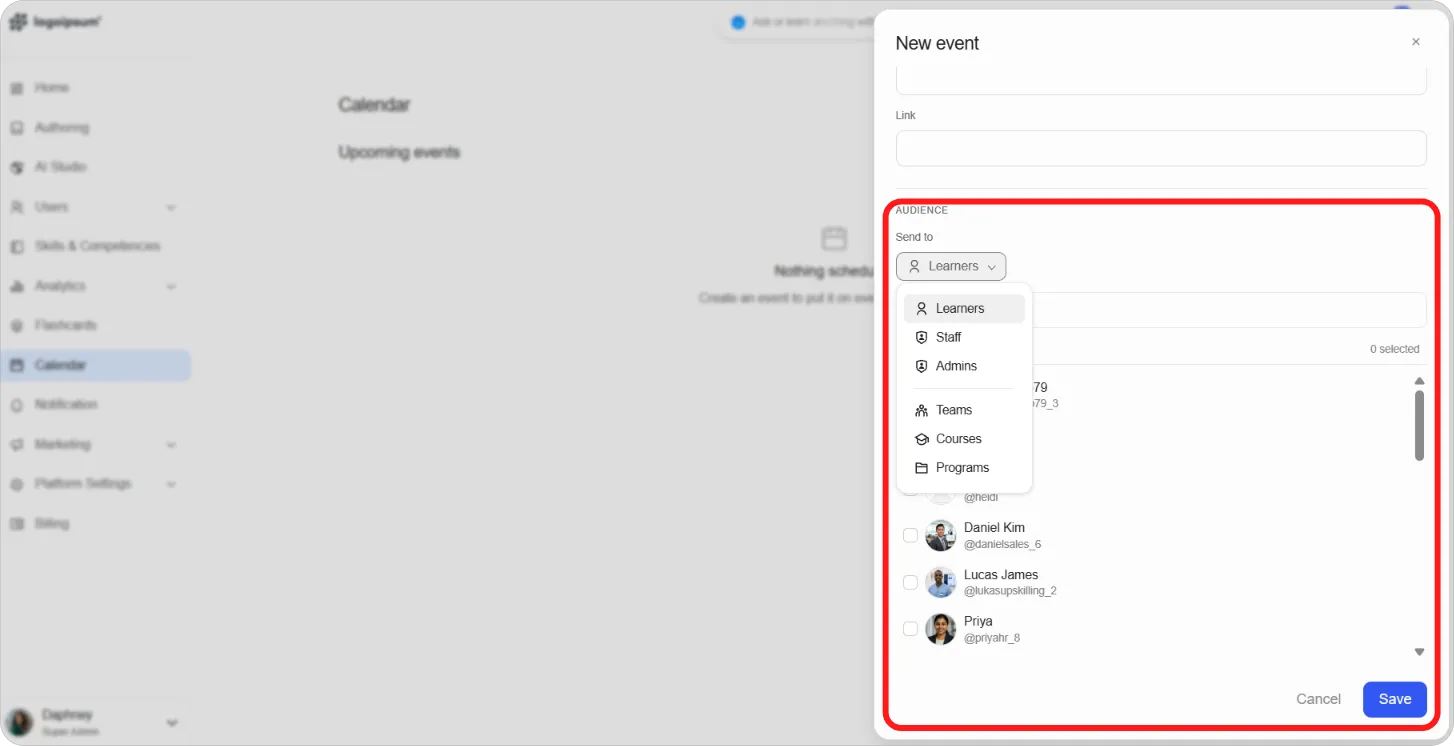
Click Save. A confirmation appears and the event lands on the calendar.
Tip: Target by Course, Program, or Team rather than picking people one by one. Individual selections go stale the moment someone new enrols; a course-targeted event reaches whoever is enrolled at the time.
Reading the calendar
Section titled “Reading the calendar”In Agenda view, each event shows the date and time on the left, then a coloured bar, the category as a chip, and the title with the location and link beside it.
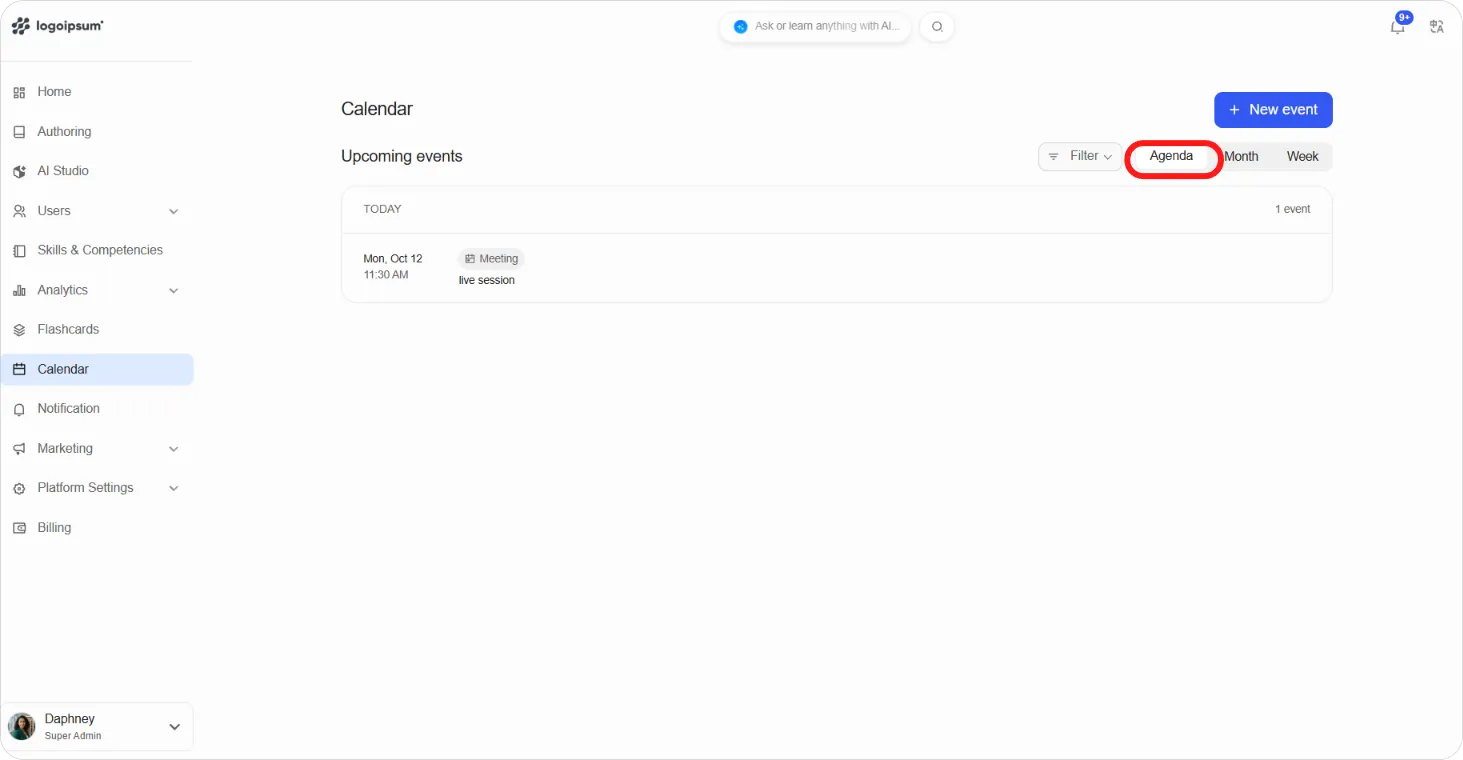
Month view shows events inside their day cell with the start time and a shortened title.
Note: A calendar event announces something; it doesn’t enforce it. Scheduling an “Assignment 1 due” event tells learners the date but doesn’t close submissions. Deadlines that actually take effect are set inside the course. See Advanced Course Configuration.
What’s next
Section titled “What’s next”-
Schedule a live session as course content: Creating & Managing Live Sessions
-
Set release dates, due dates, and course pacing: Advanced Course Configuration