
How to highlight text and take notes
Who can do this: Learners enrolled in the course
Highlight any passage in a lesson and add your own note to it. Your notes are saved with the passage, so you can find them later and jump straight back to the lesson.
Adding a highlight and note
Step 1: In the lesson, click the pencil icon at the top right.
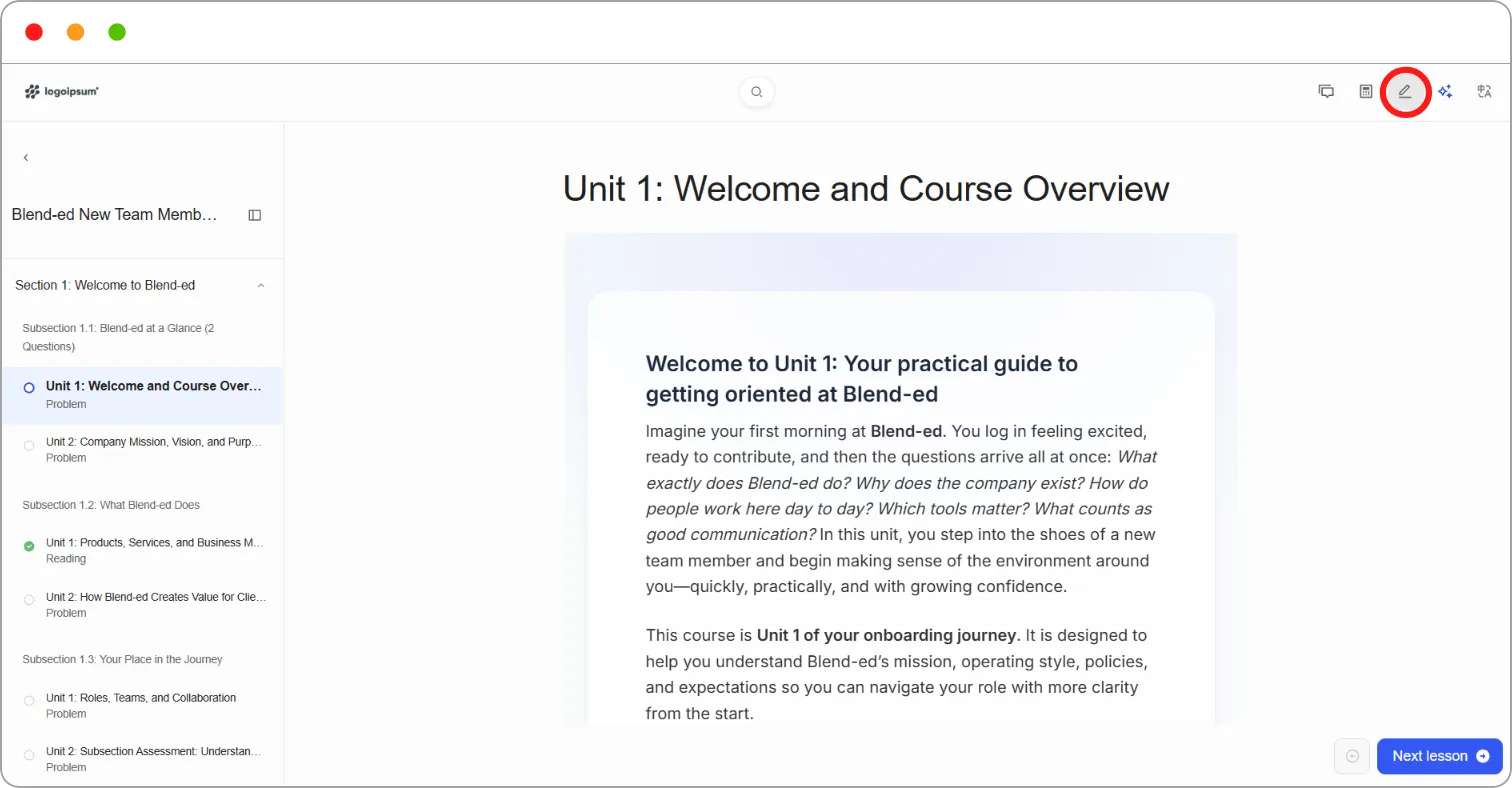
Step 2: Select the text you want to highlight.
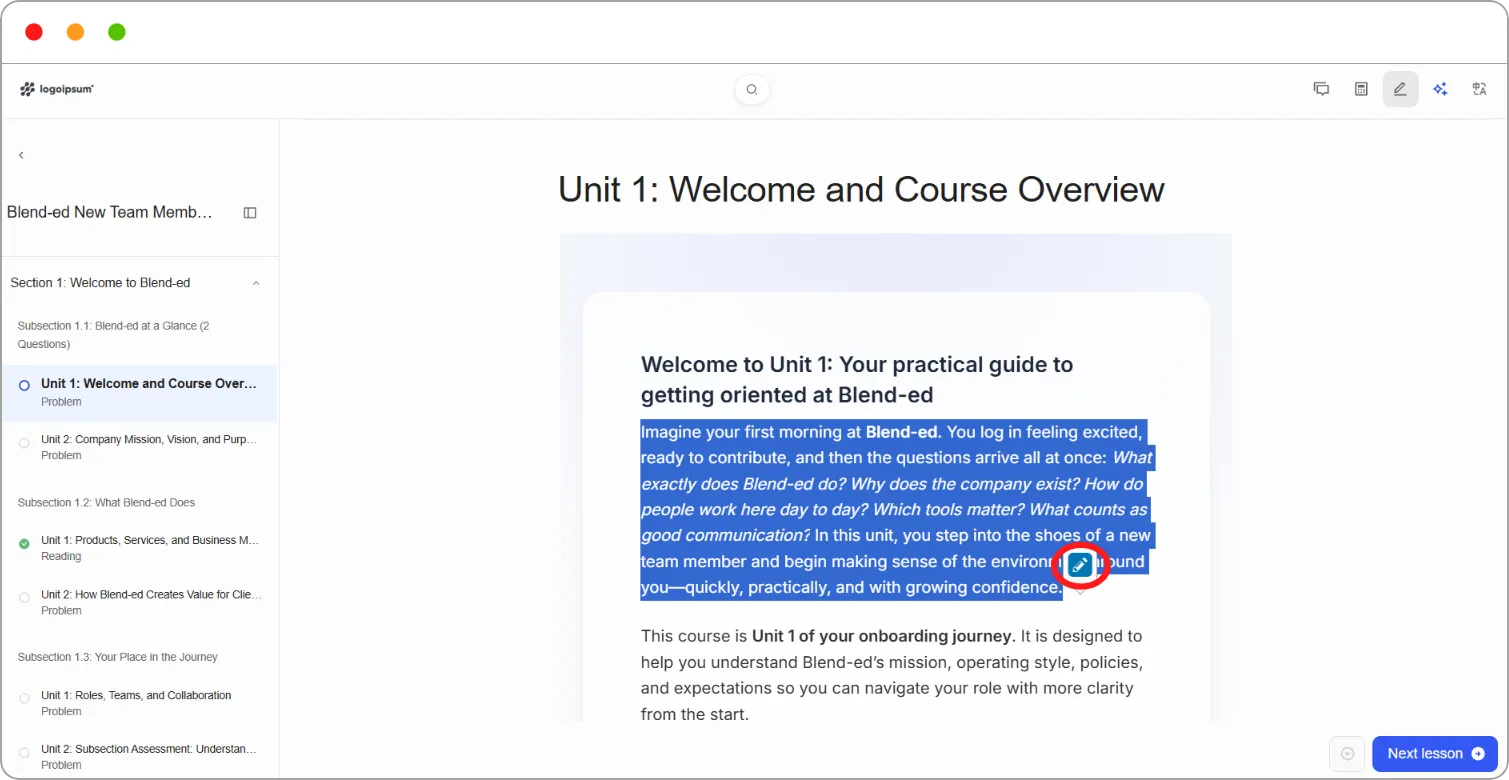
The text turns yellow and a note box opens beside it.
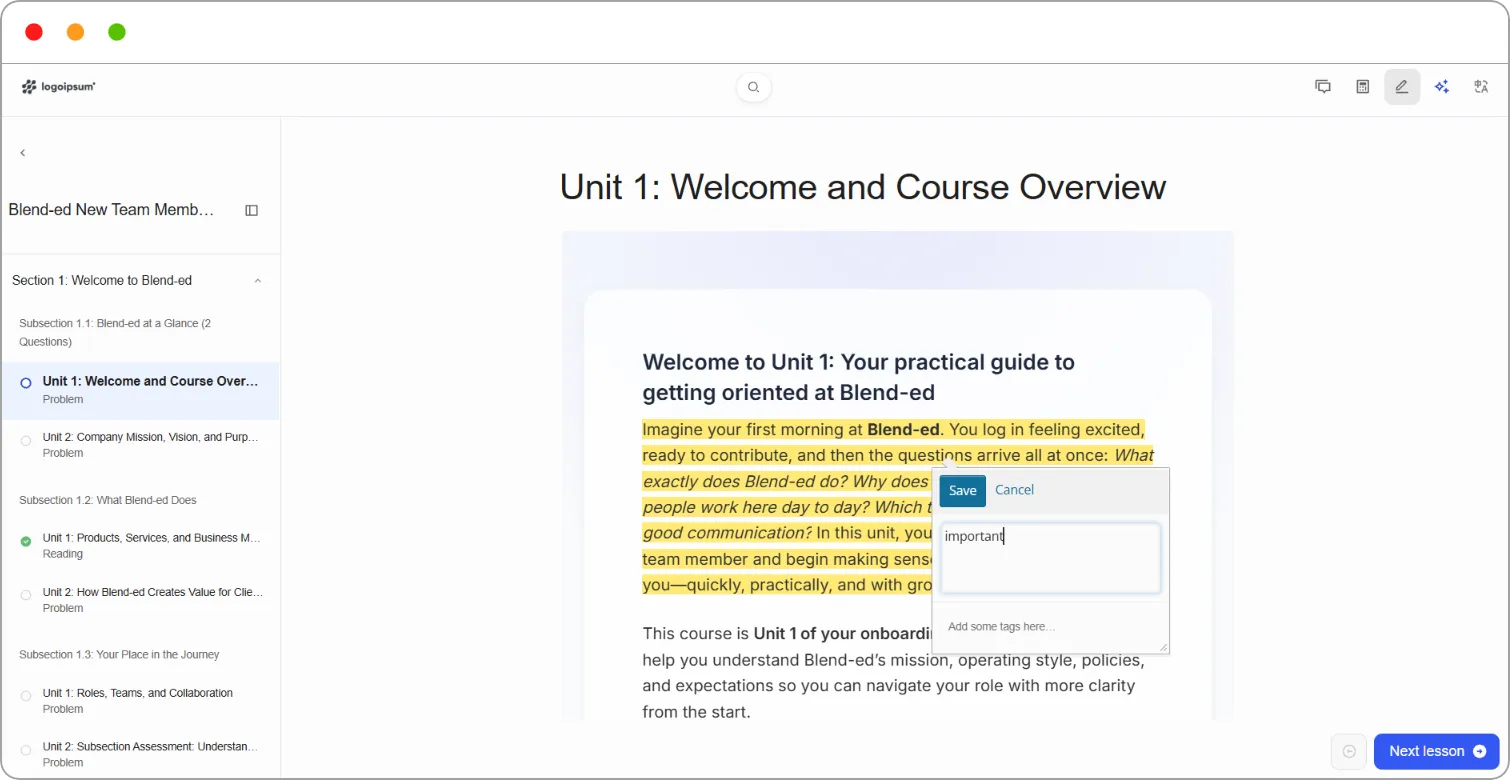
Step 3: Type your note.
Step 4: Optionally, add tags in Add some tags here… to group related notes.
Step 5: Click Save.
Tip: Write the note in your own words rather than copying the passage. The highlight already keeps the original text, and putting it in your own words helps it stick.
Finding notes for one course
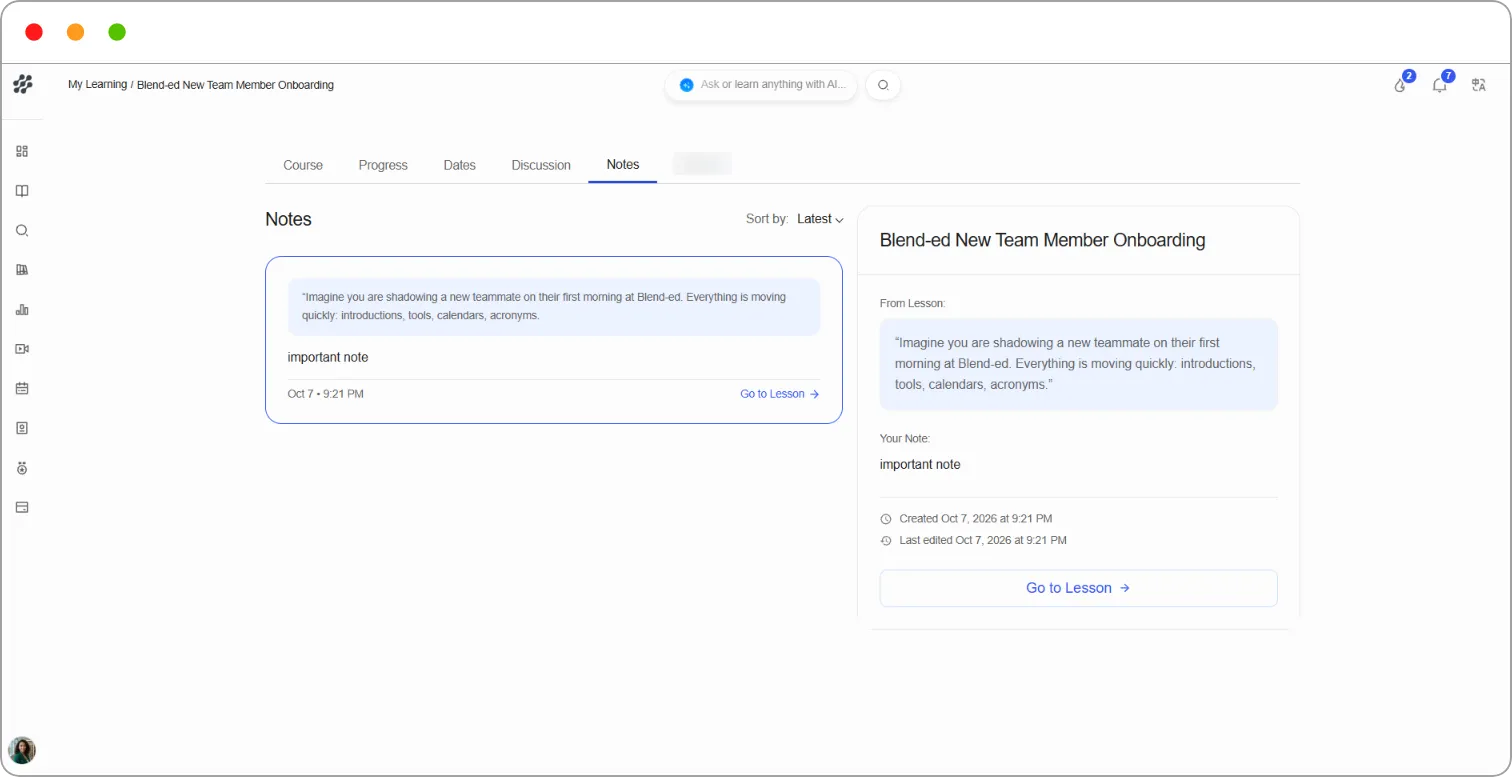
Section titled “Finding notes for one course”Step 1: Open the course.
Step 2: Click the Notes tab.
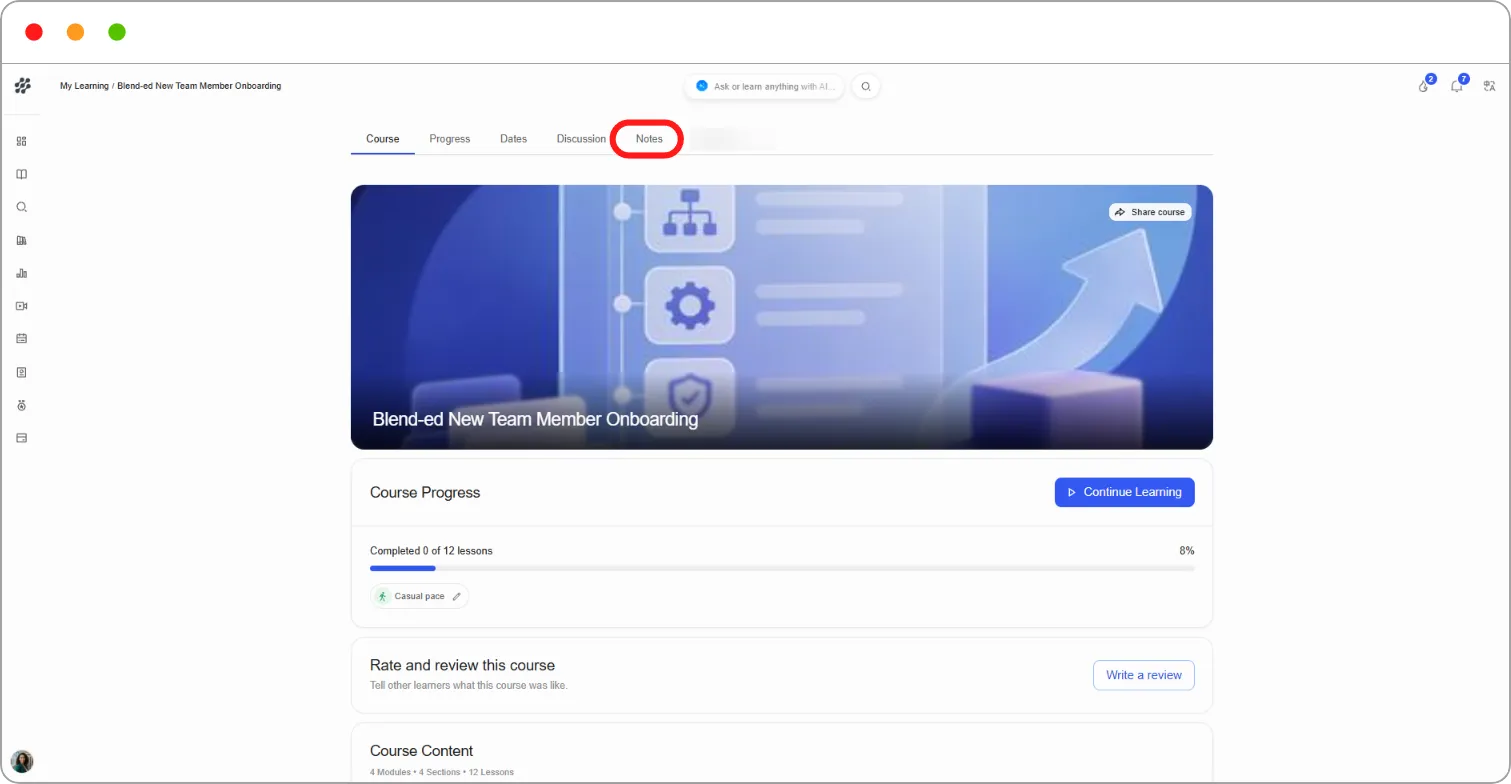
Each note shows the highlighted passage, your comment, the unit it was Noted in and when it was Last Edited. Click the unit name to go back to that lesson.
Use Search notes for… to find a note by keyword.
Finding notes across all your courses
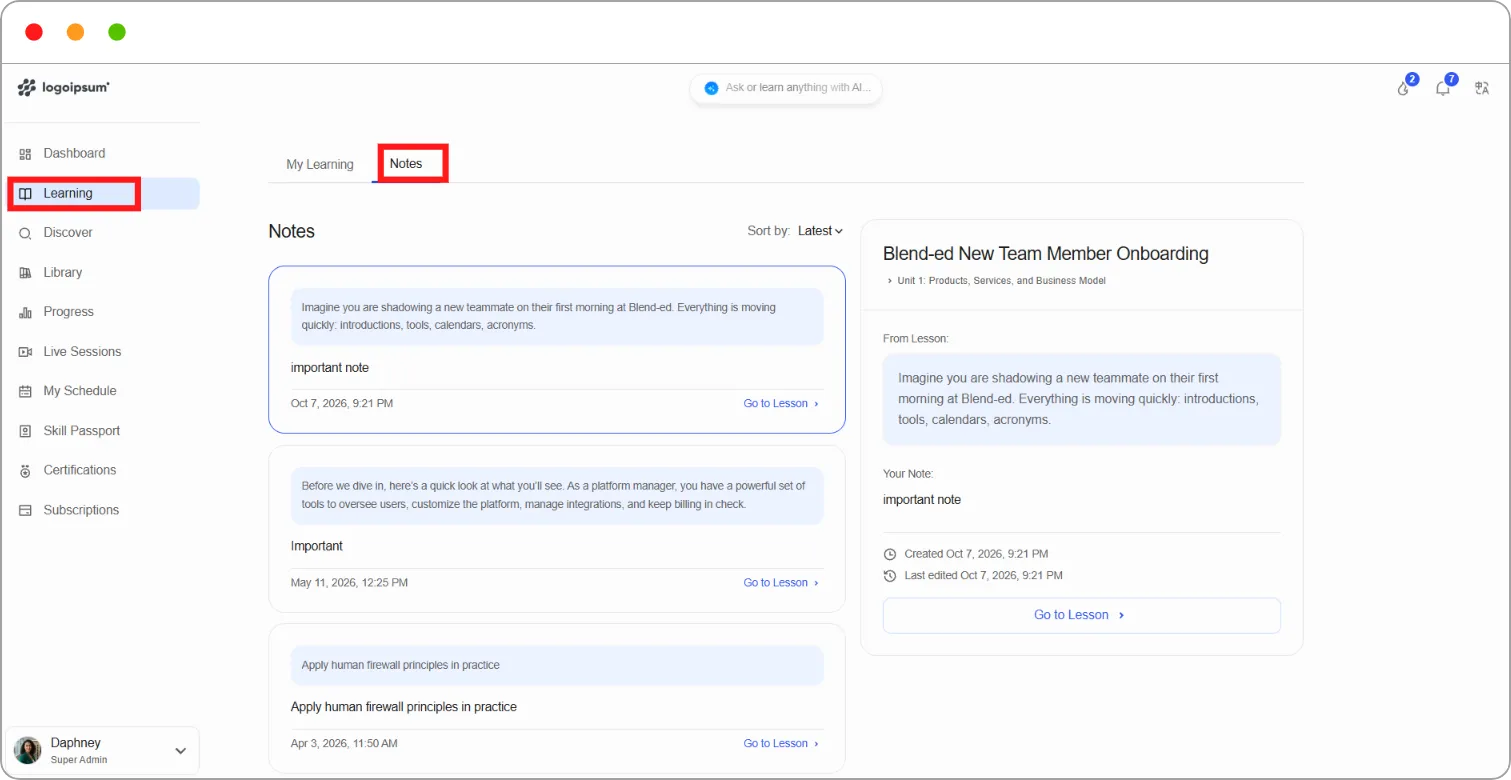
Section titled “Finding notes across all your courses”Step 1: Go to Learning in the left navigation.
Step 2: Click the Notes tab.
Every note from every course is listed here. Use Sort by to show the Latest or Oldest first.
Step 3: Click a note to see its details on the right: the course and unit, the passage From Lesson, Your Note, and when it was created and last edited.
Step 4: Click Go to Lesson to open the lesson where you made the note.
Note: Notes are private. Other learners and your instructors can’t see them.
Related articles