
How to connect an AI tool with an MCP key
Who can do this: Super Admin, Admin, or Staff with the Platform Settings permission
MCP (Model Context Protocol) keys let an AI tool connect to your Blend-ed platform and work with your data directly: reading analytics, managing enrolments, authoring course content, and more.
Blend-ed provides a Model Context Protocol endpoint. You create a key with specific permissions, then paste it into your AI tool’s configuration.
Before you start
Section titled “Before you start”Switch on MCP keys under Platform Settings > Features.
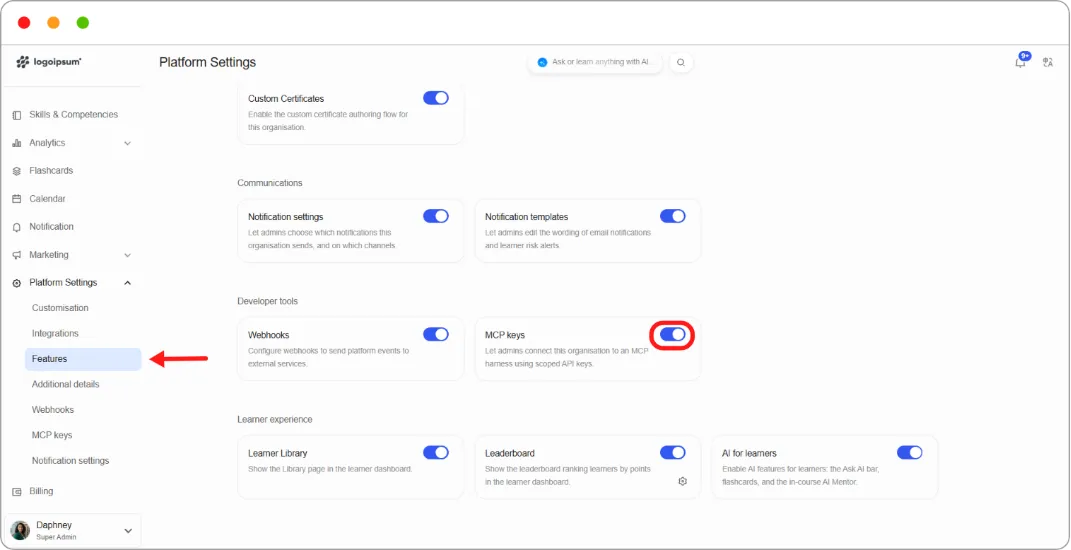
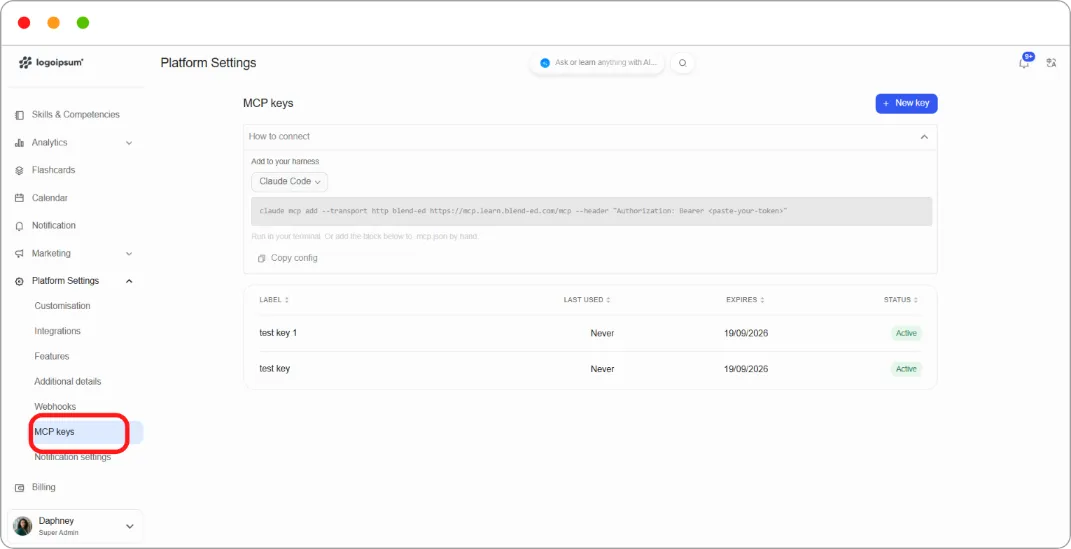
Step 1: Go to Platform Settings > MCP keys.
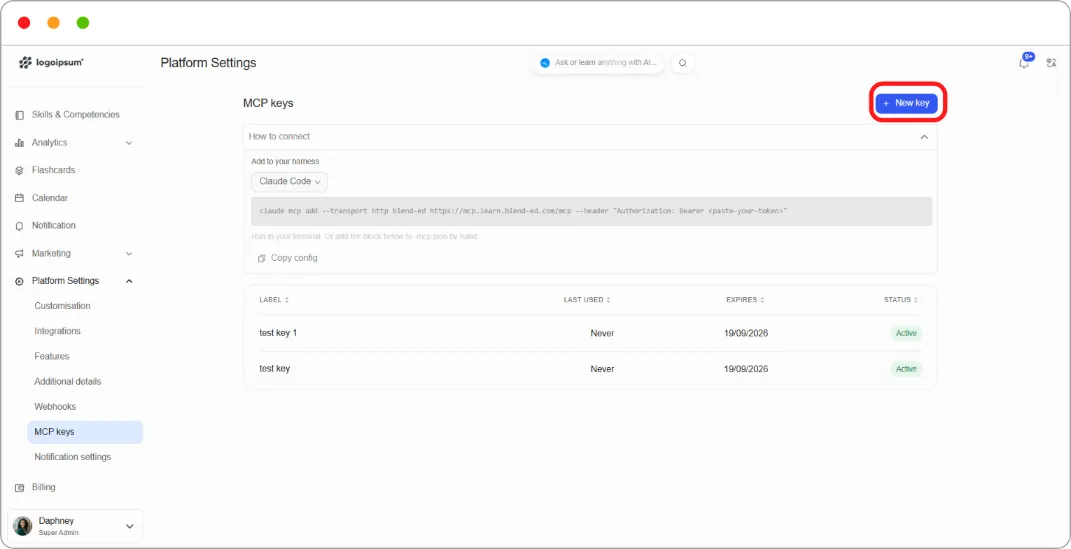
Step 2: Click + New key.
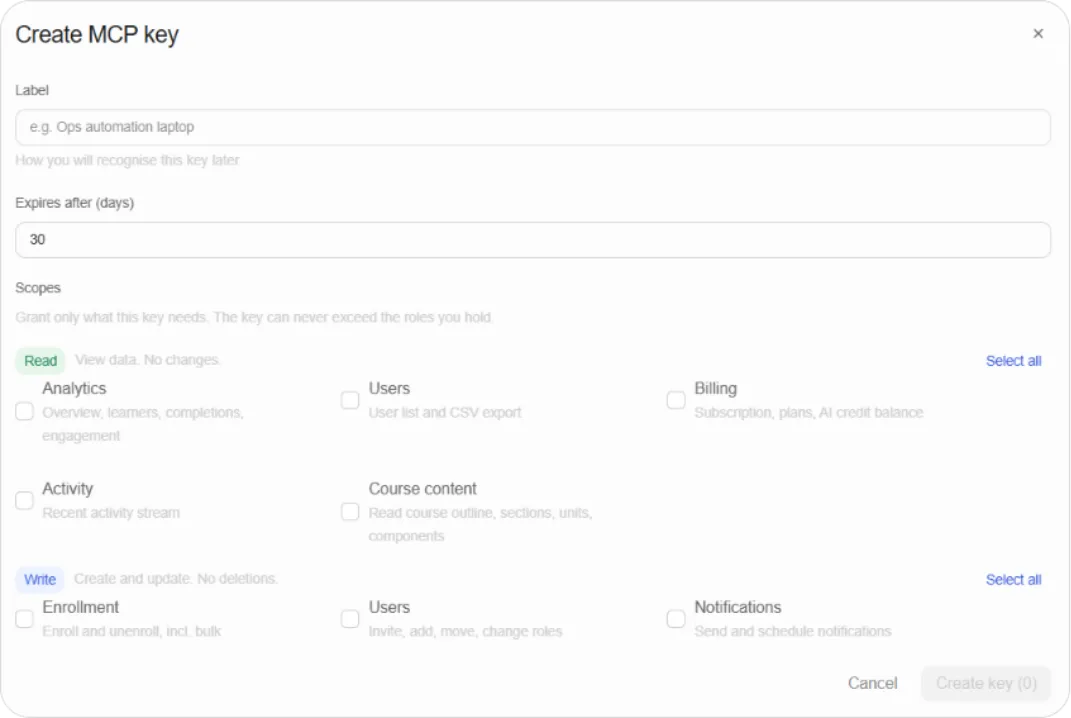
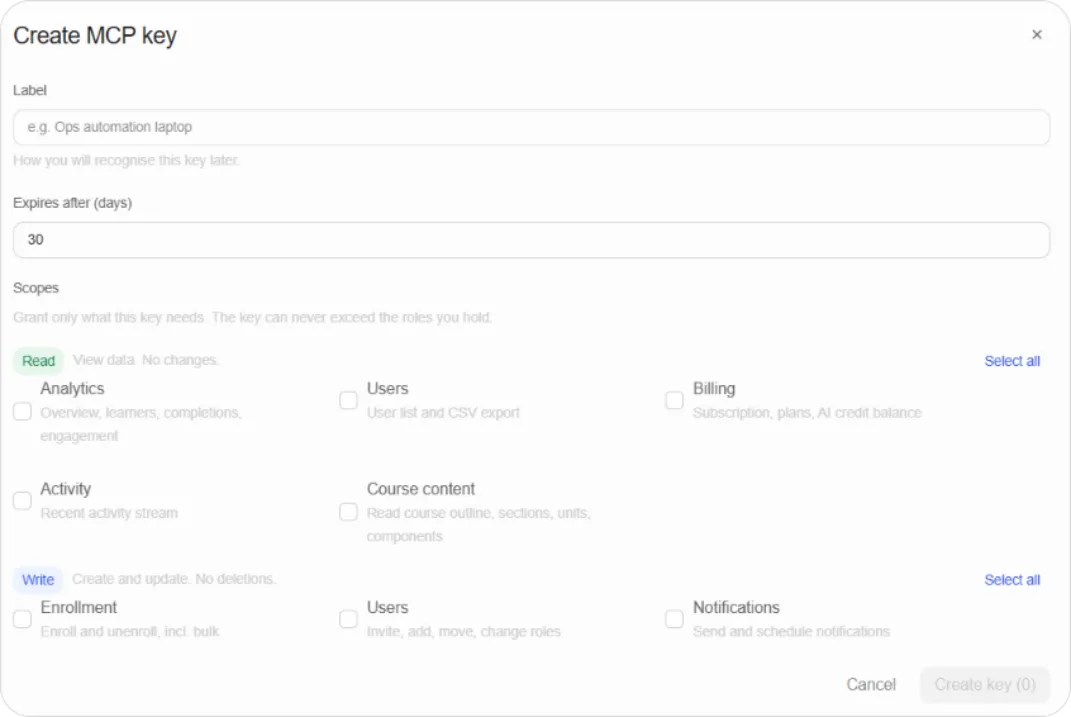
Step 3: Enter a Label. This is how you’ll recognise the key later, so name it after the tool or person using it.
Step 4: Set Expires after (days). The key stops working on that date and must be replaced.
And remove the note from Related articles. The existing tip already covers the point:
Tip: Set a short expiry for keys you’re testing with and a longer one for keys in production use. Either way the key expires, which forces a review.
Step 5: Choose the Scopes this key needs. Scopes come in three tiers.
Read — view data, no changes:
| Scope | Covers |
|---|---|
| Analytics | Overview, learners, completions, engagement |
| Users | User list and CSV export |
| Billing | Subscription, plans, AI credit balance |
| Activity | Recent activity stream |
| Course content | Course outline, sections, units, components |
Write — create and update, no deletions:
| Scope | Covers |
|---|---|
| Enrollment | Enrol and unenrol, including bulk |
| Users | Invite, add, move, change roles |
| Notifications | Send and schedule notifications |
| Course authoring | Create and edit courses, sections, units, components as drafts |
| AI credits | Allocate AI credits, cap enforced |
| Billing | Subscribe, cancel, manage plans |
Destructive — required in addition to a write scope:
| Scope | Covers |
|---|---|
| Allow destructive actions | Delete courses, remove users, block users, delete plans |
Step 6: Click Create key.
Step 7: Copy the token now. It’s shown once and cannot be retrieved afterwards.
Step 8: Under Add to your harness, choose your AI tool. A ready-made connection command appears with your token already in it. Click Copy config, or Copy token for the token alone.
Step 9: Click Done.
Connecting later
Section titled “Connecting later”The How to connect panel at the top of the MCP keys page shows the connection command for each supported tool, with a placeholder where your token goes.
Managing keys
Section titled “Managing keys”The keys table lists each key with its Label, Last used, Expires, and Status.
Click a key to see its details: the first characters of the token, when it was created, when it expires, when it was last used, and the scopes it was granted.

To revoke a key, open it and click Revoke key. You’ll be asked to confirm.
Warning: Revoking takes effect immediately. Any tool using that key stops working straight away.
Warning: A key can never exceed the permissions of the person who created it. A key created by an Admin can do more than one created by a Staff member, so create keys from an account with the access the tool genuinely needs and no more.
Tip: Start with Read scopes only. Most useful things an AI tool does with your platform are read operations, and you can always issue a second key with write access once you know what you need.
Tip: Set an expiry rather than leaving keys open-ended. A key that expires is a key you’re forced to review.
Related articles
Section titled “Related articles”[Needs confirmation of what the Expires after field accepts, and whether 0 means never expires.]