
How to create a certificate template
Who can do this: Super Admin, Admin, or Staff with the Platform Settings permission
Certificate templates define how your certificates look. Course authors then attach a template to a course.
Before you start
Section titled “Before you start”Switch on Custom Certificates under Platform Settings > Features.
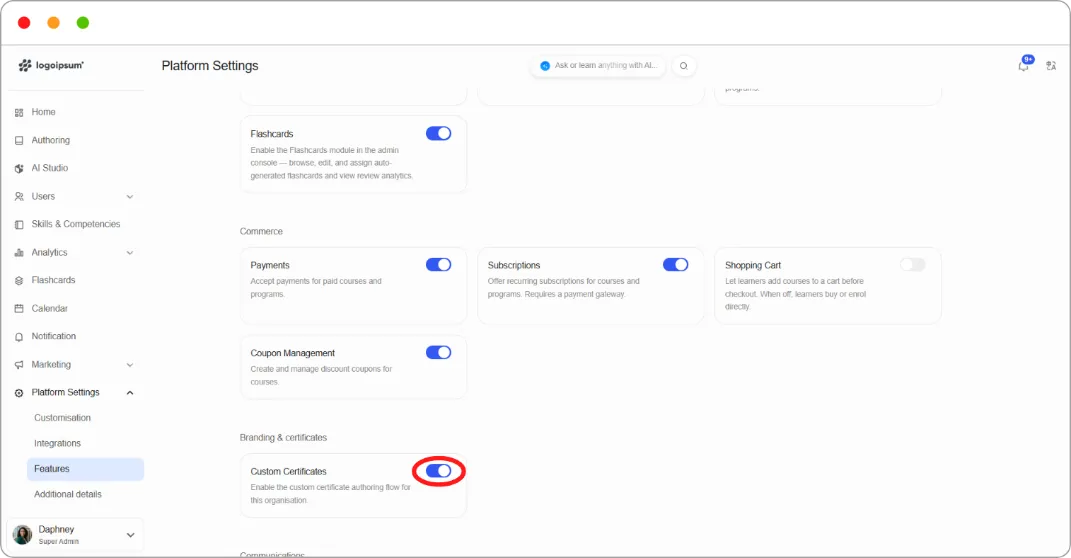
The Certificates tab won’t appear until you do.
See How to turn platform features on and off.
Step 1: Go to Platform Settings > Customisation and open the Certificates tab.
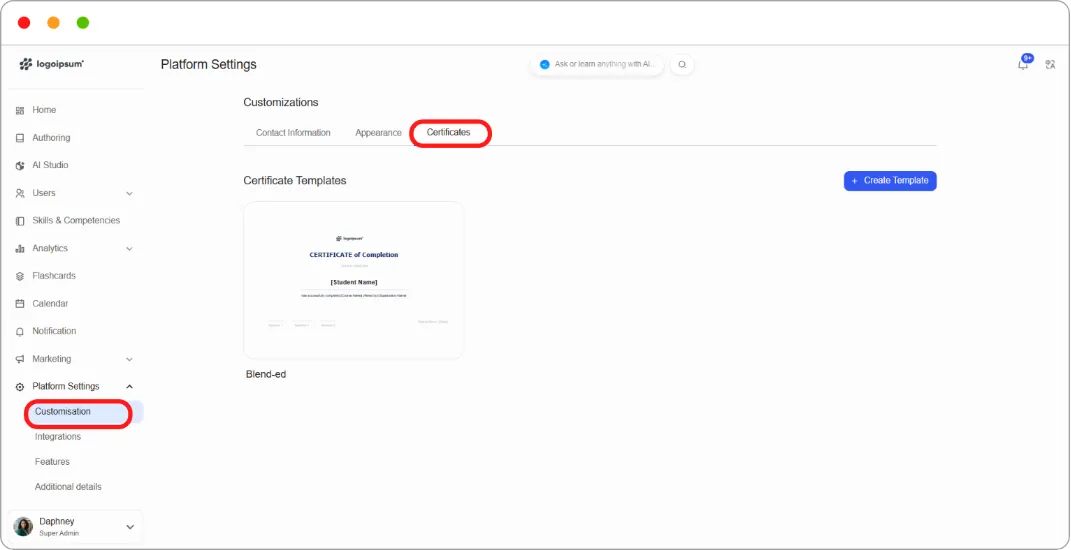
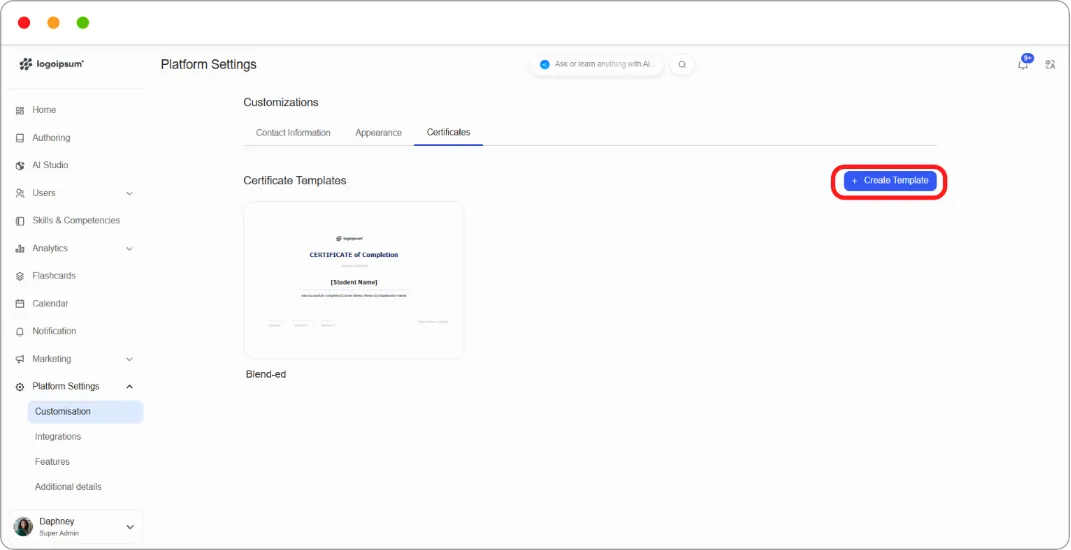
Step 2: Existing templates are shown as thumbnails. Click + Create Template.
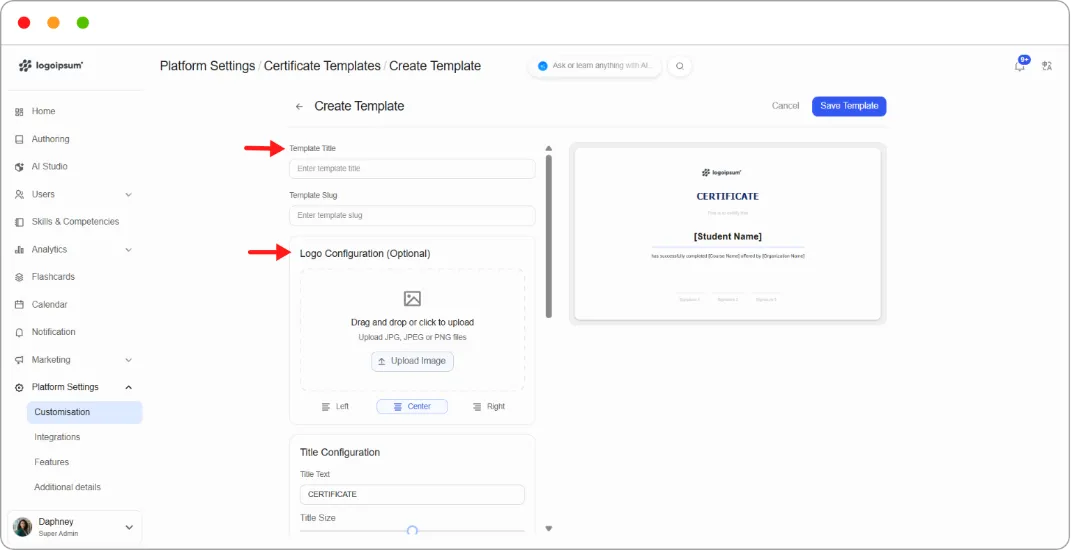
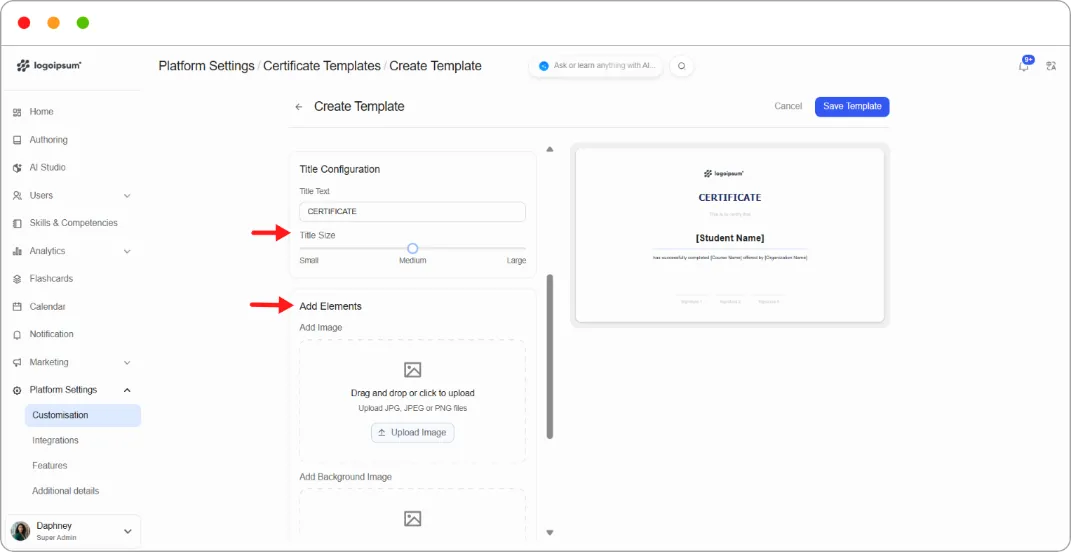
Step 3: The editor opens with controls on the left and a live preview on the right.
Step 4: Upload a logo and set its alignment: Left, Center, or Right.
Step 5: Under Title Configuration, set:
-
Title Text — for example, CERTIFICATE of Completion
-
Title Size — a slider from Small to Large
Step 6: Under Add Elements, add an image or a background image. Both accept JPG, JPEG, and PNG.
Step 7: Under Miscellaneous:
-
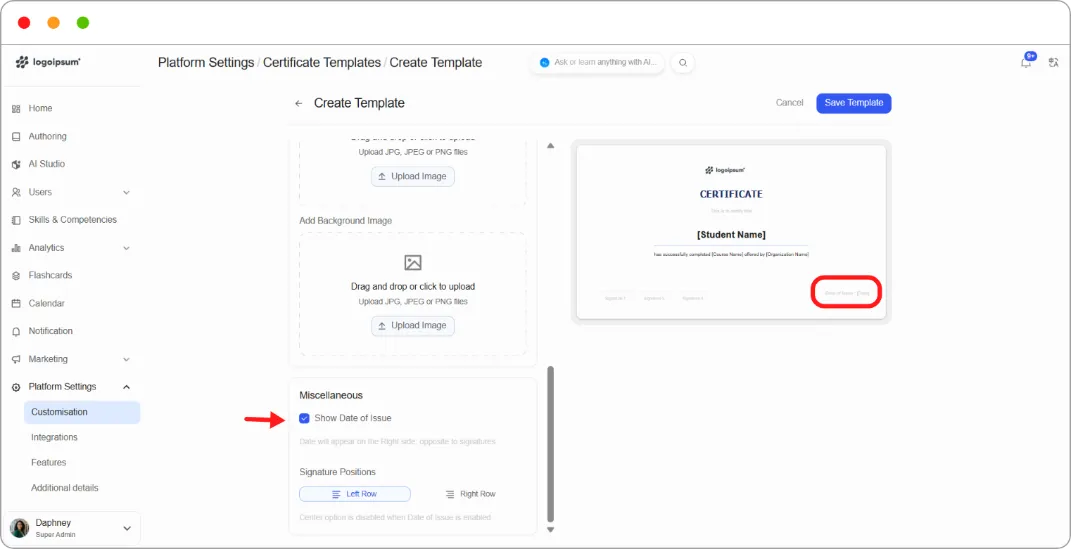
Tick Show Date of Issue to print the issue date.
-
Set Signature Positions to Left Row or Right Row.
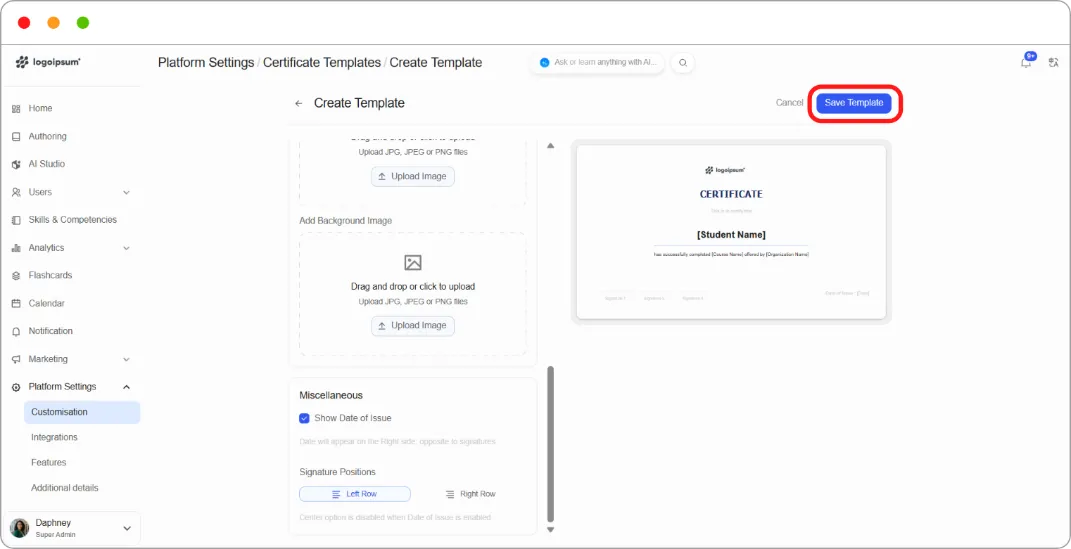
Step 8: Click Save Template.
Note: When Show Date of Issue is on, the date sits opposite the signatures, and the centre signature option is disabled. Turn the date off if you want signatures centred.
Tip: Check the preview at every step. A background image that looks fine on its own can make the learner’s name unreadable, and the preview is where you’ll catch it.
What happens next
Section titled “What happens next”Course authors select your template when configuring a certificate for their course. See Adding a Certificate to Your Course.